


WIM Witch is a utility that can be used to update and modify WIM files for Windows deployment scenarios. It allows the WIM to be patched, drivers to be applied, in-box applications to be removed, and .Net 3.5 binaries to be injected. It also supports the ability to inject an Autopilot configuration file into the WIM file to support “Autopilot For Existing Device” deployments. It accomplishes this by providing the user with a GUI to setup the desired configuration. Once the parameters have been configured, the image can be created, or the configuration saved for use with command line functionality.
Installing WIM Witch
WIM Witch can now be installed from the PowerShell gallery. Use the following command to get it:
save-script -name wimwitch -path [your download folder] -force
To get started, simply run the script with Administrative rights. WIM Witch will start a pre-flight check to see if its folders exist in the folder that the script was run. If it doesn’t detect any of its folders, it will start the installation routine.
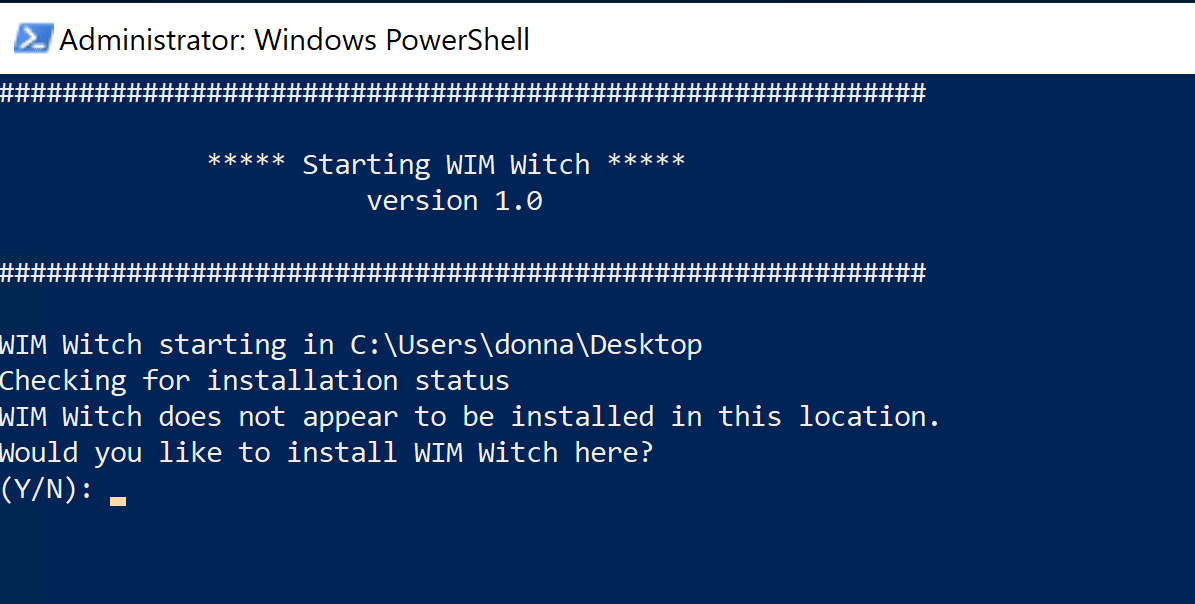
At the prompt, select “Y” for “yes” or “N” for “no”. If “N” is selected, WIM Witch will then ask for the folder that it should install to.
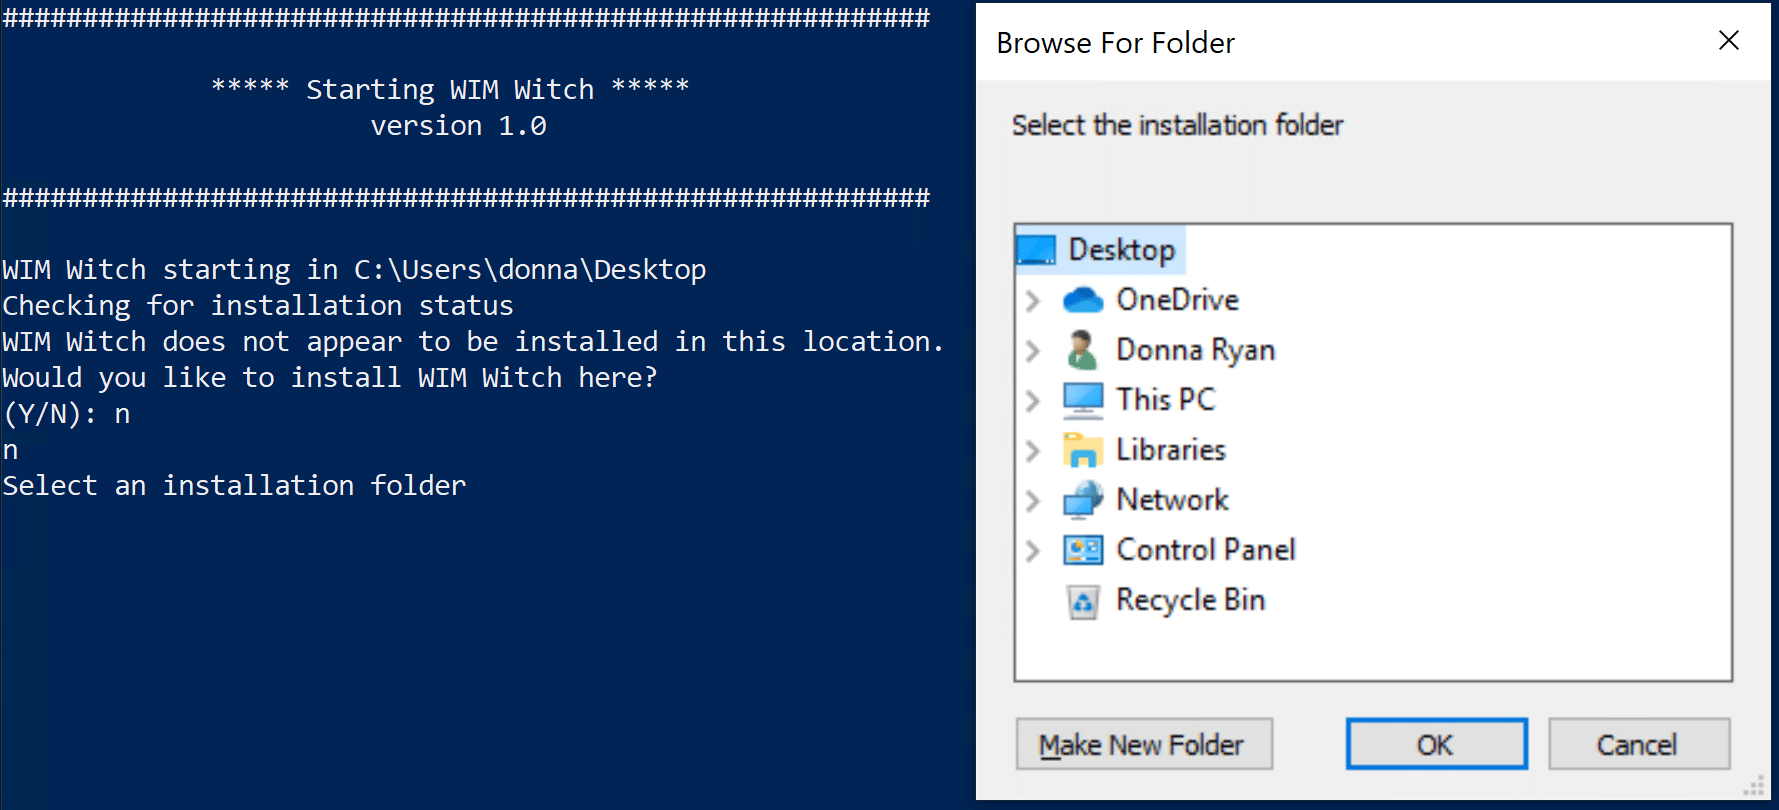
- Sometimes the browse window loses the focus and becomes “hidden” behind active screens. If the window doesn’t spawn, minimize all windows to find it.
Select the folder to continue.
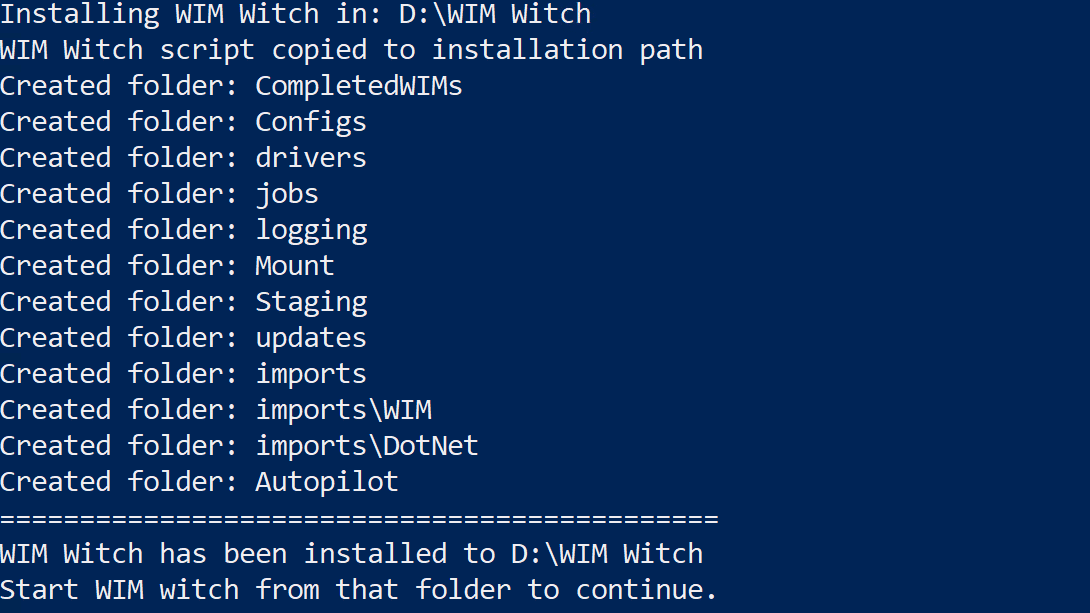
WIM Witch will create several folders and will copy itself to the path specified. Once this operation is complete, WIM Witch will exit. Please then run WIM Witch from the newly installed location.
Upon starting, WIM Witch will always check to see if its folder structure is present and will replace any folder that is missing.
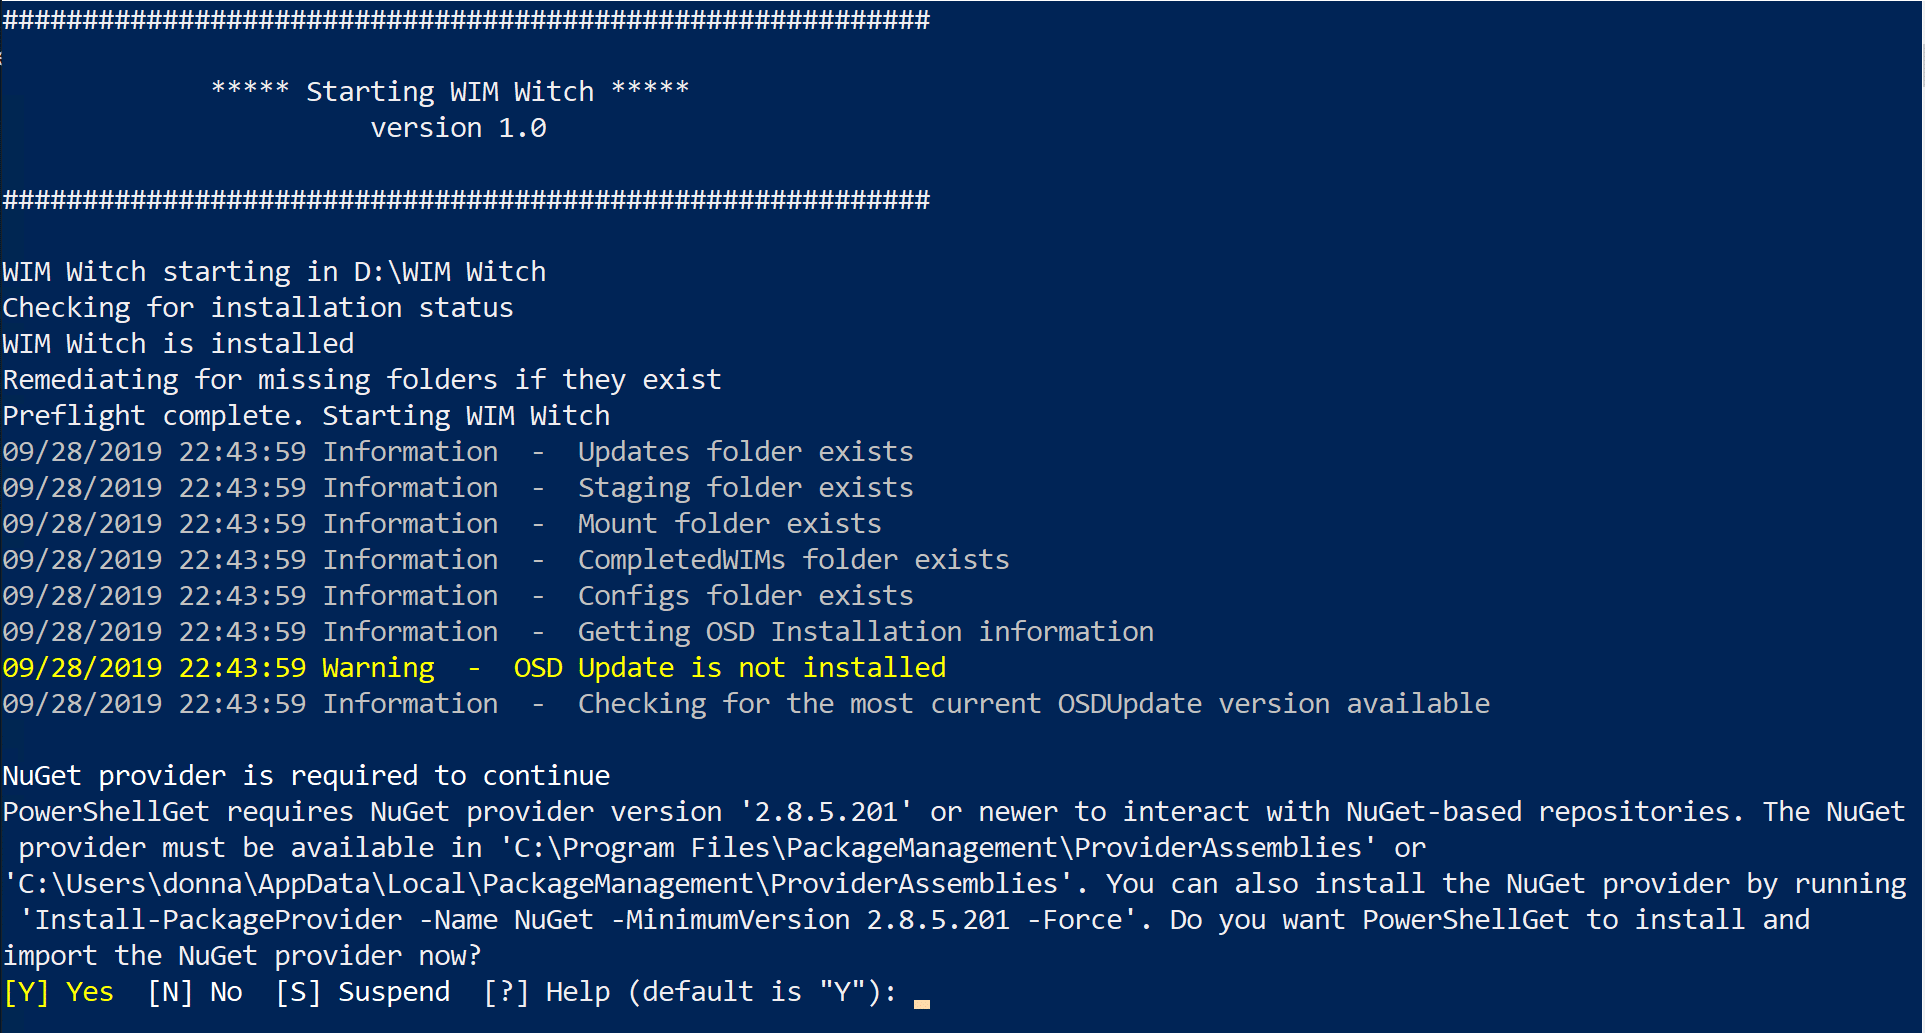
If this is the first time WIM Witch is being run on the computer, it may prompt to install NuGet. This is required to check the latest version of OSDUpdate and OSDSUS, which are the core of the update mechanism. If prompted, please allow it.
Importing Content into WIM Witch
WIM Witch provides a mechanism to import Install.wim and .Net 3.5 files into its folder structure. When applying .Net 3.5 to an image, prior importation will be required as WIM Witch cannot download the .Net files Microsoft directly. Importing Install.wim files is optional, but may be beneficial.
To import, start on the “Import Tab”
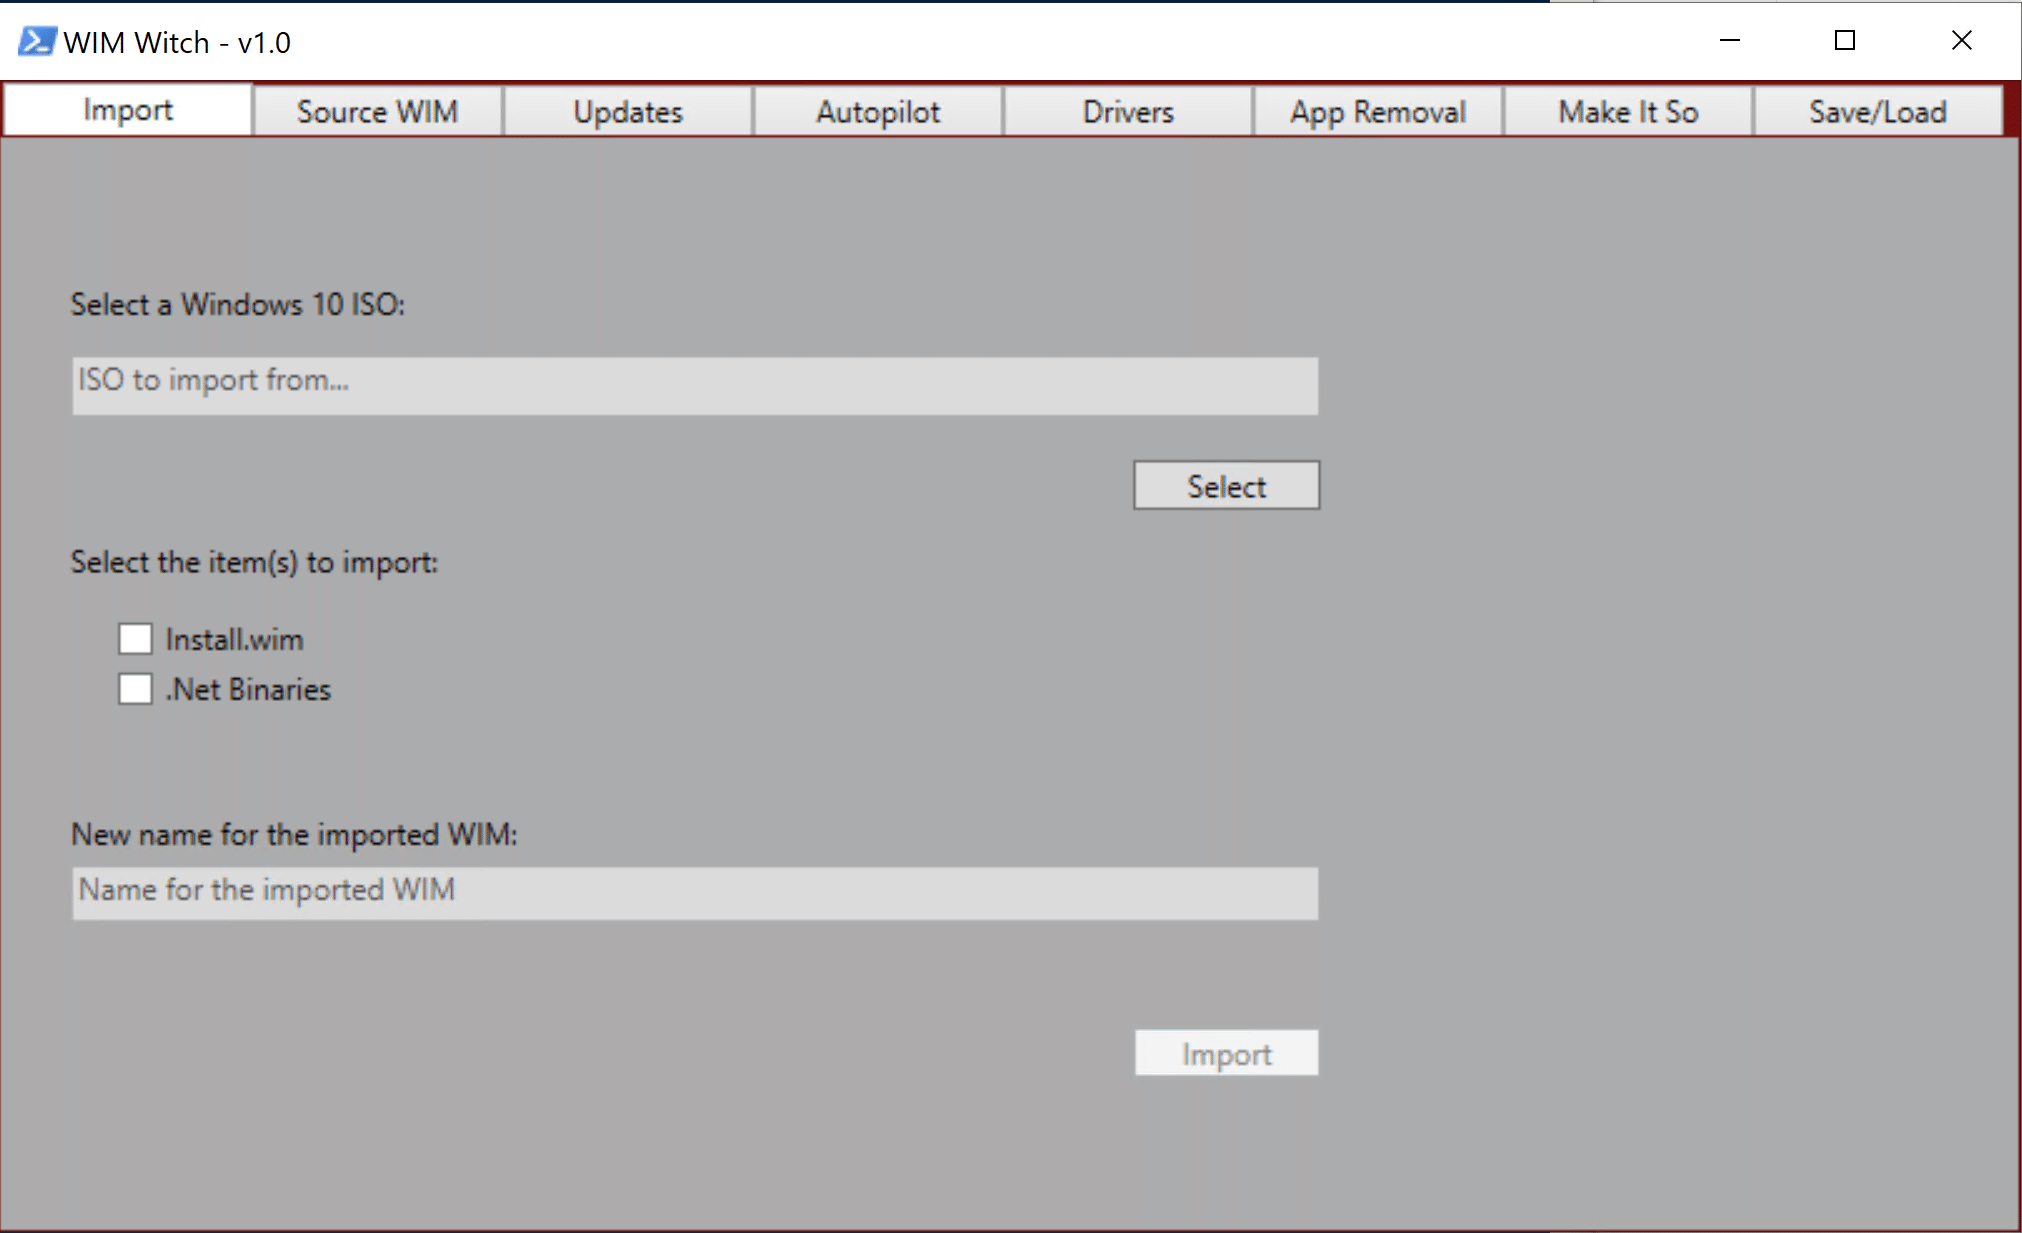
Press the “Select” button and browse to the ISO file that contains the files that should be imported. It should be noted that WIM Witch cannot import from an already mounted image; only ISOs. Once the ISO file is selected, check the box for the items that should be imported. If “Install.wim” is checked, the field to supply the name for the imported “Install.wim” file will now be accessible. Provide a unique name for the file. .Net 3.5 Binaries do not require any additional configuration.
Once the proper check boxes and fields have been completed, click “Import” to start the process.
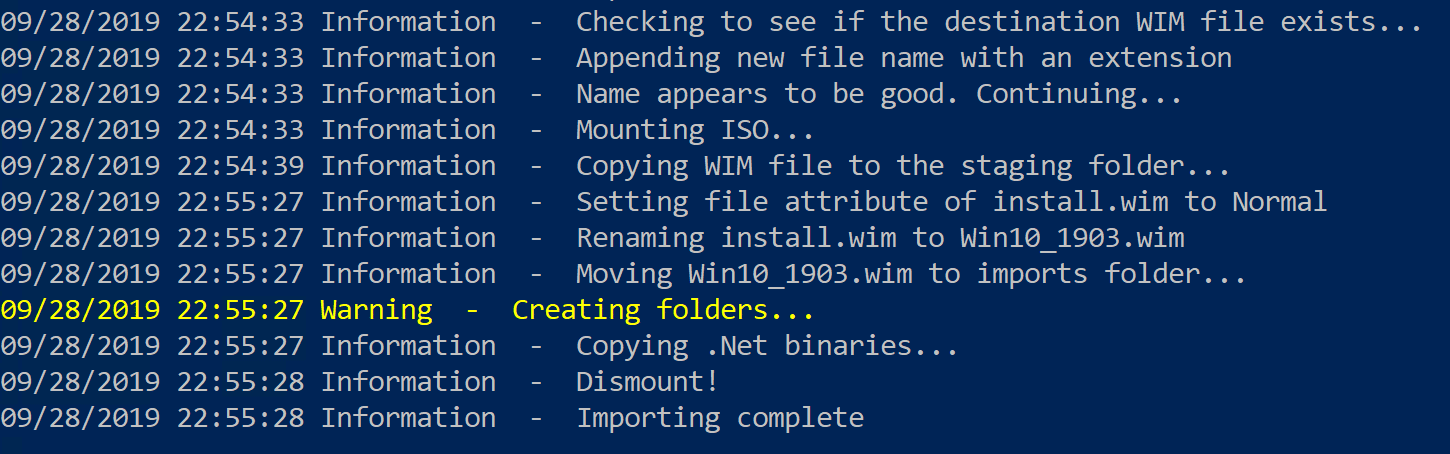
During the importation of the .Net binaries, if the required subfolders do not exist, WIM Witch will create them automatically.
Selecting a WIM file for Customization
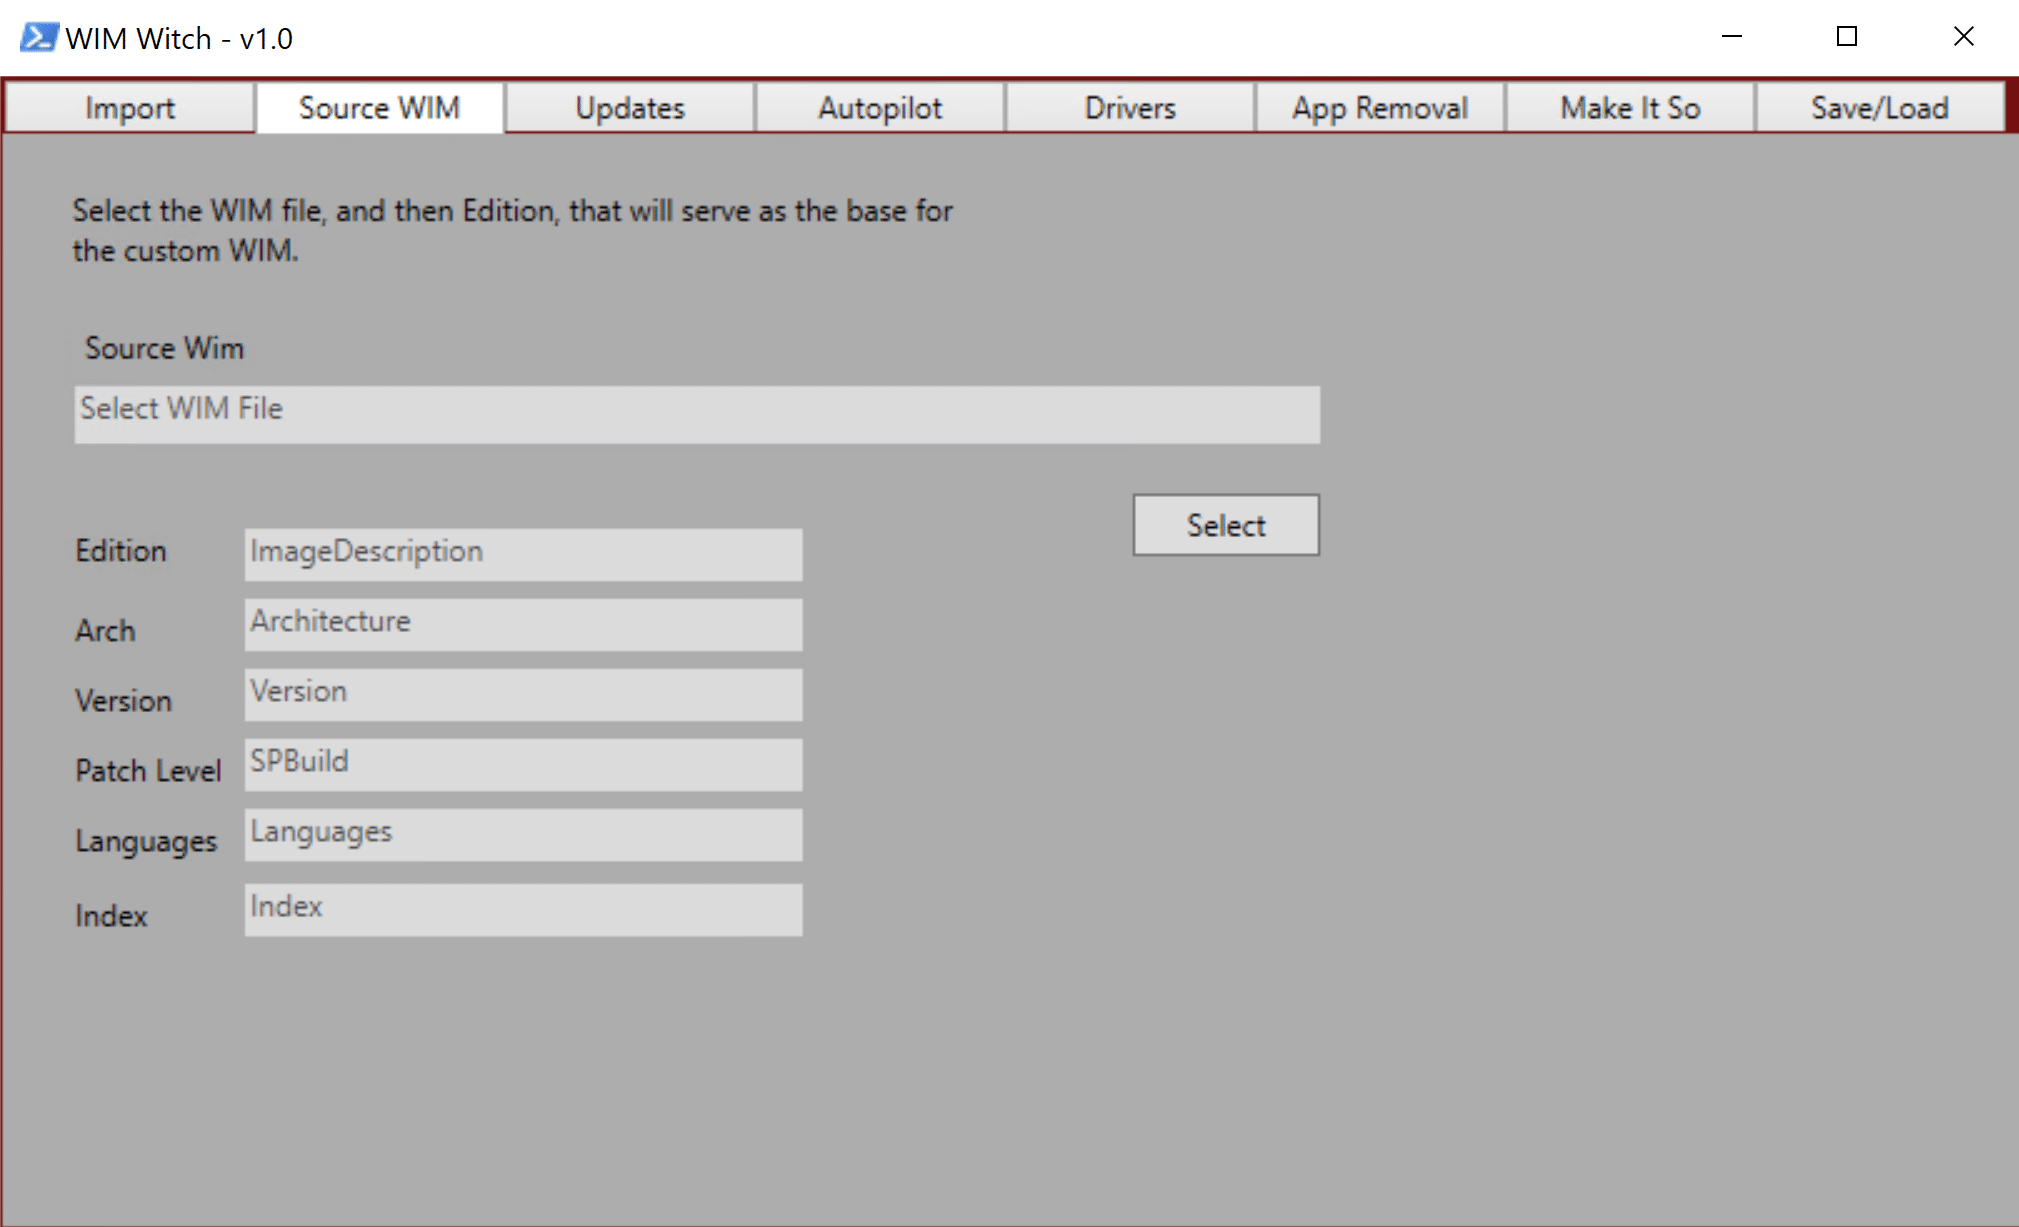
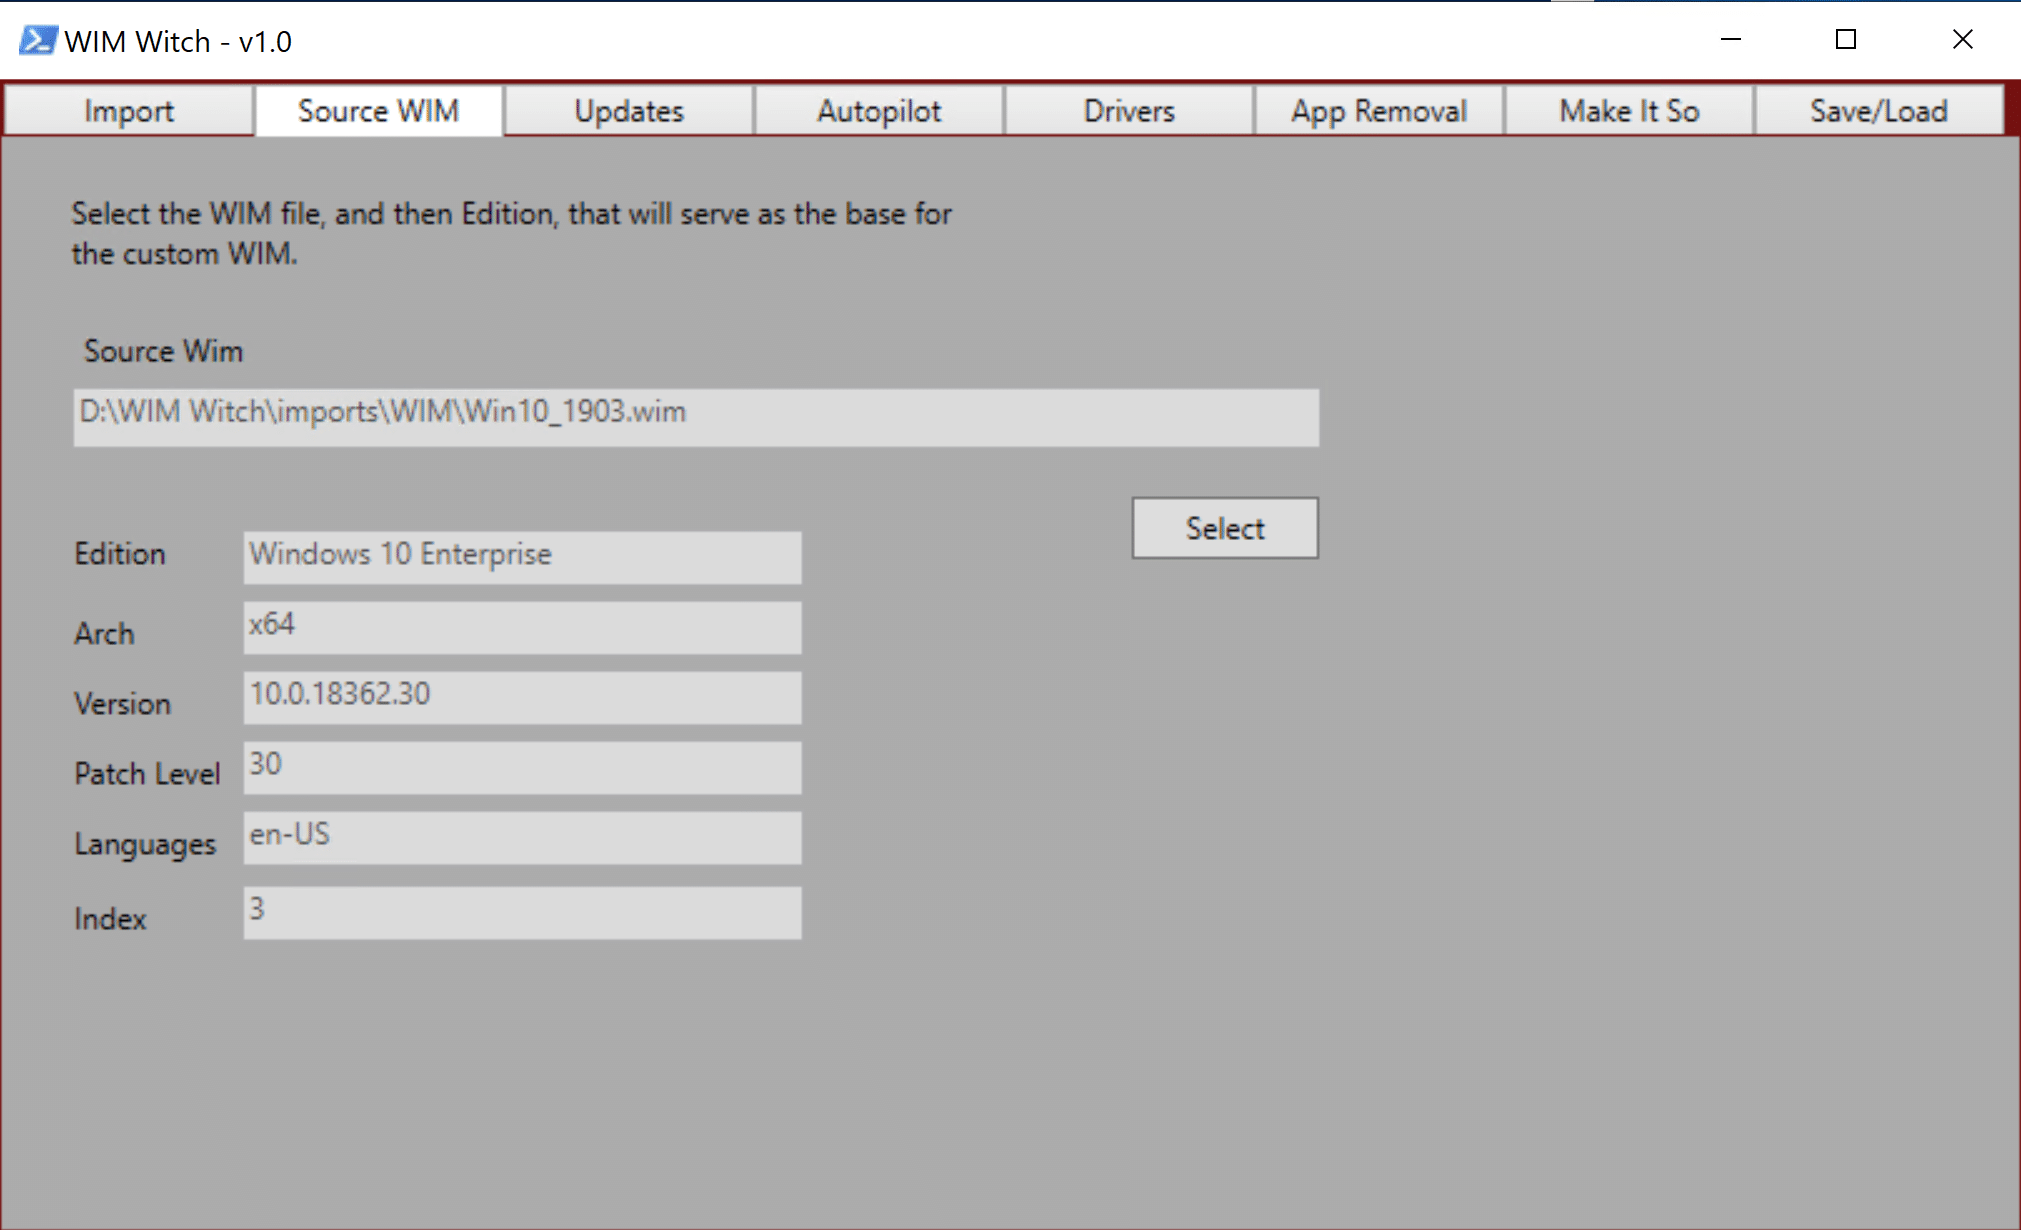
Starting at the “Source WIM” tab, click the “Select” button. Browse to the WIM file that will serve as the base for the image build.
After selecting the WIM file, a Grid View window should appear:
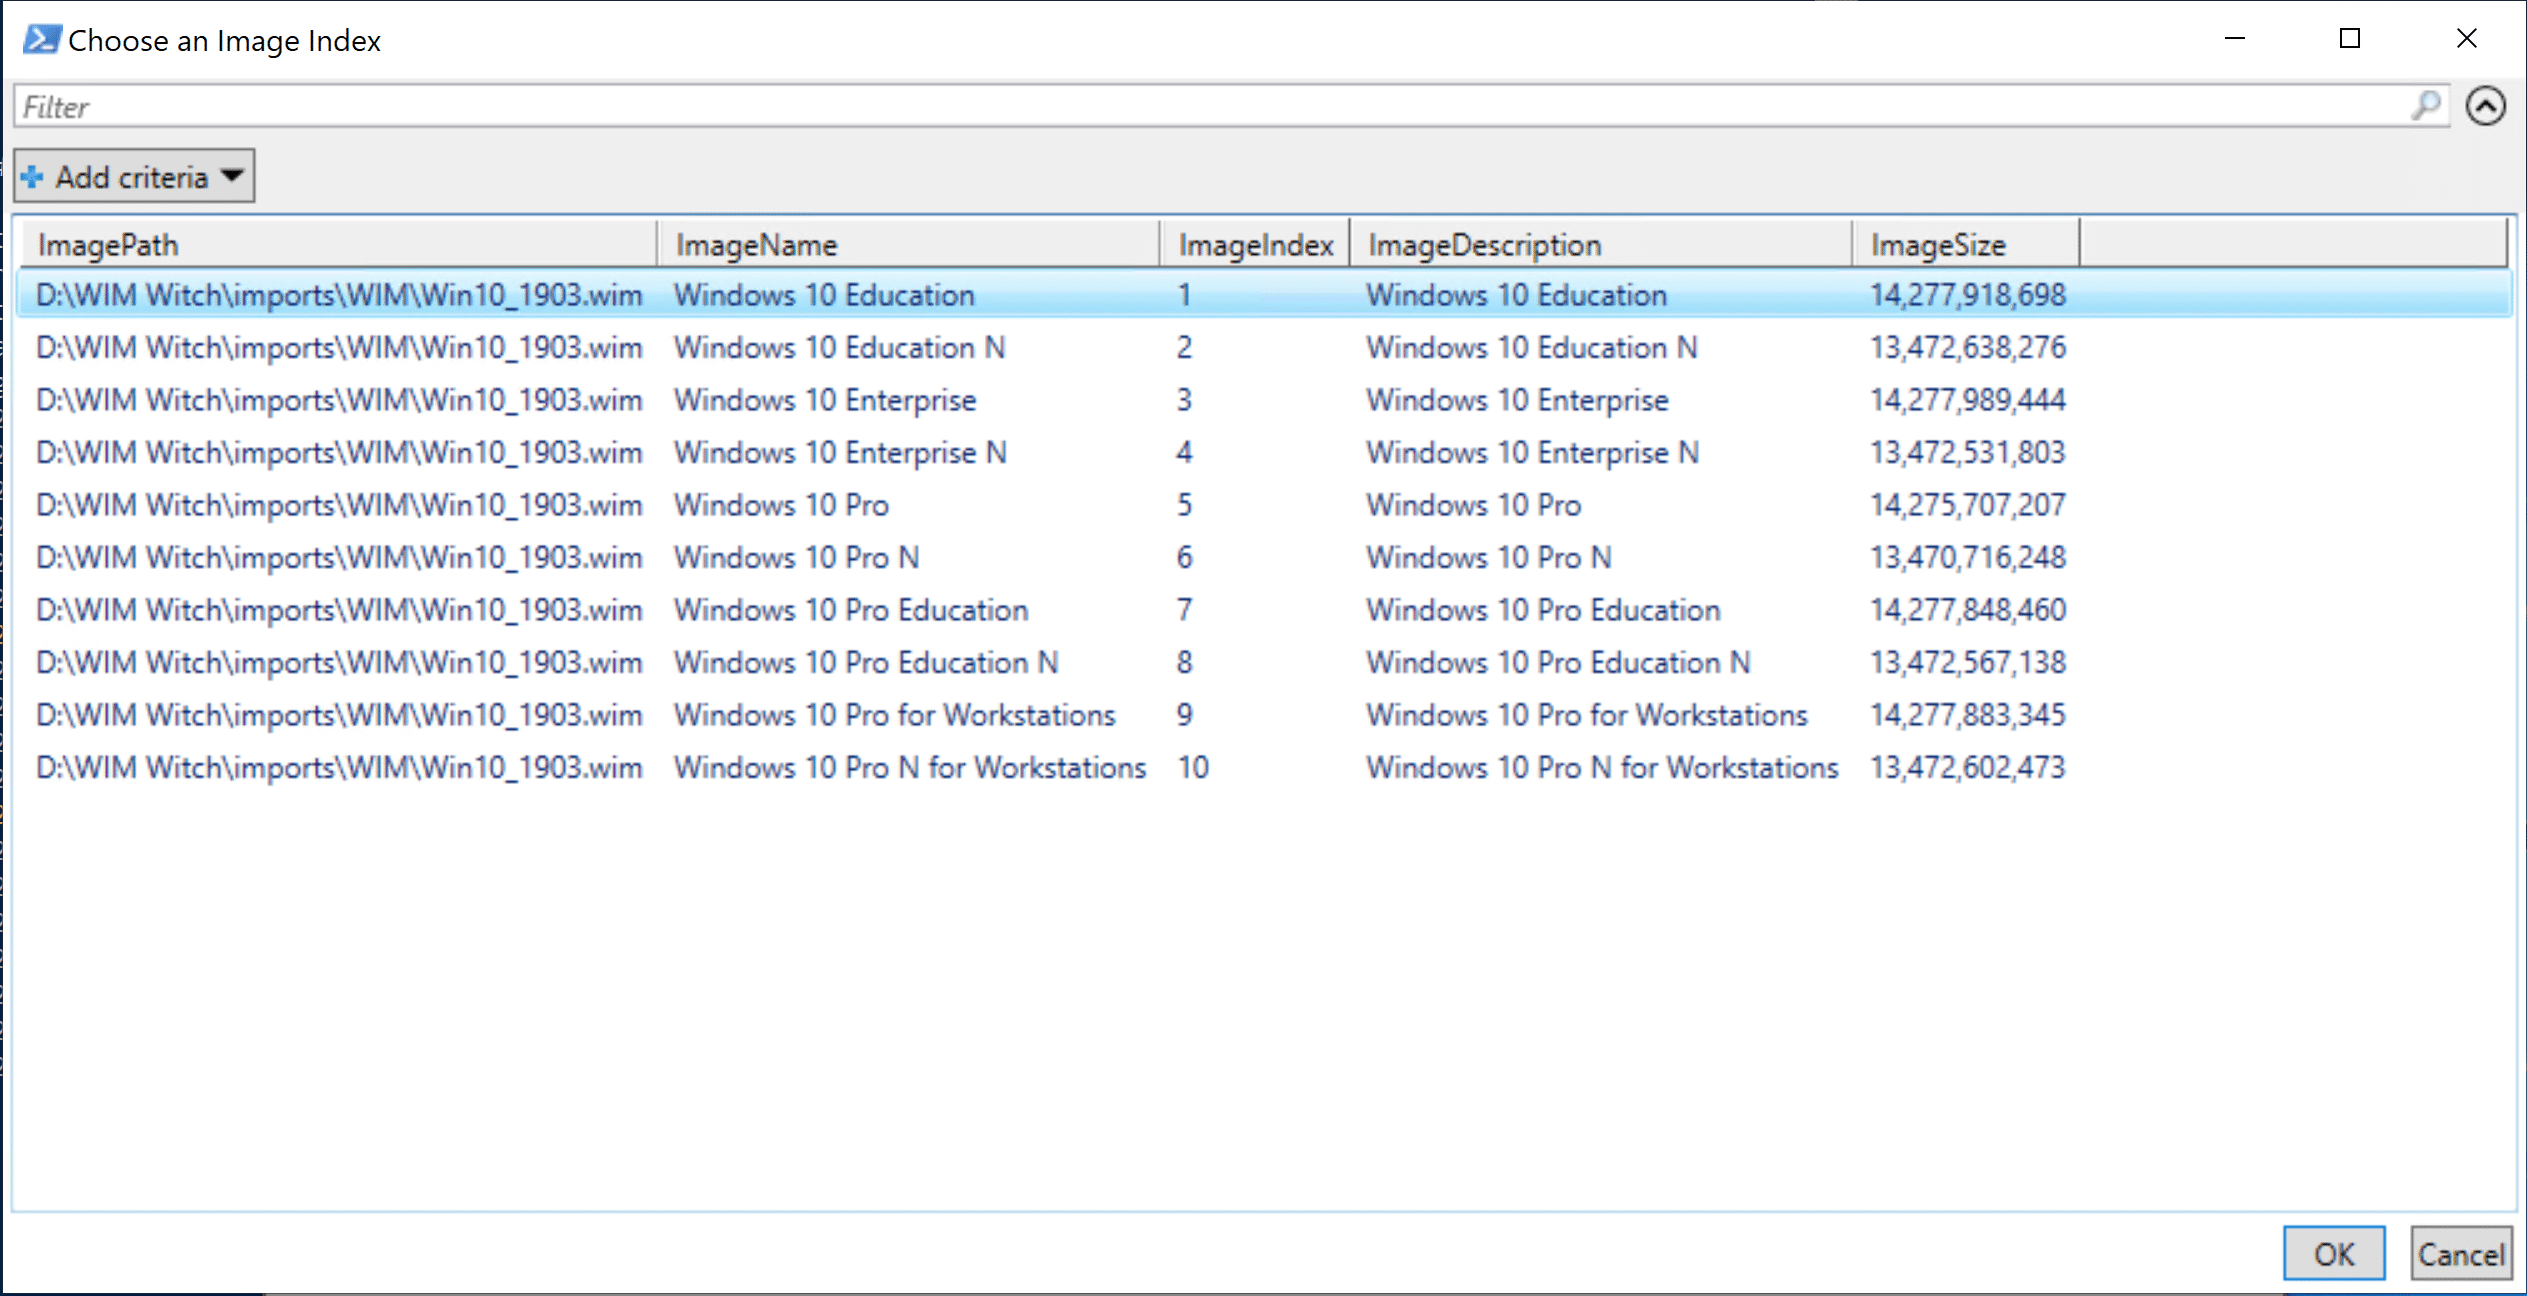
Select the edition / index of Windows 10 that will be used. Click “OK”.
WIM Witch will take a small amount of time to analyze the selection and extract relevant information. When the processing is complete, the fields will be populated.
Applying Updates
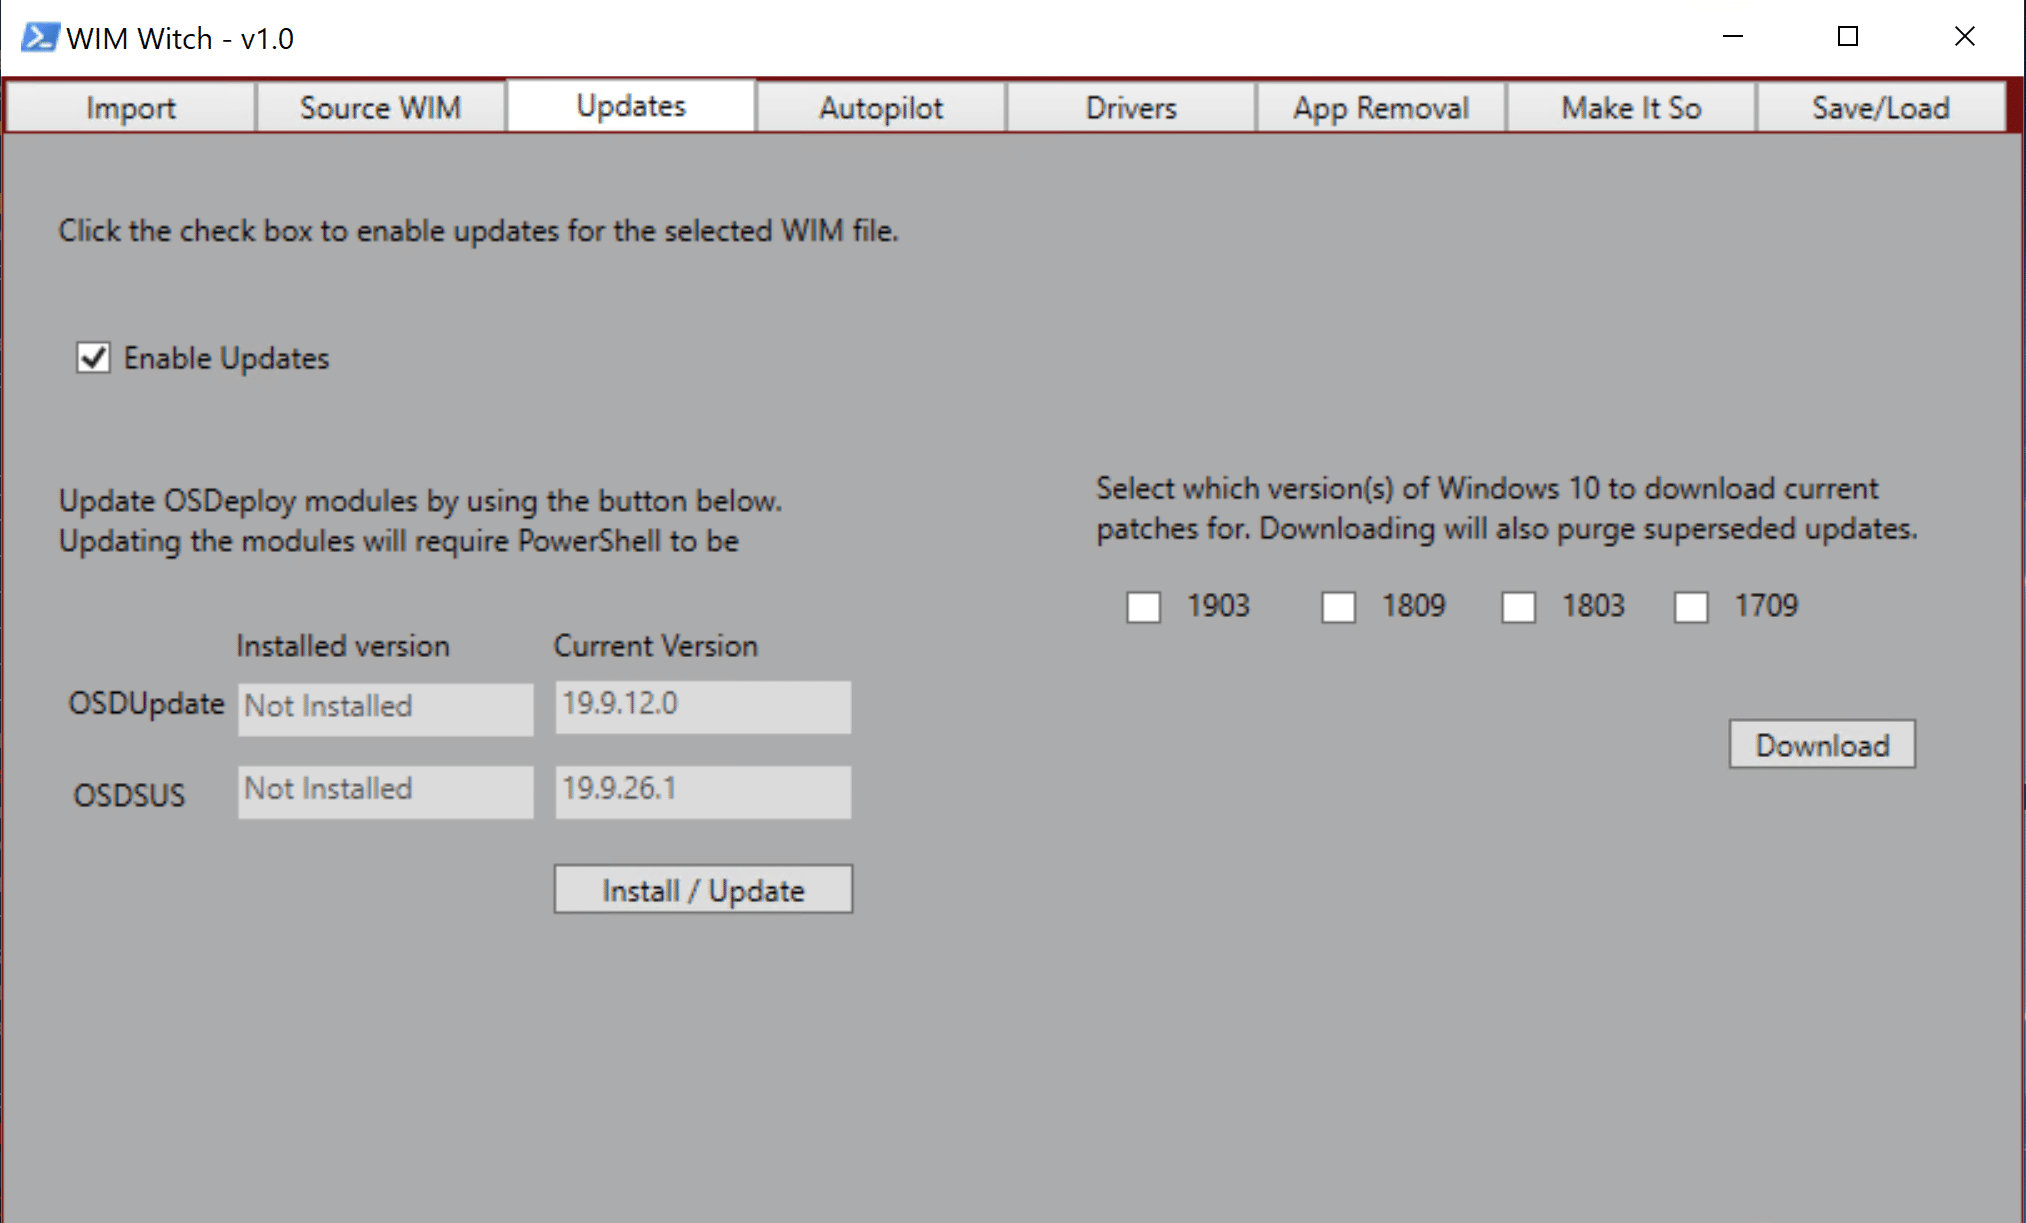
If the WIM file should have updates applied, on the Updates tab, tick the checkbox for “Enable Updates”:
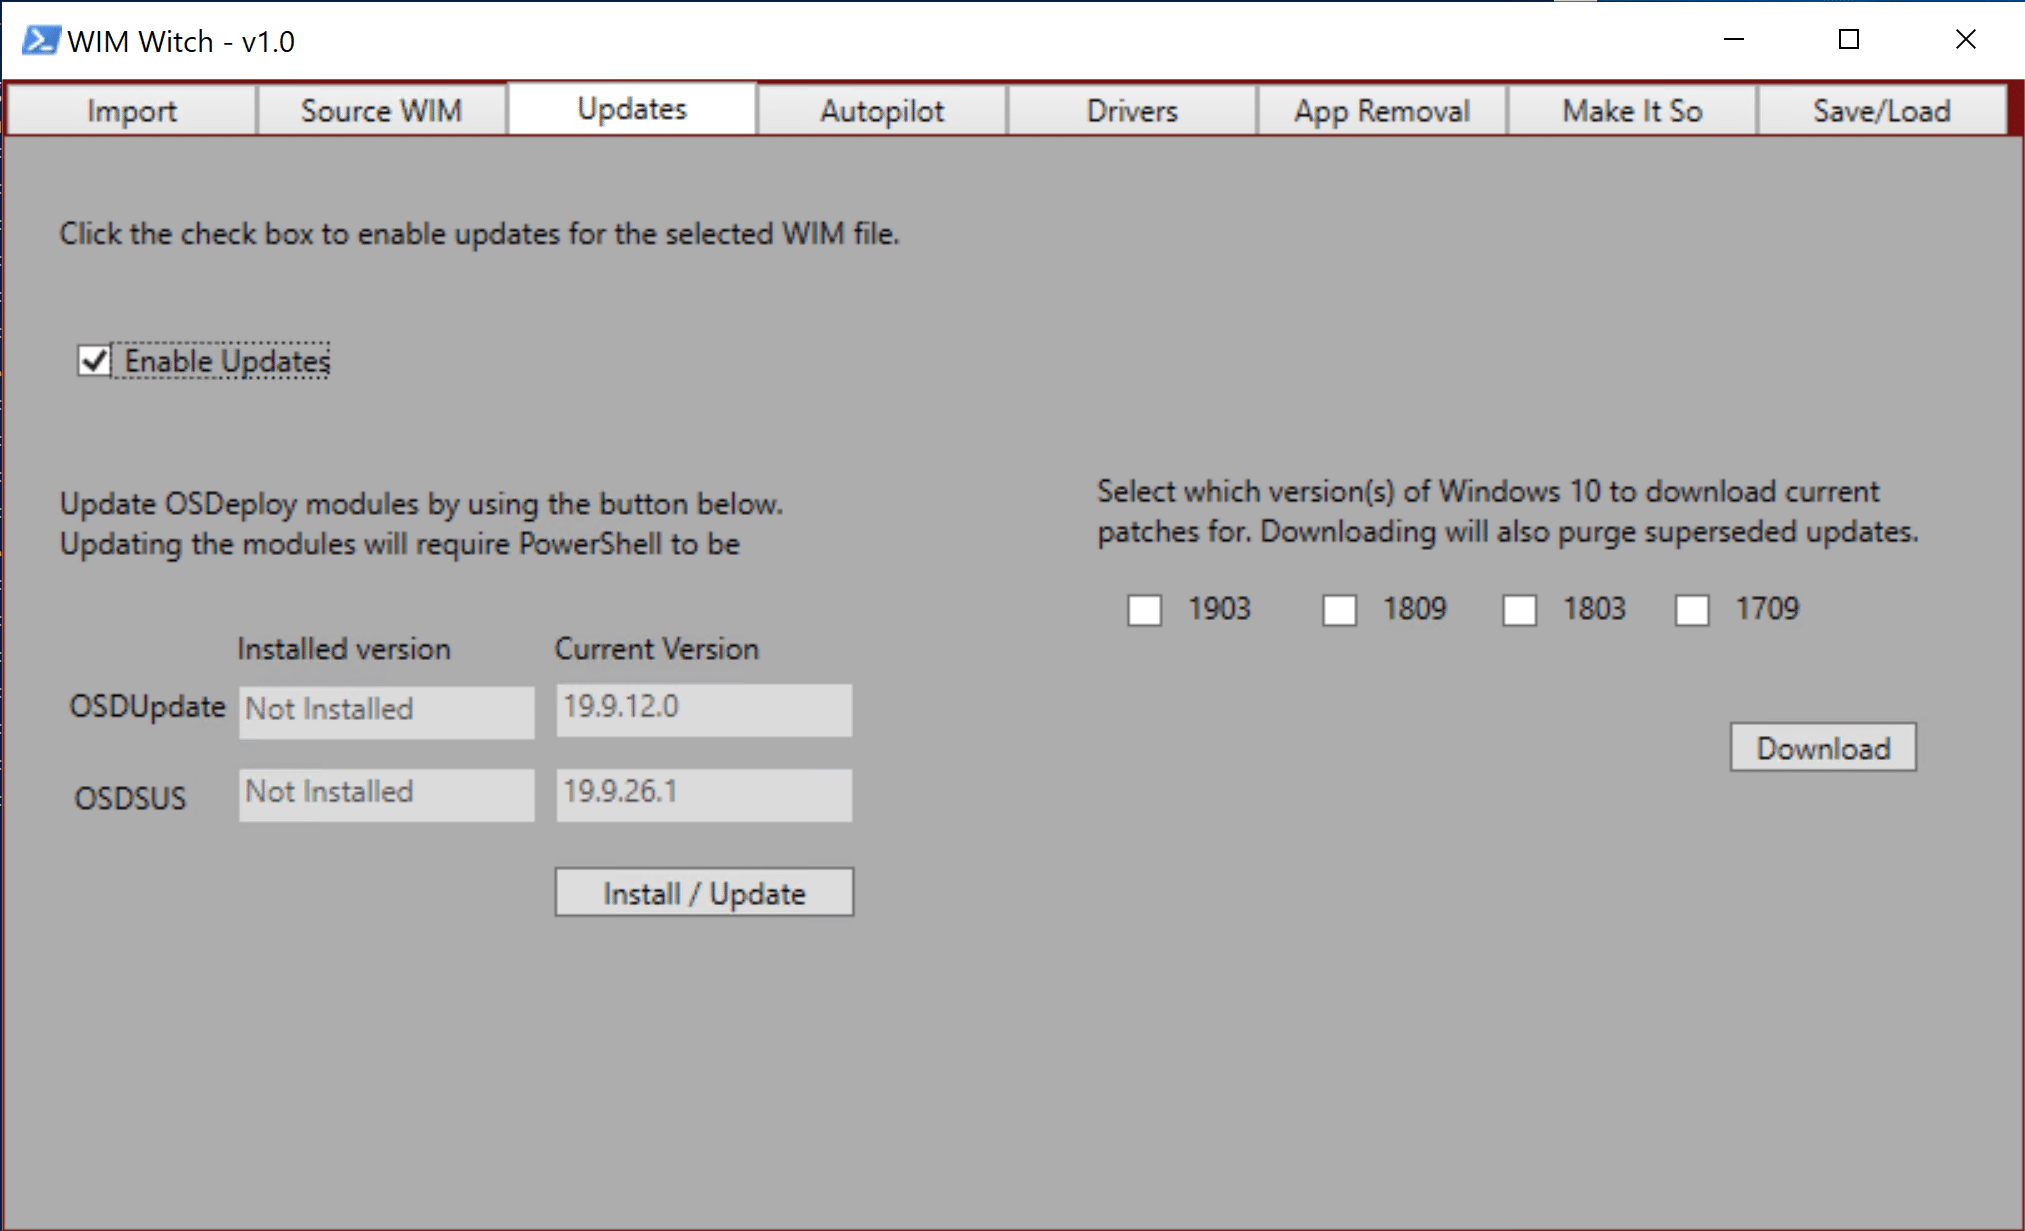
- The other options on this tab, including software update maintenance, will be discussed later in the documentation.
Applying Autopilot Profile
To apply an Autopilot configuration file for use in an “Autopilot for Existing Devices” deployment, check the checkbox “Enable Autopilot”
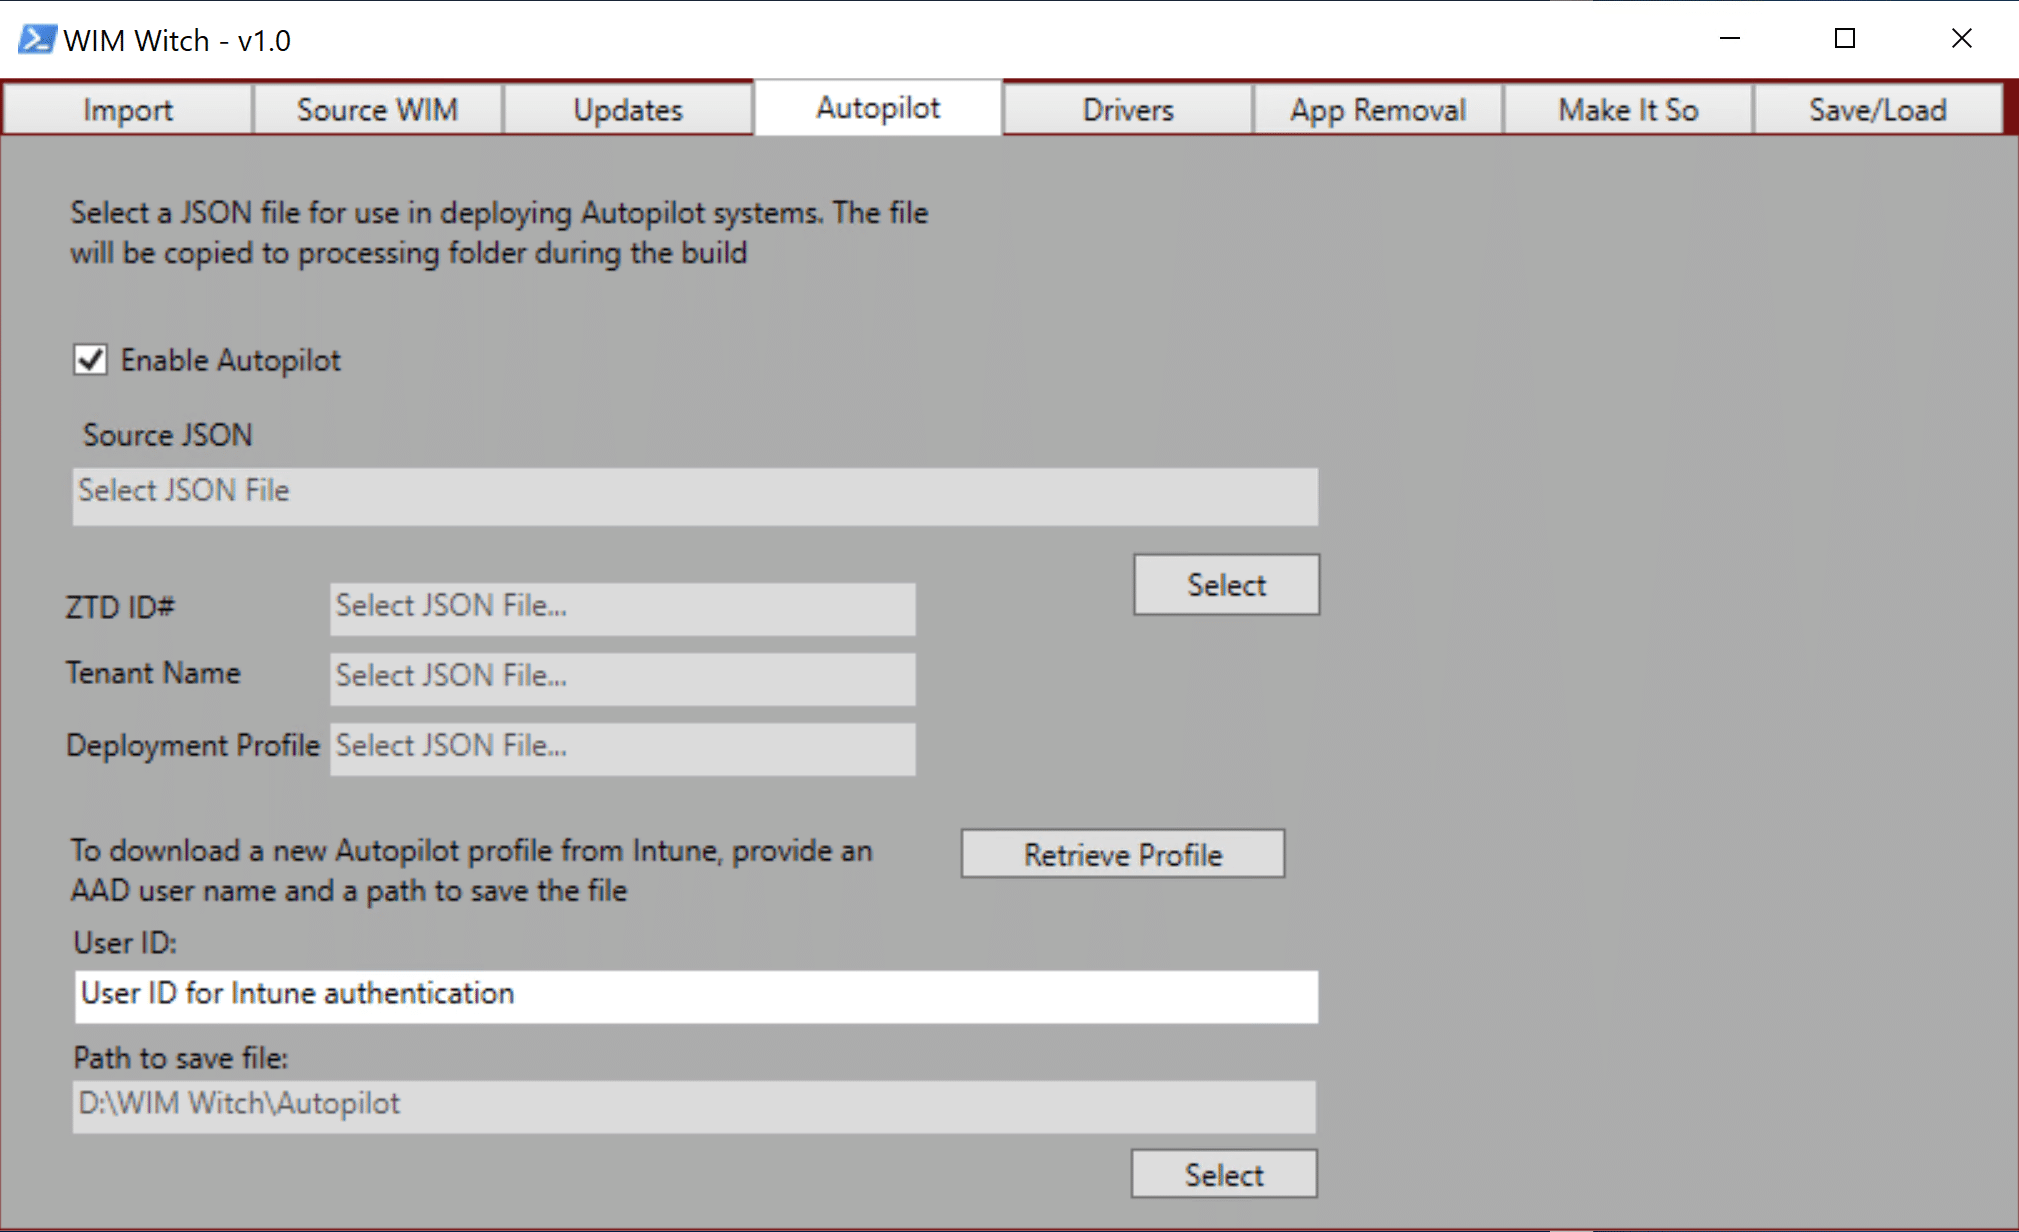
Once selected, click the “Select Button” under “Source JSON” file. This will allow the desired configuration file to be browsed to and selected. Once the process has been completed, the ZTD ID#, Tenant Name, and Deployment Profile fields will be populated.
If a new file needs to be downloaded from the cloud, simply enter the Azure AD User ID name into the User ID field, and then select a path to save the file to. Once completed, click the “Retrieve Profile” button.

WIM Witch will check to see if the required PowerShell modules are installed in order to connect to Intune and will install them if they are missing. Once all of the prerequisites have been installed, you will be prompted to provide a password.

Once authentication is complete, a screen will display a list of Autopilot deployment profiles. Select the one that is required. Click OK. The file will be created in the folder specified.
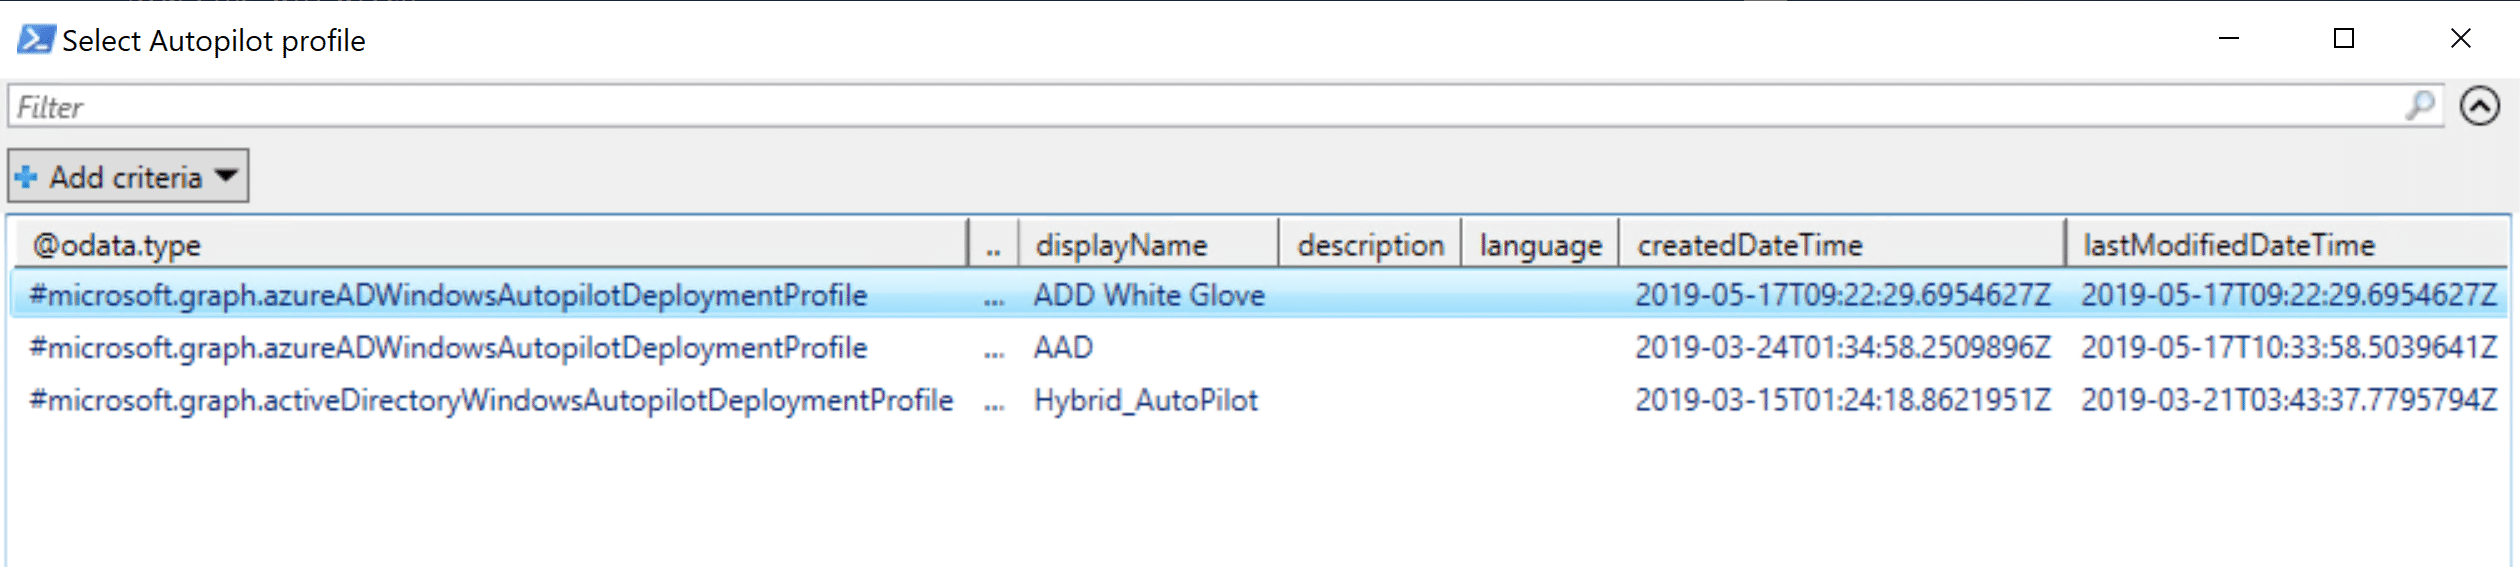
The file will be created in the folder specified and now can be selected in WIM Witch for injection.
Driver Injection
To select drivers for injection, check the box “Enable Driver Injection”.
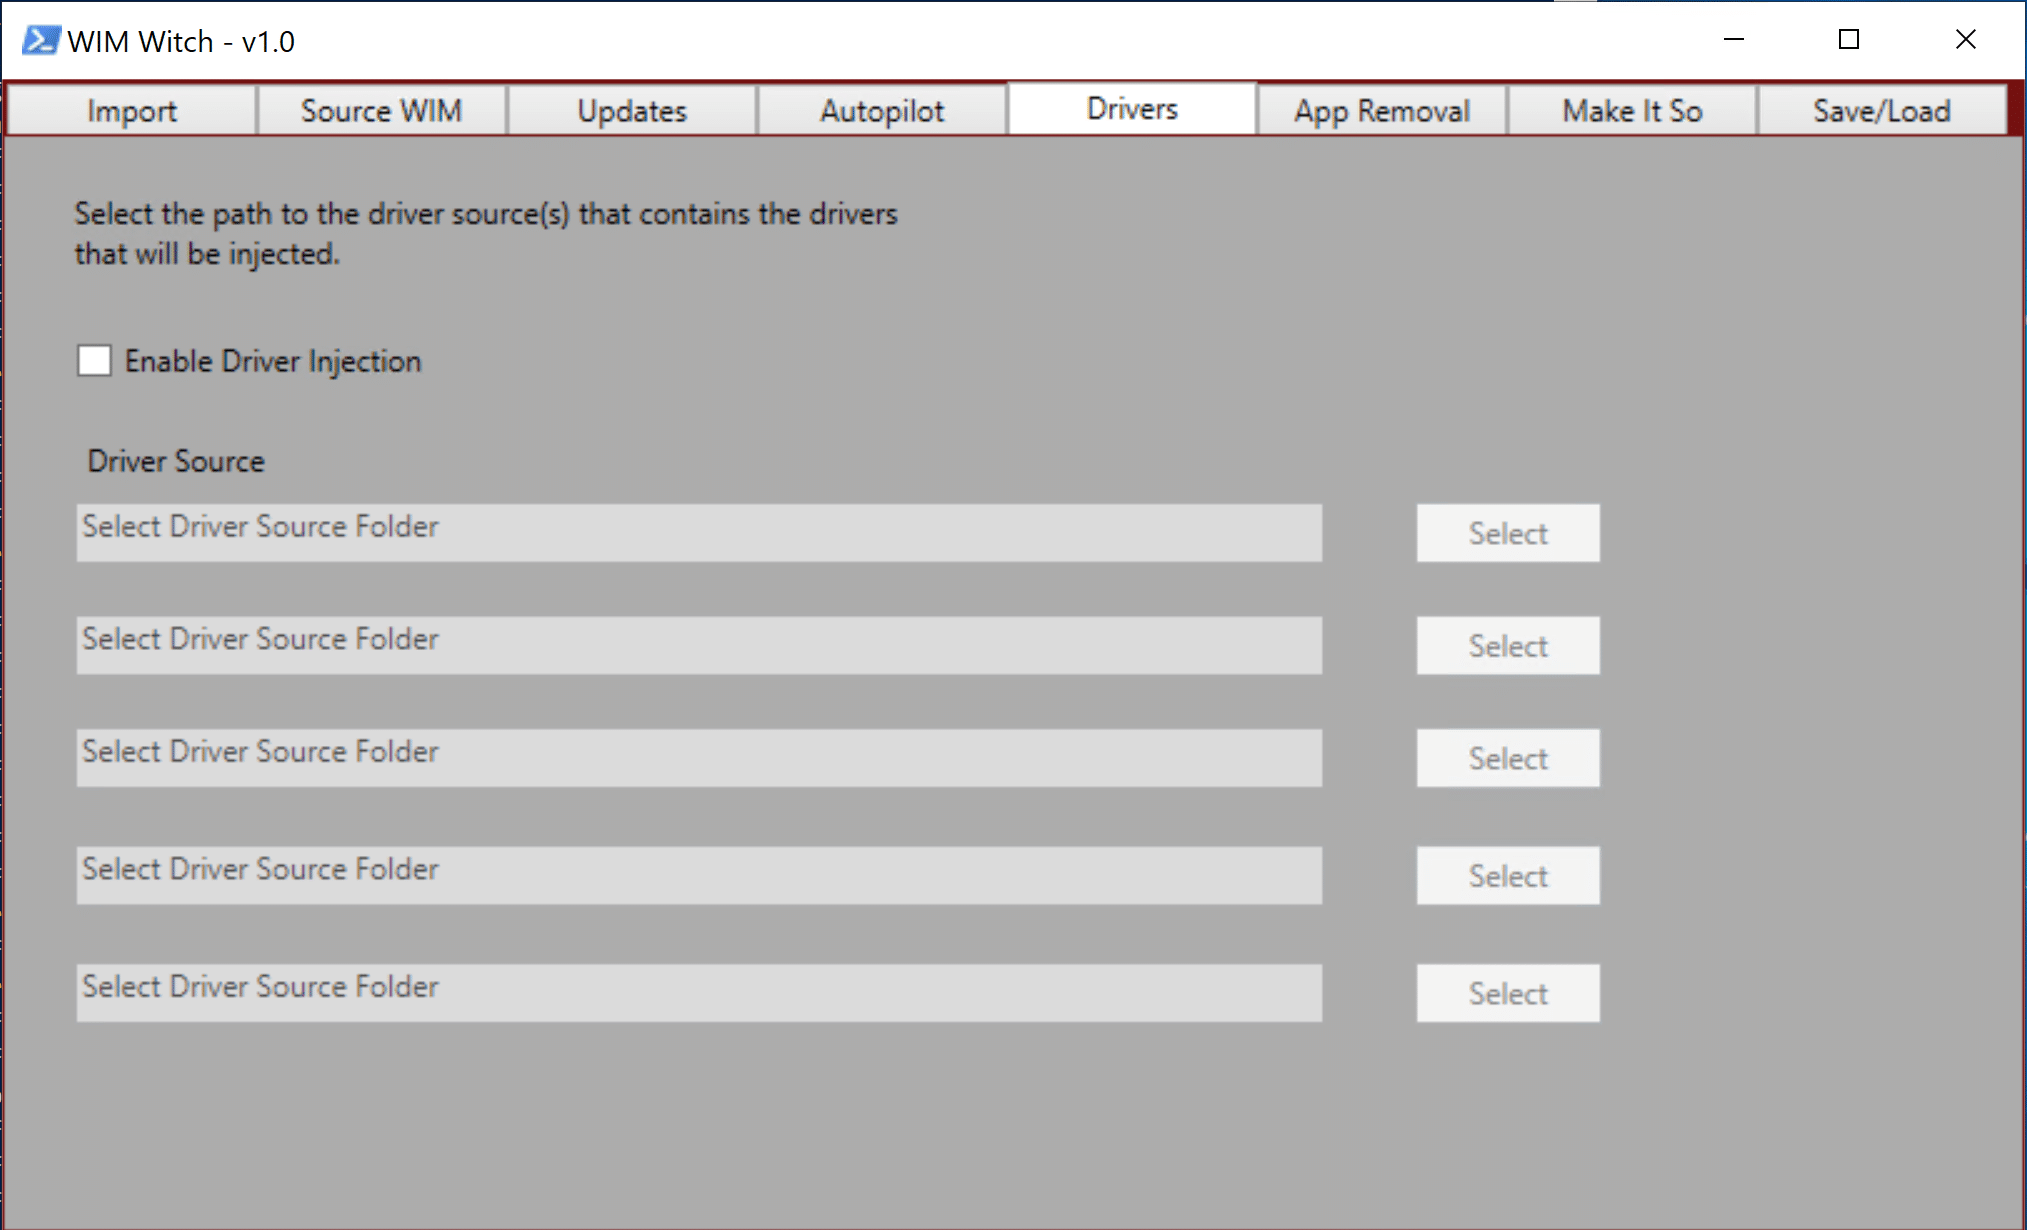
WIM Witch provides five paths that can be searched recursively for drivers. Not all fields are required to be populated as this just provides the ability to supply multiple folders if needed. Simply click the “Select” button at the end of each line and browse to the required folder.
Removing In-Box (Pre-Provisioned) Apps
To enable removing the pre-provisioned apps (store apps) from the WIM, on the App Removal tab, check the box “Enable app removal”.
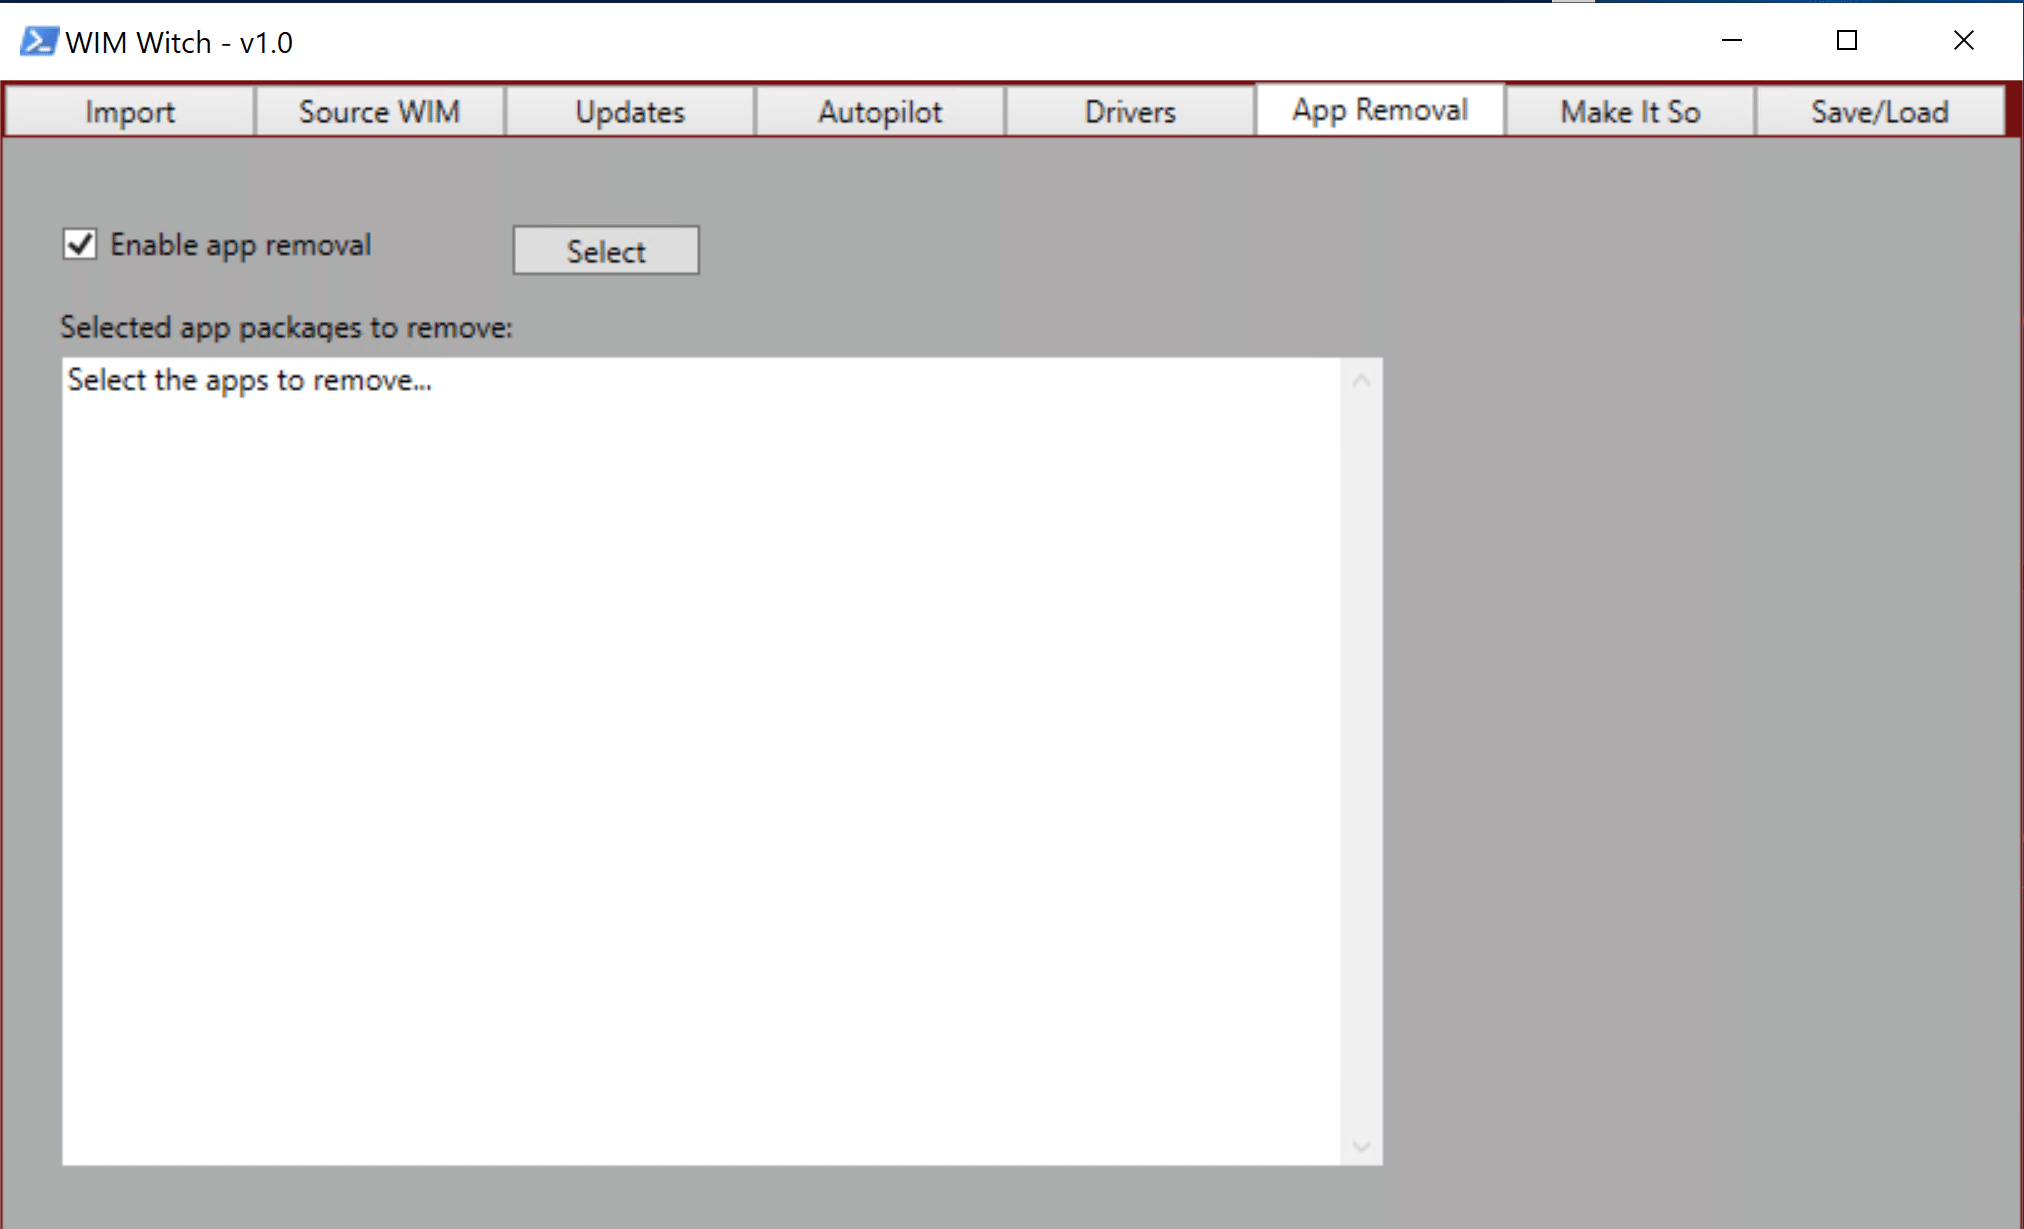
Next, click the Select button. Ensure that a WIM file has been selected in the Source WIM tab or this function will not work. WIM Witch requires a WIM to be selected as each version of Windows 10 has different apps and it needs to know which version is being modified so it can display the proper app list.
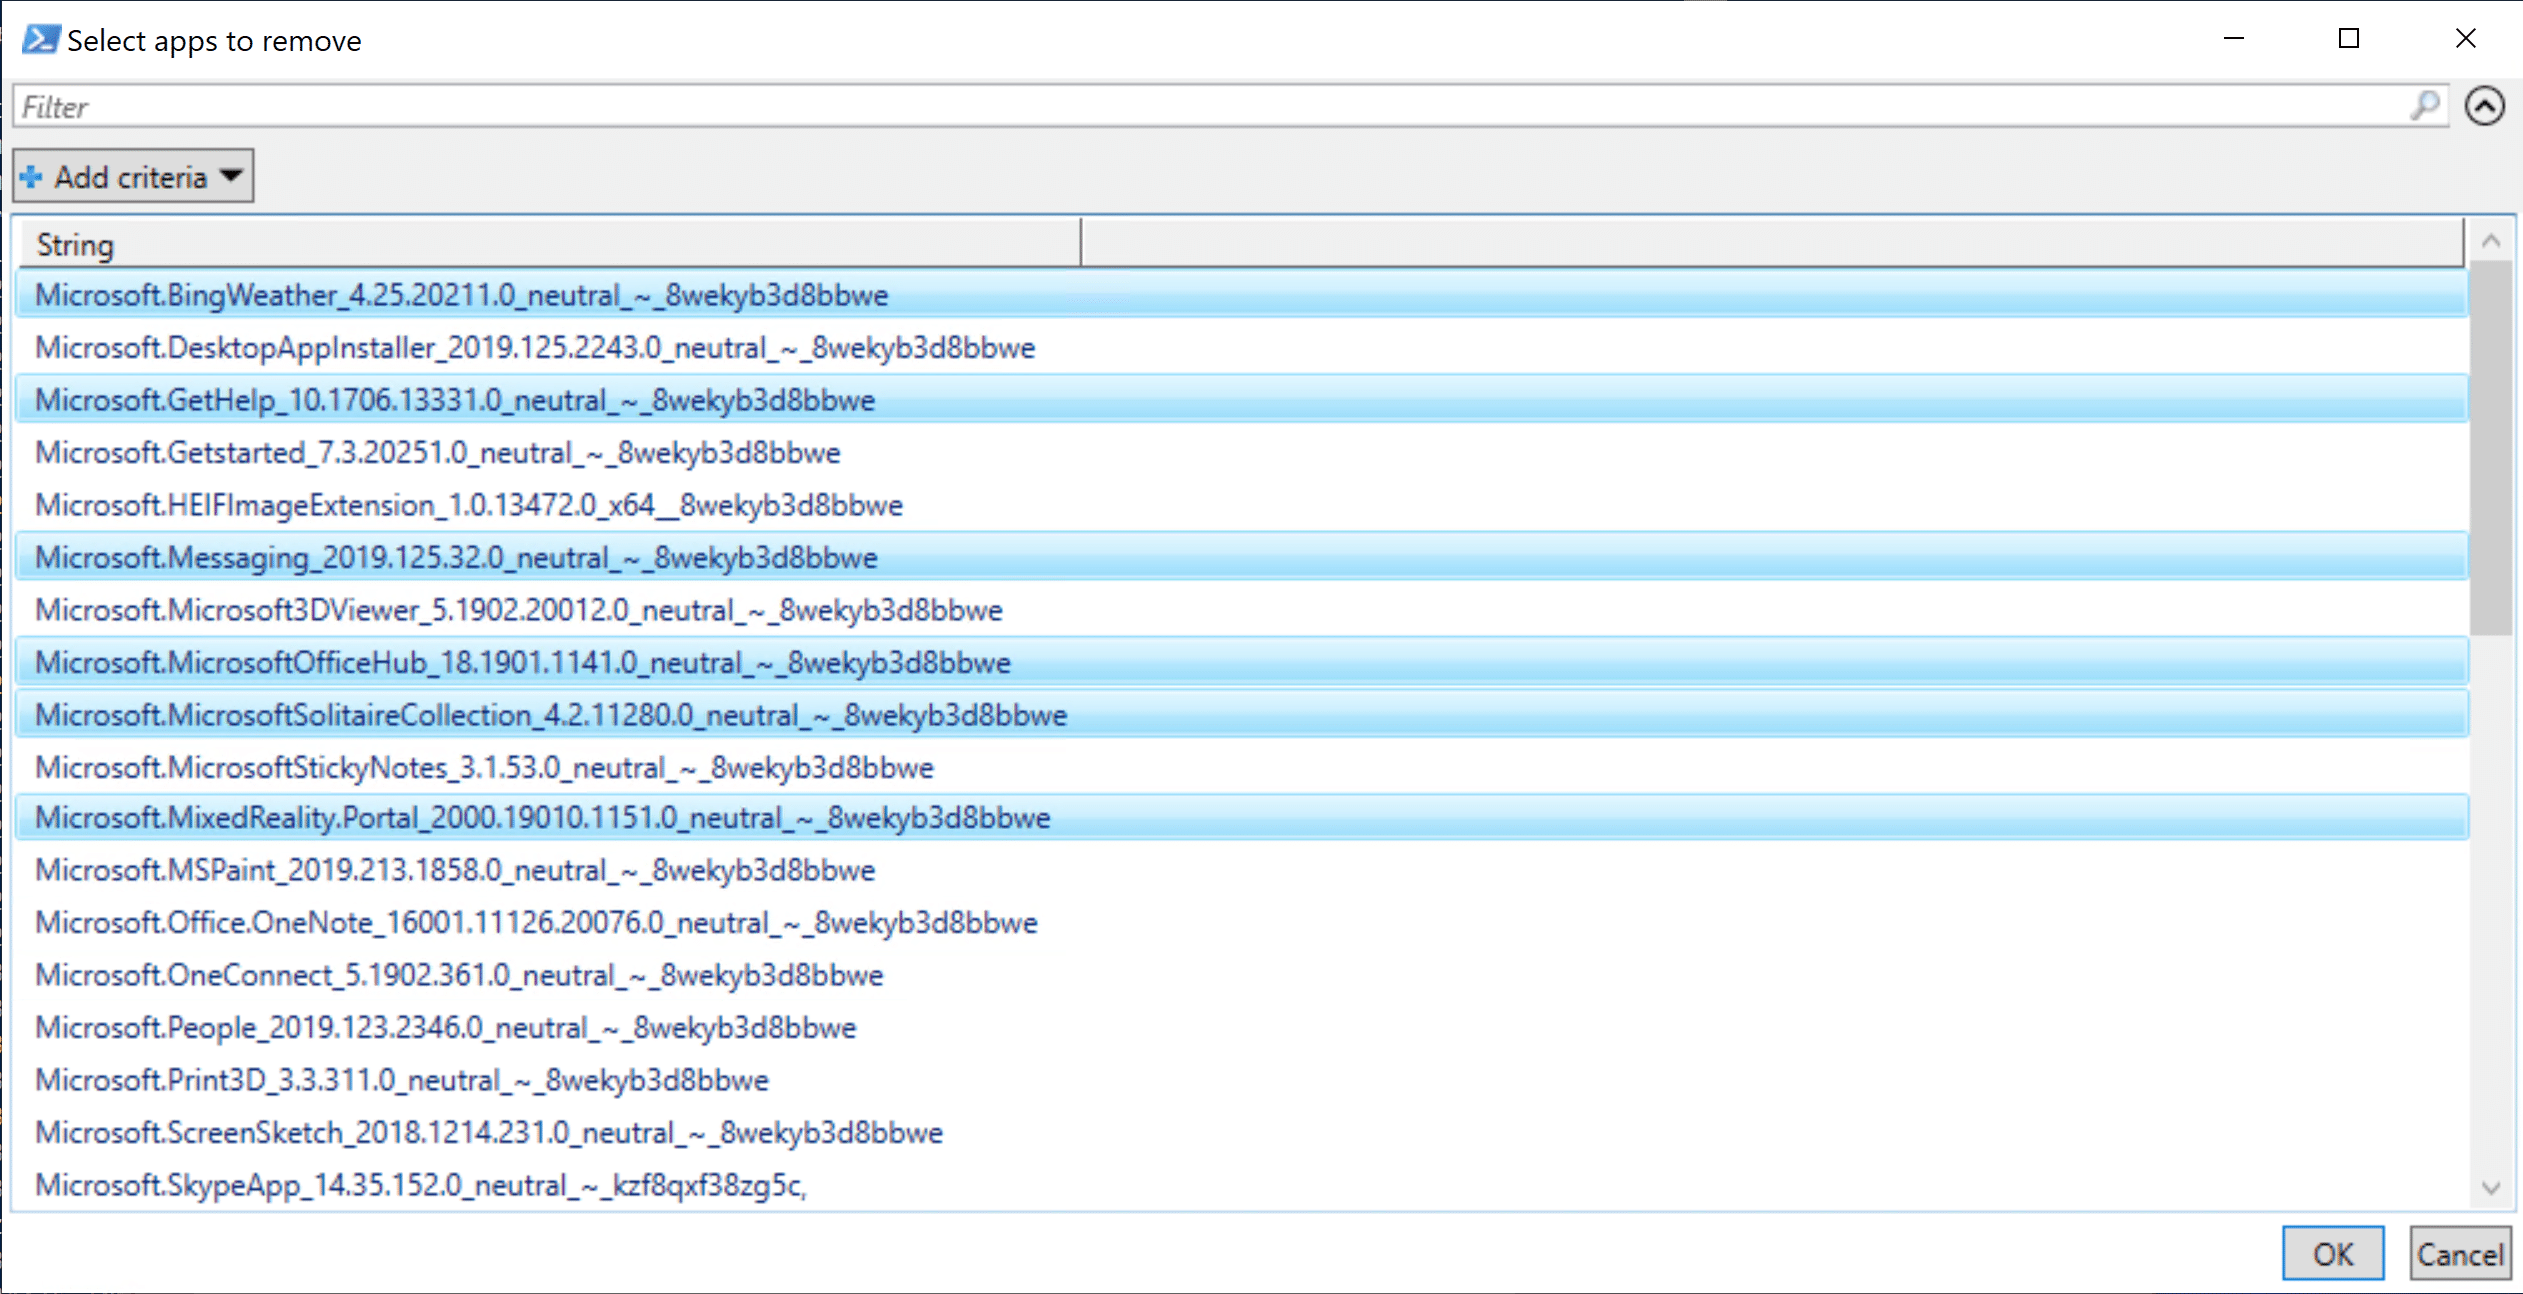
Select the apps that will be removed, then click “OK”.
Upon completion, the pane in the App Removal tab should display the apps that were selected.
Starting the build (Make it So)
Select the Make it So tab to provide the final required information for the build.
Provide a name for the new WIM file in the field labeled “Enter Target WIM Name”. By default, WIM Witch provides a path to the CompletedWIMs folder in the WIM Witch installation directory. This path can be changed by clicking the “Select” button below the path.
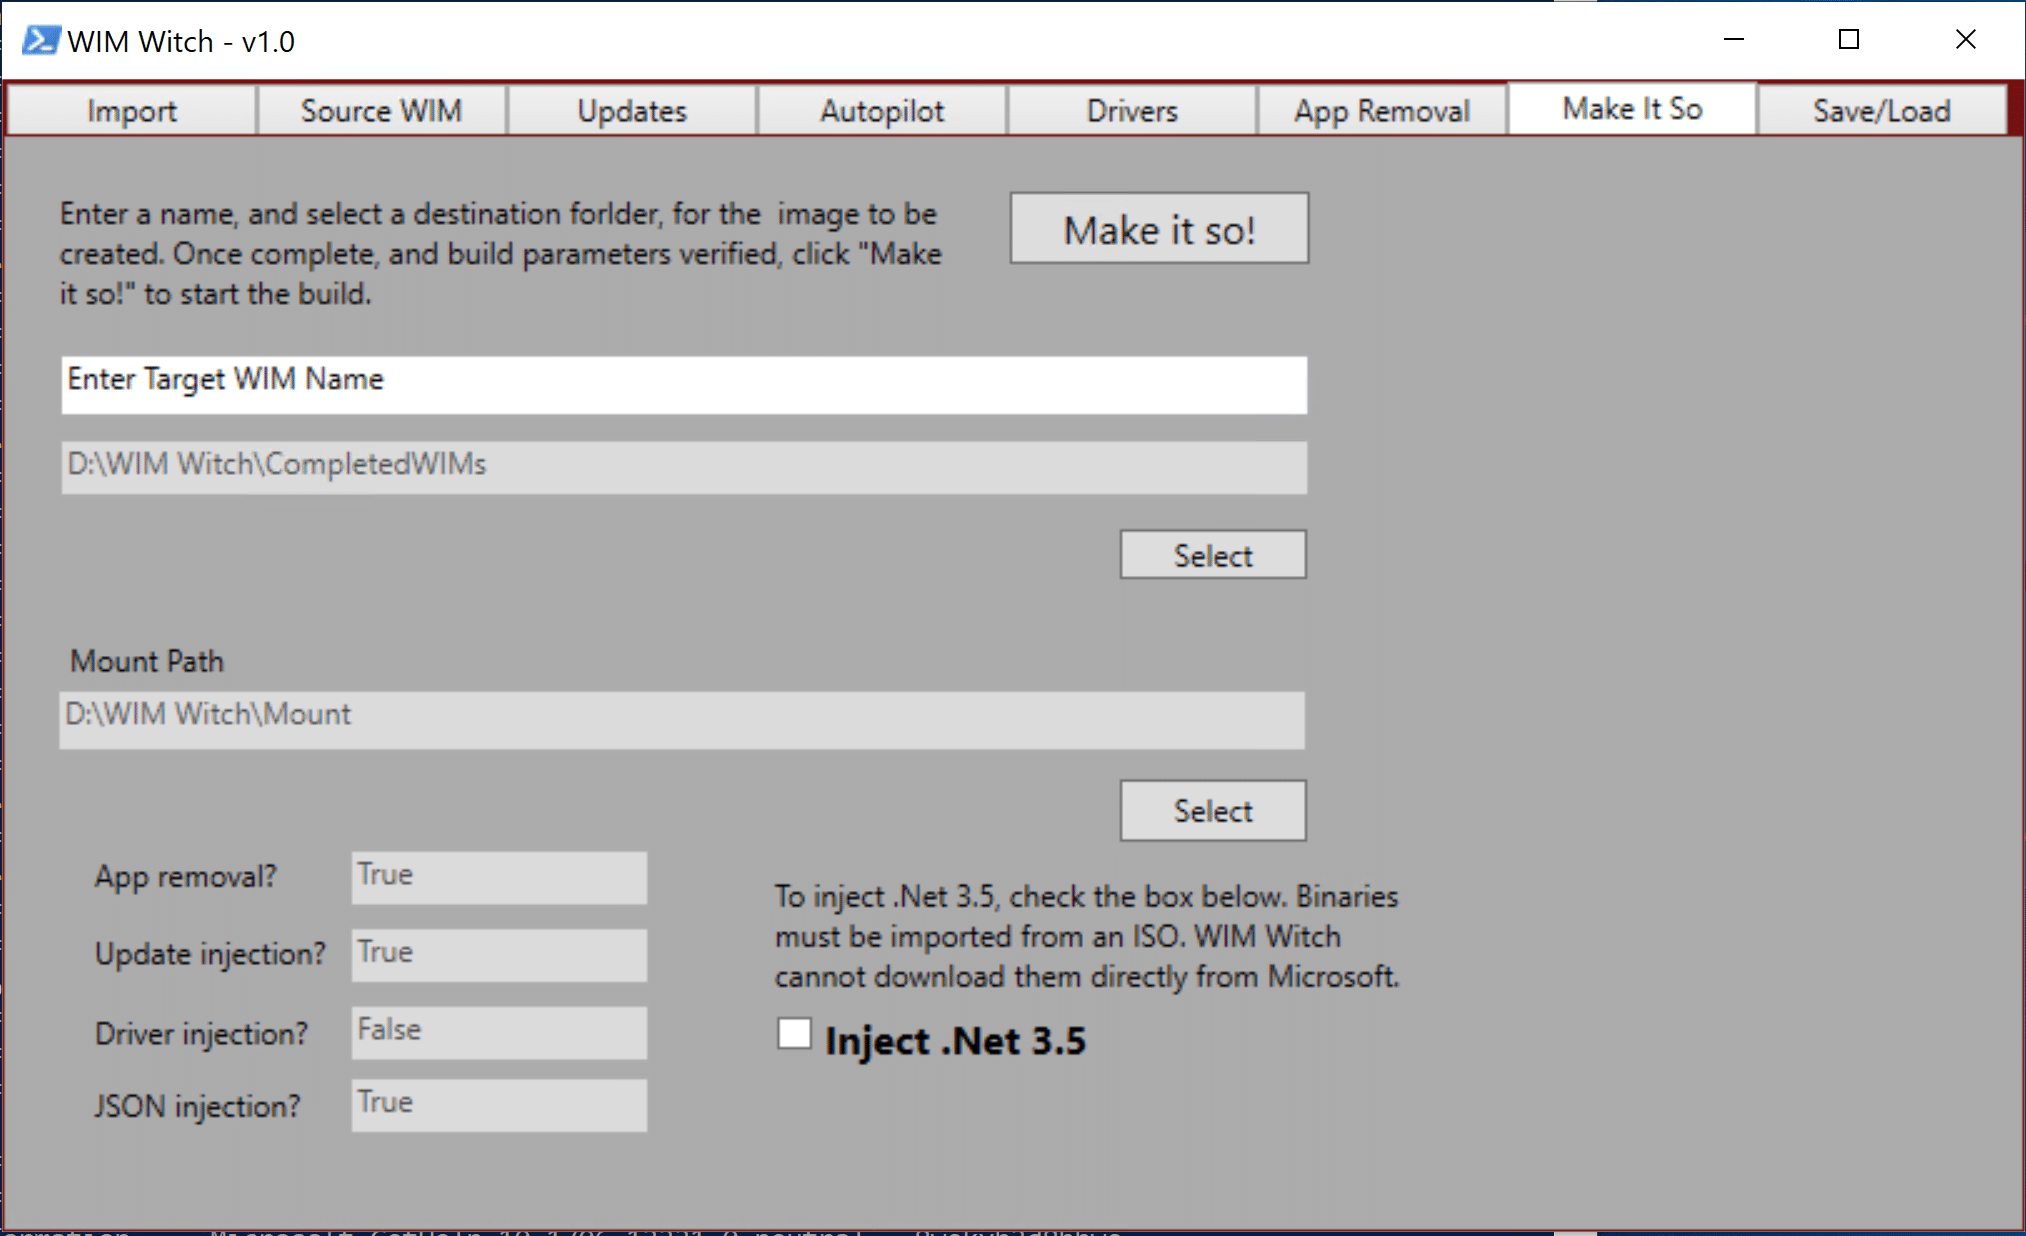
The Mount Path is also populated to a default directory under the WIM Witch installation path. This can be changed as well by clicking the “Select” button. During a preflight check, the mount path will be checked to see if it contains files and if it is an active mount point. WIM Witch will attempt to purge any files and discard any mounted image if it determines that either of those cases are true. If this remediation step is unsuccessful, select a new path or manually clean the path.
The App removal, driver, update, and json injection fields in the bottom left portion of the screen provide a confirmation of what optimizations were selected for the build and are not interact-able.
.Net 3.5 Injection (Make It So Tab)
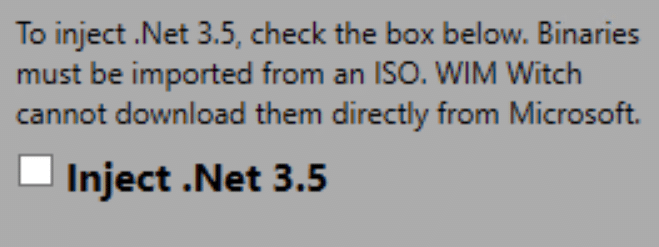
Enabling .Net 3.5 is as simple as checking the checkbox labeled “Inject .Net 3.5”. In order for this function to work, the binaries must have already been imported. WIM Witch will detect which version of Windows has been selected and will check the “imports\WIM” folder for the required content.
Once all fields have been populated correctly, simply click “Make It So” to start the build process. Depending on the customization selected, as well the resources available to WIM Witch, the build process can take some time to complete. Once it has completed successfully, “Job’s Done” should be stated in the PowerShell window.

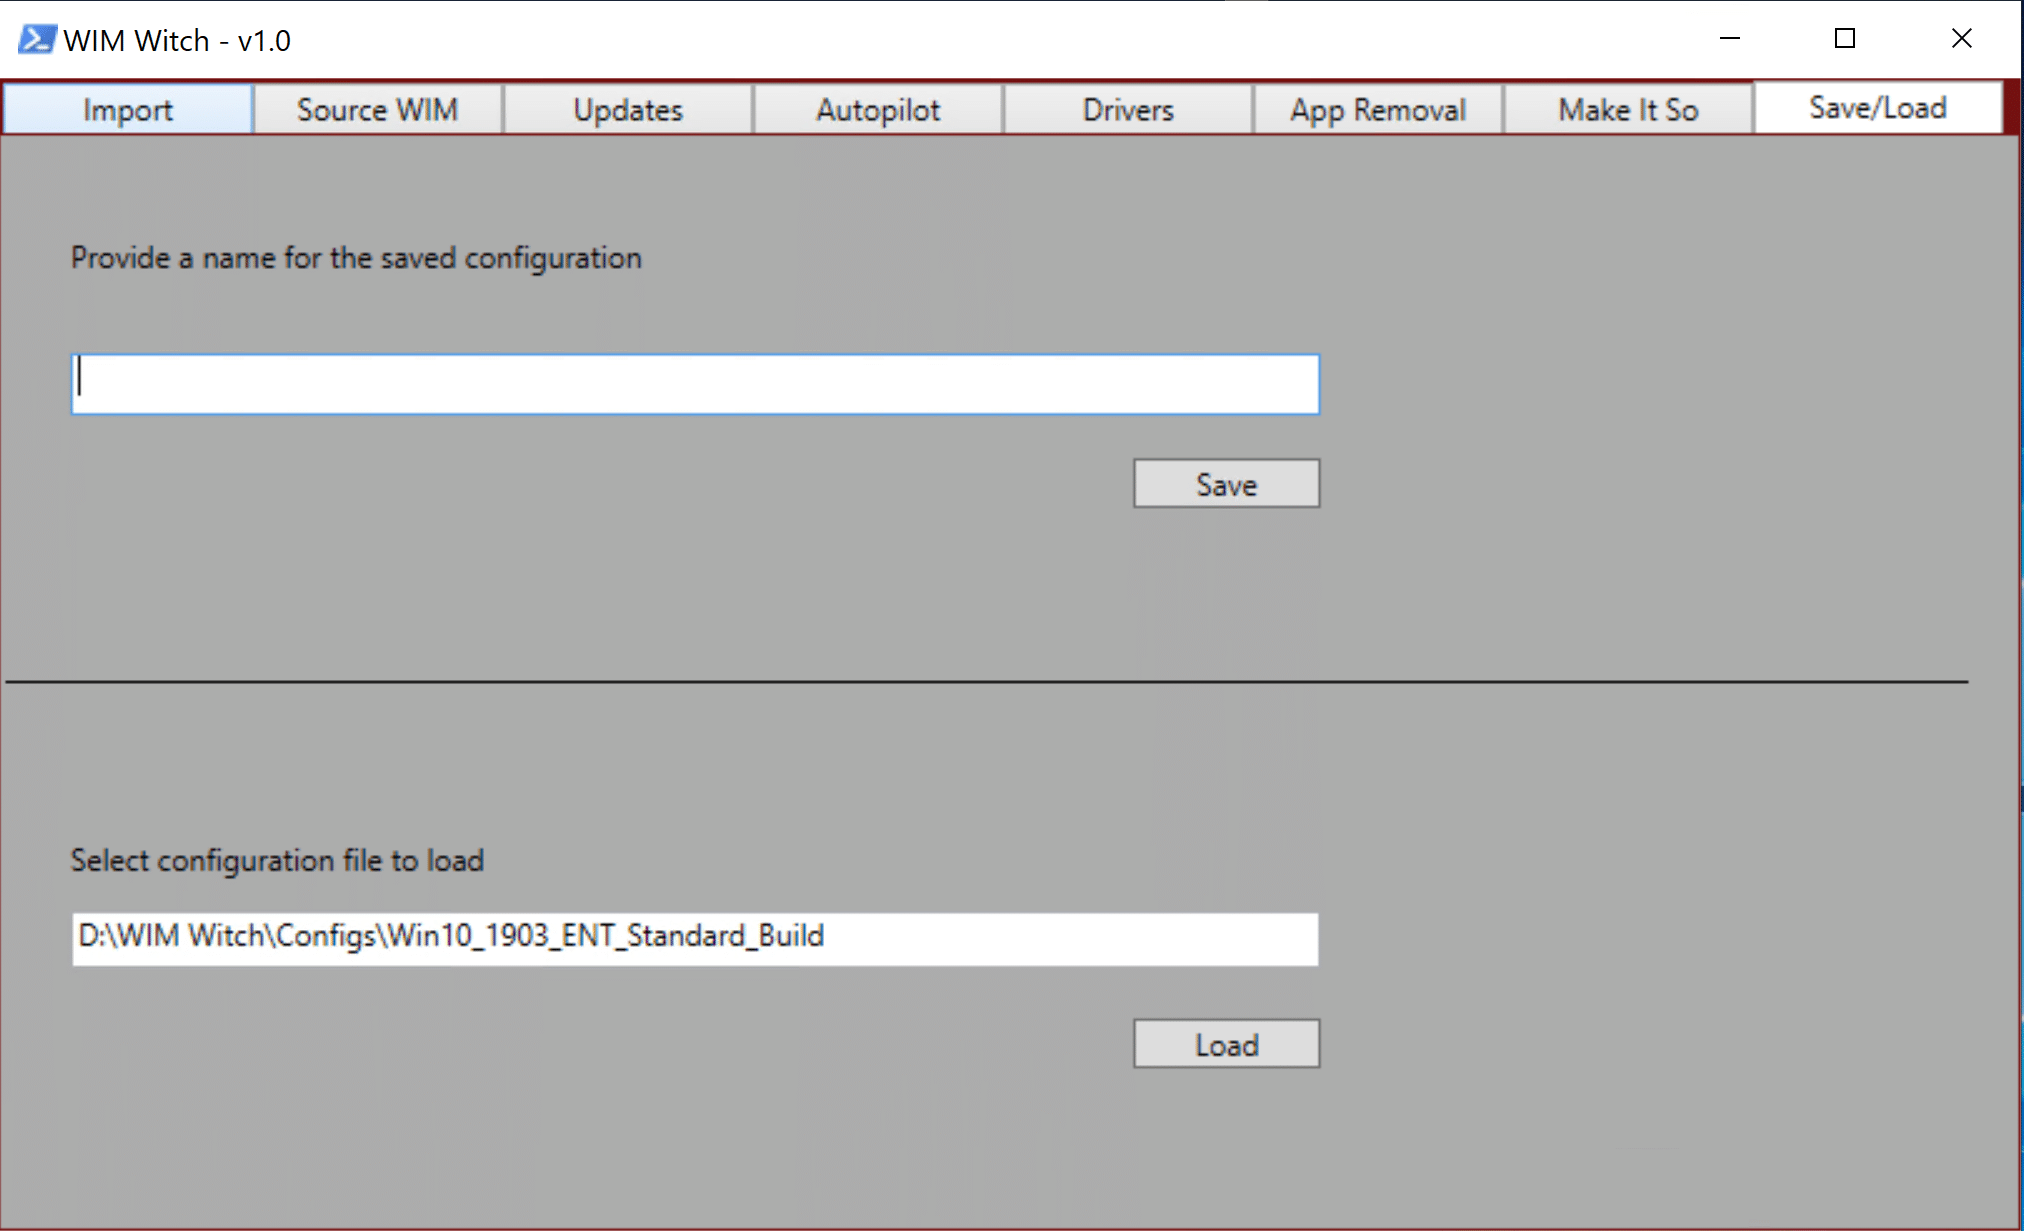
Saving configurations
To save a configuration that can be loaded later, configure the WIM Witch build with the required source WIM and configurations. Do not click “Make It So”. Once complete, select the “Save/Load” tab and enter a name in the “Saved Configuration” field. Then click “Save”.

This will place a file in the “Configs” folder in the WIM Witch installation path.
Loading configurations – GUI
To load a configuration, select the “Save/Load” tab, then click “Load” under Load configurations. This will bring up a window to find the config file to be loaded.
Once selected, WIM Witch will process the config file.

Once the Config file has been loaded successfully, select the “Make It So” tab, then click the “Make It So” button to start building the WIM file.
Loading configurations – Command Line
From the PowerShell terminal, type in the following:
- .\WIMWitch.ps1 -auto yes -autofile [path to and name of config file]
The “-autofile” parameter should be the path and file name of the config file that should be run.
Loading multiple configurations
If the user would like to run a series of config files in a batch job, WIM Witch supports this functionality. Enter the following command:
- .\WIMWitch.ps1 -auto yes -autopath C:\WIMWitch\jobs
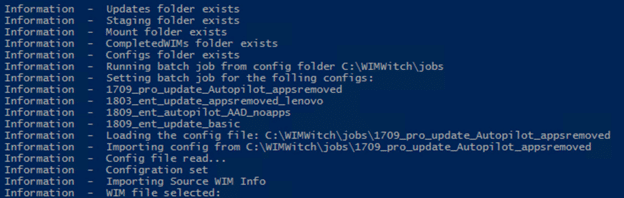
Replace the parameter after “-autopath” to a folder that contains all the config files that should be run. These config files will need to be manually copied to the “job” folder from the “configs” folder.
The PowerShell window will output each file found before starting the first build:
Downloading and Maintaining the software update catalog – GUI
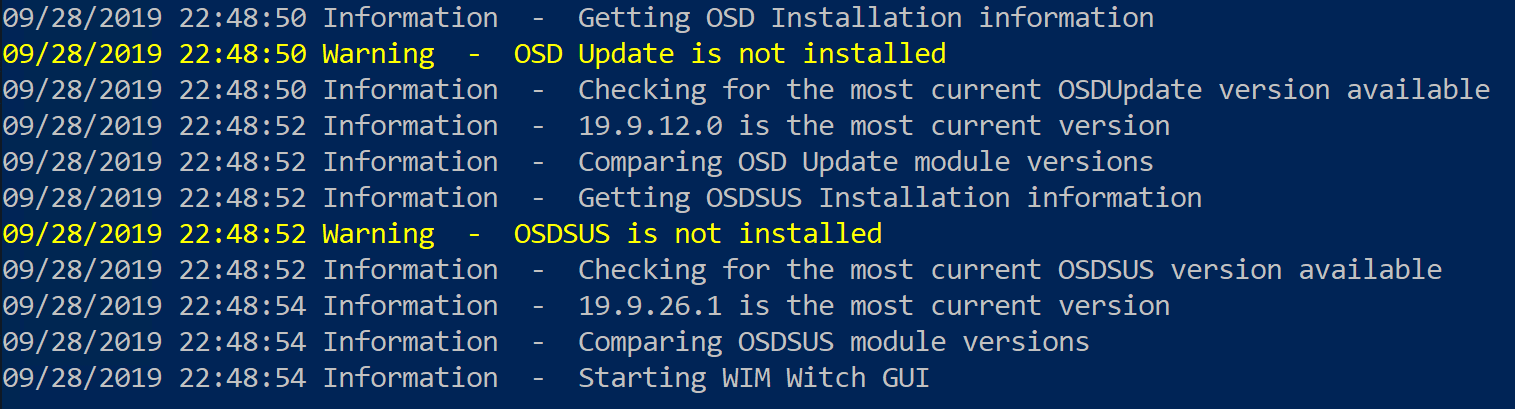
If this is the first time WIM Witch has been run, WIM Witch may detect that OSDUpdate and OSDSUS have not been installed. It will also check to see what the latest version available is.
WIM Witch uses David Segura’s OSDUpdate and OSDSUS modules to handle updates downloading and superseding. These modules will need to be kept up to date to ensure access to new software updates.
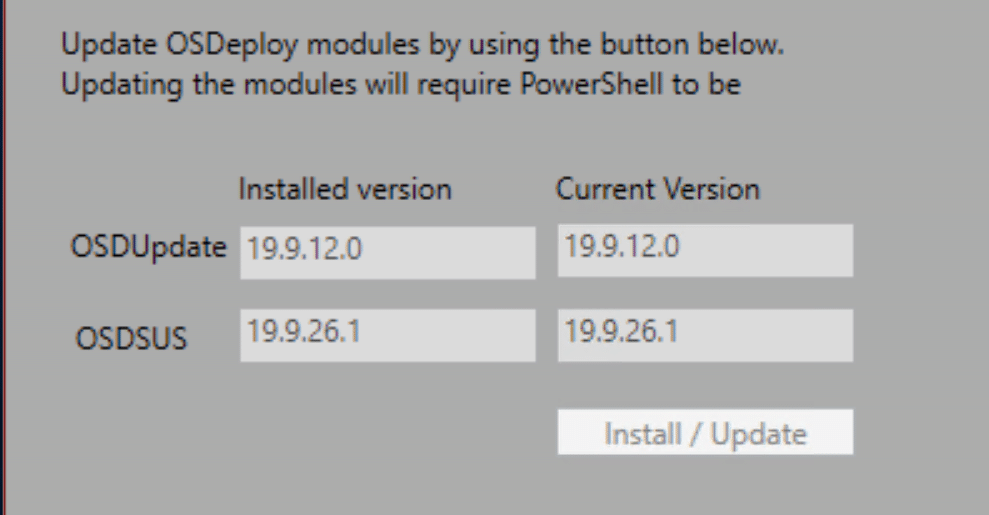
Once WIM Witch’s GUI loads, click on the “Updates” tab. If the modules have not been installed previously, “Not Installed” should be in the “Installed Version” fields.
Click “Install / Update” to install the OSDUpdate and OSDSUS modules from the PowerShell Gallery.
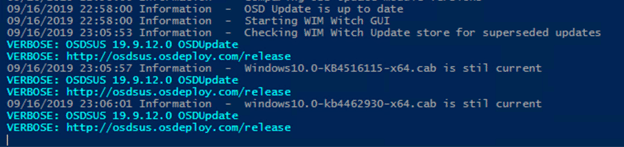
The following should display in the PowerShell window:

The same message will also display in the Updates tab of the GUI. Do as it asks and close it all, then reopen.
When WIM Witch starts, it will see the installed version and list it as current.
To download updates, select the “Updates” tab and select the checkbox “Enable Updates”.
On the right side of the pane, select which version of Windows 10 to download updates for. Once checked, click the “Update” button.
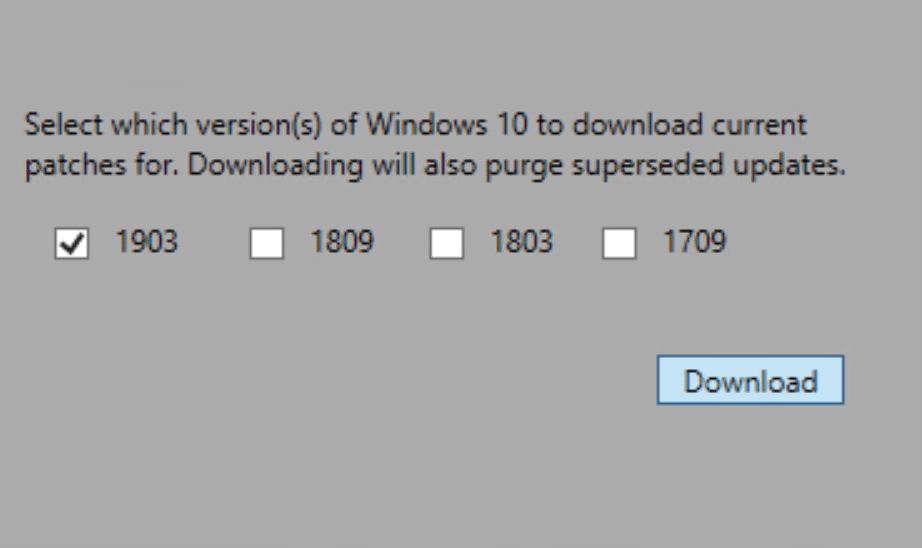
- The Update process will evaluate all downloaded updates to see if they have been superseded. Any update evaluated to be superseded will be deleted from the local store.


*NOTE* This functionality will be modified for simplicity in future versions of WIM Witch
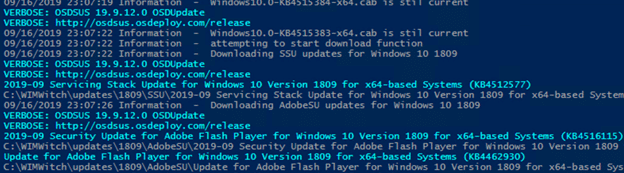
Once the download process has completed, the version of Windows selected will have the most current updates.
It is important to update the source regularly, ideally after any update to OSDUpdate or OSDSUS has occurred because that is indicative of new patches being released.
Downloading and Maintaining the software update catalog – Command Line
The following arguments can be passed to the script from command line in order to maintain the WIM Witch software update catalog.
- Example: .\WIMWitch.ps1 -updates yes -OSDSUS update -Superseded delete -DownUpdates all
“-updates”
Parameter accepted: “yes”
When set, it allows the other parameters to function
“-OSDSUS”
Parameter accepted: “update”
This allows the OSD Update module to be updated if it is detected to be obsolete
“-Superseded”
Parameters accepted:
“audit” – This checks for superseded updates but takes no action against them
“delete” – This checks for superseded updates and deletes them if found
“-DownUpdates”
Parameters accepted: 1709, 1803, 1809, 1903, all (these are the windows version that should be downloaded)


This looks like it was really hard work! Thanks so much it looks like its bound to help so many people. Can this be used to inject the 1909 main feature update into a 1809 install.wim that comes with recovery media? It’s a real issue not being able to update windows to the latest version before running sysprep.
It does not support Feature Updates. Wouldn’t it make more sense to download the latest version of Windows 10 from the VLSC?
Hi
It might be a bug in 1.4.0 version for updates. The downloaded updates seams to be stored in .\wimwitch\updates\Windows10\1909\ but when you “Make It So” it will search in .\wimwitch\updates\1909\.
Can you look that up ?
Sure! I’ll start digging in shortly
This path ( .\wimwitch\updates\1909\.) is where updates would have been downloaded to, prior to me adding support for Windows Server. While I don’t get why it’s looking there if you are on 1.4.0, I would delete or rename the existing WIMWitch.PS1 file and download a fresh one from the PS Gallery (save-script -name WIMWitch -path [path to your WIM Witch folder]) and try it again. Ping me if that doesn’t work.
FYI – Twitter DM’s are a quicker way to get a hold of me. 🙂
Unless I’m missing something, WIMWitch can currently only process one WIM file at a time?
Any plans/possibility on making it do some sort of batch update, where you could do Win10, Server 2019 and Server 2016 one after the other?
Many thanks, Bavo
That functionality already exists with command line. Create separate save files for each image you would like to create. Then copy those save files into a folder of your choosing. Using the command line parameters, select the folder that contains all of the save files. It will process them all.
Loving this utility! I wish it’d been around the past few years! The app removal alone is great.
You’re going to save me so much time. Thank you!
I was going to ask about BOOT.WIM support, but that was addressed in other comments.
I need to inject drivers to BOOT.WIM to deal with the assortment of machines we build.
Going to use this to get our 1909 image ready, and for a change I won’t be spending the whole weekend on it!
You can try and select a boot.wim file. My guess is WIM Witch will accept it. So long as you aren’t apply updates, removing APPX, or other “Windows” stuff, it may apply drivers. Give it a whirl and let me know what happens.
Installed it on my primary SCCM server at D:\WIMWitch. It’s a VM Server 2012 R2. Running it with administrator rights. No matter what I do, I always get
Get-WindowsImage : The system cannot find the path specified.
The org ISO files is placed at D:\WIMWitch\OrgISO.
What am I doing wrong? The same setup works fine on my Windows 10 laptop.
No files in staging or mount or anywhere.
My guess is that this is a limitation on the native version of PowerShell that ships with 2012 R2. That version is 4.0, and WIM Witch needs 5. Win10 ships with 5.0.
Let me know if that helps you out.
Great tool, Any chance that you could add an option to generate an .iso as part of the process?
Not in the near future, no. I am not ruling it out completely, but WIM Witch will need further development before she gets to that point.
Nice tool developed
Why thank you!
Can I report what might be a bug in 1.3.1 with Win 10 1909? I imported a WIM with the .Net binaries. When I created the image I selected Inject .Net 3.5 But during the process the log file said that it couldn’t find the .Net binaries in Wimwitch\Imports\DotNet. I found them instead in Wimwitch\Imports\DotNet\1909. I manually copied them back into the DotNet folder and it works fine.
Absolutely! I’ll check this out ASAP. Thanks for reporting it!
The path WIMWitch\imports\dotnet\1909 is exactly where the .net binaries for 1909 should reside. Are you using a stock or otherwise unmodified ISO? The 1903 vs 1909 mechanism is dependent on more variables than just version number. If you were using something custom, that could mess up the determination algorithm.
I tried to duplicate what you described, but I cannot.
OK thanks for checking. We are using Windows 10 1909 x64 ISO downloaded from the volume licensing service centre. We haven’t made any modifications to it. I’ll check it again.
Thanks for all your work on this, it’s a great tool.
Hi, it’s the second time I try to use the tool but I always have problems with the sccm agent.
It installs right but also after days I have not all the tabs and the actions. Any other have this issue?
This way I cannot use the tool
Thanks
WIM Witch has nothing to do with the ConfigMgr agent, its installation, or its ongoing health. I have not had any other reports of a WIM Witch built image causing problems with the ConfigMgr agent.
What you are experiencing sounds like a Management Point communication issue, quite possibly involving Boundary Groups.
I’d also love to get an Create an ISO button somewhere. Not that it’s hard to create one using ADK, but still… 🙂 Great work
Thank you!
The create an ISO feature has been requested by multiple people, and it is on the board.
Very shiny and elegantly simple. Thanks so much for your contributions to communities like this!
You are welcome. Thank you for trying her out!
is there a version that includes 1909 available yet?
great work by the way
It is available now. I think I added that around v 1.2.0, but don’t remember the specifics. If you are running the latest version (1.2.5), you are good to go.
Thanks!!!
It seems to work fina with custom boot wims. Haven’t had time to do extenisve testing but on my laptop it seems to work with all drivers. On a Dell server not so much but that’s possibly a driver injection issue…
Result: now I’m drooling for an ISO create function – I looked at OSDBuilder, but that does NOT accept/import any custom WIMs. I asked about changing this (so only the ISO build function would need to accept custom WIMs), but I’m not holding my breath.
Regards,
Bavo
You aren’t the first person to ask about ISO creation, and I have added it to the road map. When would that be available? I can’t commit to a time frame as there are more pressing features to make available first. But I hear you!
Good Afternoon,
I cannot for whatever reason get the .wim file to dismount at the end of the process. Am I missing something? Any guidance will be appreciated.
Appreciate the effort behind the tool…
The only thing I have seen cause problems with the dismounting of images is a lack of free hard drive space. Are you able to manually dismount the image?
Good Morning,
Is it possible (or even int he works) that the option be available to select a Driver Source from a URI or even a mapped network drive? The current browse window only shows local resources.
For the URI, that’s not on the roadmap. I will look at changing the folder selection process for the drivers section so we can select network paths.
Thanks for the feedback!
Good Afternoon,
First things first, Awesome program
I am trying to use Wim witch to configure Win10 1909 (x32; ver 10.0.18362.148), but the update downloads are defaulting to x64, and obviously failing once the Add-Windowspackage cmdlet is called. I have the x32-bit image imported, and the correct index selected.
Help! 🙂
Good Afternoon,
First things first, Awesome program
I am trying to use Winwitch to configure Win10 1909 (x32; ver 10.0.18362.148), but the update downloads are defaulting to x64, and obviously failing once the Add-Windowspackage cmdlet is called. I have the x32-bit image imported, and the correct index selected.
Help! 🙂
At this point, WIM Witch only supports x64. Sorry 🙁
Hallo, could WIMwitch be used to just install drivers into (custom) boot images, so boot.wim not install.wim?
Thanks.
You could try it. Boot.wim isn’t currently supported, but I am not doing any version checks (install vs boot vs re) so it may just work. Just be careful to not select any of the other options, such as Autopilot or APPX.
Good luck. Let me know how it goes!
Is it possible to exclude an update?
Not directly from WIM Witch, no. You could find the update in the Updates folder and delete it, which would prevent it from being installed. If you do go down that path, the patch will likely be downloaded again when checking for new updates.
This is great, thank you! It seems version 1.1.3 has a misplaced Param() statement on line 45 which prevents CLI arguments from being parsed.
Thanks for the heads up! I’ll dig into this ASAP.
Scott, if looks like you are correct. I’ll do a wee bit of testing and get this uploaded. Thanks for catching this.
This is a very nice tool. Awesome PowerShell scripting – thank you for all the hard work and making this available to others! Will you be updating for 1909?
I will, probably right around the time 1909 goes RTM. I’ve done some initial testing and don’t see any major technical hurdles.
Hi Donna,
I do a relatively small amount of deployments using SCCM, and I use a vanilla image from the latest Windows build our organisation allows to use. I use modern bios management and modern driver management during the deployment, and install .Net 3.5 as an application.
Doing it this way is quick, easy and it is normally completely error-free to go from one Win 10 build to another.
Is it a lot faster to deploy a customized image, or what other reasons are there to use a custom image, vs a more dynamic task sequence?
Thanks,
Kenneth
Offline servicing allows you to deploy an updated image, so updating the OS during or after the imaging process isn’t required. If you are removing the APPX packages or injecting .Net 3.5 during imaging, servicing negates those steps. So it does speed up imaging time.
Also, the customized WIM is totally compatible with Modern Driver/BIOS Management, so you can continue to use the process you know and love.
This looks fantastic, thank you so much for sharing! Can’t wait to try it out!
Thank you. Hopefully you like it 🙂
Thank you Donna.
Previously I just copied the .cab files to the WimWitch\imports\DotNet directory which didn’t work. But creating a 1903 directory and moving them there did work.
The OS updates are now working as well I didn’t hit the download button before the wim capture. Once I downloaded them they injected into the .wim
Great tool so far. Would there be any chance of support for .esd based ISOs? Would help when the only ISO you can grab is the one directly from MS since techbench is still not back up.
It’s not on the road map yet, but I’ll put it on the board.
Fantastic tool and this item really caught my eye! Thank you!
You are welcome! Thanks for trying it out.
I have been trying to use the utility to add .Net 3.5 Binaries to Windows 10 1903, but the error I keep seeing is Error – Couldn’t copy the . Net binaries. The ISO I am pointing at is the original 1903 iso. Is there a different iso I should point at?
Also for the Enable updates to install I assume it needs to be run from the same OS Build to make the updates available.
Thanks for all your work on this Donna
It’s hard to see what is going on with the copy function, which resides on line 1971. My guess is that the utility is hitting a read permission on the ISO. Not sure why. Using the original ISO is perfect.
As a work around, you could copy the .net files from the ISO manually [d:\sources\sxs\*netfx3*] to your WIM Witch folder structure. If it doesn’t already exist, make a folder called “1903” under [WIM Witch path]\imports\DotNet. Copy those files from the iso to this path. That should get you moving forward.
For the updates to apply, the Enable Updates check box needs to be ticked, and updates for that particular version already downloaded. So if you are planning on applying updates to 1903, you’ll want to download the 1903 updates first.
Thanks for using the tool, and for reaching out. Good luck!
Is there anyways to use this utility to inject my own Windows update files (offline) instead of using OSDUpdate or OSDSUS?
The only way to add updates with WIM Witch today is with the OSDUpdate/OSDSUS modules. You could use WIM Witch to customize the WIM without updates, then apply them yourself outside of the tool.
This is great but after it dismounts the image, lets say for 1809 fully updated from the base wim, the wim is 5.7GB cause it doesnt look like its exporting the image and cleaning up un needed files. I had to modify the ps1 file to include this step, which saves roughly 1GB in file size. Other than that step the script is great!
What command did you add? Did you inject .Net 3.5 into your WIM?
Yes I injected .net and October Updates. For the command im using.
Export-WindowsImage -SourceImagePath $PSScriptRoot\CompletedWIMs\$($WPFMISWimNameTextBox.Text) -SourceIndex 1 -DestinationImagePath $PSScriptRoot\CompletedWIMs\Exported_WIM.wim -DestinationName “Exported Wim” -ScratchDirectory $PSScriptRoot\Staging
I figured you were doing something along those lines 🙂 I’ll be adding in this functionality in the next update. Hopefully within the next week.
I never post, but this is worth a thank you.
Very handy tool, keep up the great work. well done 🙂
Thank you! I am glad you are finding it useful. I intend to keep the work up. It has been so rewarding that people are using WIM Witch and enjoying it. Worth it!
Thanks alot for this!
Working like a charm!
Only missing the language packs and we are golden!
Keep up the Good work
Language packs are on the road map for the next release. Thanks for the feedback
I found it in the Staging folder. Thank you. Prepping to deploy it now.
Fantastic! Good luck
Should the redone WIM be in the CompletedWIMs folder? Not sure but think my powershell hung after a while after clicking Make it So. I did see the Job’s Done in the powershell window.
If the job completed successfully, it will be in whatever path was specified for the finished wim to reside. The default is in CompletedWIMs. If it isn’t there, it could be hiding in Staging, but that path does get cleaned out when starting WIM Witch, so it may be gone.
Great Job, it should be usefull to add the languages too–maybe in next version!!
Thanks
Thank you! And I agree on the Language Packs. It is on the road map for the next version.
This tool looks great… I’ve previously been doing this manually (via a batch file i wrote a while back), had been considering switching to OSDBuilder, but this looks even better…
Once Language Packs are added, i’ll definitely be using it. Looking forward to it!
Nice utility Donna. I know it may be outside the scope of the utility as it has “WIM” in the title, however, being able to generate an ISO at the end would be a welcome addition. Either way, the utility was fairly straightforward as far as ‘usability’ goes as most things were labeled and defined quite well.
Thank you for your feedback! It is appreciated. Building an ISO isn’t something I had put much thought into, but if there is enough demand, I could work on it. If you needed that functionality now, OSDBuilder can do that for you today.
I would also like the ability to generate an ISO (very much), thanks!
Perhaps at some point that will be possible, but that function is not currently on the roadmap. If there is enough demand, perhaps.
Thank you for reaching out, though. I will take your feedback under consideration.
Tried this on 2 different servers, and always get the same error, changed permissions on folder, moved ISO, etc error does not change
Get-WindowsImage : The system cannot find the path specified.
At F:\SourceFiles\WimWitch\WIMWitch.ps1:1862 char:19
+ … indowsver = Get-WindowsImage -ImagePath $iso\sources\install.wim -Ind …
+ ~~~~~~~~~~~~~~~~~~~~~~~~~~~~~~~~~~~~~~~~~~~~~~~~~~~~~~~~~
+ CategoryInfo : NotSpecified: (:) [Get-WindowsImage], COMException
+ FullyQualifiedErrorId : Microsoft.Dism.Commands.GetWindowsImageCommand
Off hand, I can’t tell what is going on. If you can reproduce the error, can you open the log in [wim witch path]\logging\wimwitch.log and reply with the few steps that happen before the error? This should show me what you are doing.
I’m having the same problem. Permissions on the iso are “full control” for all users and groups. Here’s my log:
10/25/2019 09:43:34 Information – Starting WIM Witch GUI
10/25/2019 09:44:03 Information – C:\Users\EJ\Desktop\SW_DVD9_Win_Pro_10_1903_64BIT_English_Pro_Ent_EDU_N_MLF_X22-02890.ISO selected as the ISO to import from
10/25/2019 09:44:10 Information – Checking to see if the destination WIM file exists…
10/25/2019 09:44:10 Information – Appending new file name with an extension
10/25/2019 09:44:10 Information – Name appears to be good. Continuing…
10/25/2019 09:44:10 Information – Mounting ISO…
10/25/2019 09:44:11 Information – Copying WIM file to the staging folder…
10/25/2019 09:44:11 Information – Setting file attribute of install.wim to Normal
10/25/2019 09:44:11 Information – Renaming install.wim to 1.wim
10/25/2019 09:44:11 Error – Couldn’t rename the copied file. Most likely a weird permissions issues.
It looks like isn’t an issue with the ISO as WIM Witch was able to copy out the install.wim from the ISO. It also looks like it was able to change the attributes of the copied install.wim, so that’s good. Did you run WIM Witch as Administrator? You could try renaming the install.wim that is residing in the “staging” folder and see if Windows squawks at you. Barring all of that, you can copy over the install.wim to the imported WIM folder manually. That should be enough to get you moving forward.
I had the same problem when running on a win10 1709. I tried today with the same ISO on a Win10 1903 and there was no issues.
Another thing you can do if you can’t get import from ISO to work, you can copy out the install.wim manually, and then reference in the Source WIM tab. Importing from ISO is an optional step.
Hi Donna,
This is an amazing tool and I would love to start using it. I am having an issue where “OSDSUS appears to be out of date” based on what the log says. I may be looking in the wrong place within your script but what is the correct syntax to look for update / install update for OSDSUS?
In the GUI, you should be able to click the Install/Update button on the Updates tab to update the OSDeploy modules. From commandline, you should be able to use “-OSDSUS Update” as part of the string. If either of those don’t work, let me know.
Have it working now on a Windows 10 VM, does not seem to like running on the Server VM’s i have though
I only tested it on Win10 boxes, and I’ll give it a whirl on some Server test boxes to check compatibility. Thanks for the heads up
This is slick! Thank you for all your hard work and sharing this with the community.
Thank you! It has been a labor of love, and it is so rewarding to get feedback like this 🙂