

Over the past number of months I have had several engagements as a consultant to implement Microsoft BitLocker Administration and Monitoring (MBAM). Many of you might pose the question of why? is MBAM not a legacy product? can you not store recovery keys in Active Directory or Azure Active Directory instead?.
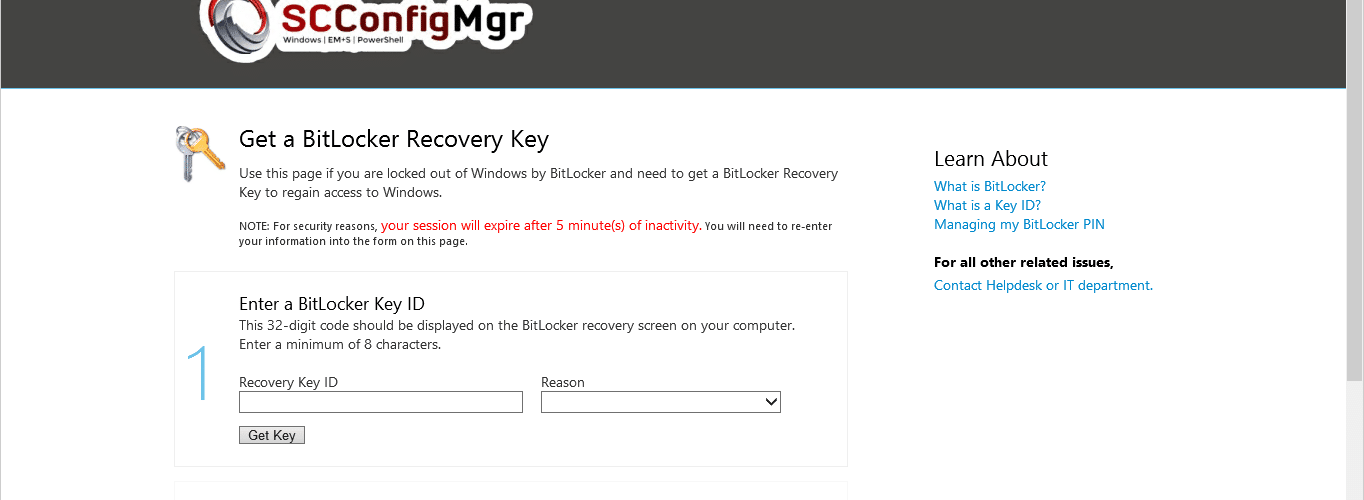
For many companies simply storing the key in a repository that requires their IT helpdesk staff to have elevated Active Directory or Azure Active Directory rights is not something they want to do, so providing both self service and a dedicated helpdesk portal is the best option for them.
Aside from the portal issue the other main benefit for deploying MBAM in your environment is of course the key rollover process that occurs post recovery. Microsoft are no doubt looking to move people to a cloud delivered solution but until the shortcomings that are there are addressed, MBAM will continue to be deployed by organisations.
In this series of posts I am going to run through the process of setting up MBAM, deploying the agent and group policies out to clients, customisation of the self service portal and troubleshooting. These items might have been covered in other sources throughout the years since MBAM was released, however I wanted to put everything into a comprehensive guide for our readers.
Part 1: Installation of MBAM components
Part 2: Validating IIS sites and customisation
Part 3: Configuration of GPO policies and client agent deployment
Part 4: Validation of key storage and recovery tests
Downloading the media
MBAM is part of the Microsoft Desktop Optimization Pack which is included as part of your Windows Enterprise volume licensing. The latest MDOP download available on the Microsoft Volume Licensing Service Center is MDOP 2015.
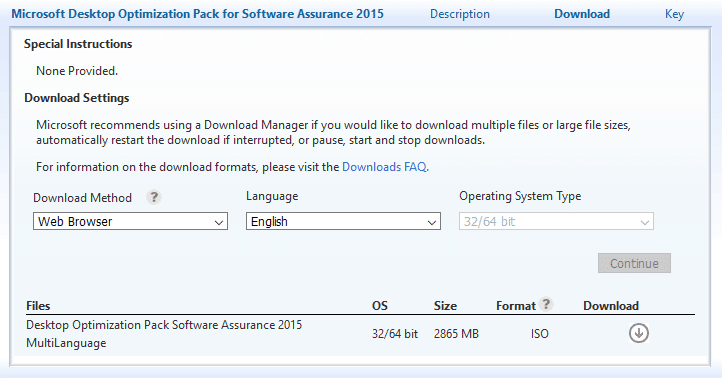
In order to support the newer AES XTS ciphers in Windows 10 and SQL 2017 though you will also need to download the July 2018 service release (https://support.microsoft.com/en-us/help/4340040/july-2018-servicing-release-for-microsoft-desktop-optimization-pack). You will also need to download the ASP.NET MVC 4 as a pre-requisite, this can be downloaded from https://www.microsoft.com/en-us/download/details.aspx?id=30683.
Supported Configuration
At the time of writing MBAM is currently supported on server operating systems up to Windows Server 2016 and the back-end database on SQL Server 2017.
Microsoft provides a full compatibility list on the following URL – https://docs.microsoft.com/en-us/microsoft-desktop-optimization-pack/mbam-v25/mbam-25-supported-configurations
Active Directory Preparation
MBAM requires several service accounts and security groups to be set up prior to installation. For this post and example, I am going to create the following user accounts and security groups (you can obviously use different naming to suit your environment however);
| Name | User Accounts / Security Group | Description |
| MBAM-RO-SVC | User Account | Read only service account |
| MBAM-RW-SVC | User Account | Read/write service account |
| MBAM-IISAP-SVC | User Account | IIS application pool service account |
| MBAM Helpdesk Users | Security Group | Members of this group are granted read-only access to the helpdesk portal |
| MBAM Advanced Helpdesk Users | Security Group | Members of this group are provided with helpdesk access without the need to specify user and computer details for recovery |
| MBAM Report Users | Security Group | Members of this group have access to the MBAM SSRS reports |
| MBAM Database Read-Only | Security Group | Security Group for adding Read-Only DB members |
| MBAM Database Read-Write | Security Group | Security Group for adding Read-Write DB members |
Further details on the security group and user requirements are available here – https://docs.microsoft.com/en-us/microsoft-desktop-optimization-pack/mbam-v25/planning-for-mbam-25-groups-and-accounts
Note: The MBAM-RO-SVC account needs “Logon as a batch job” permissions on the SQL Server machine. Add this account to the IIS_IUSRS group. The MBAM-IISAP-SVC needs Logon as a batch job and Impersonate a client after authentication permissions on the server running the web service components.
Service Principal Name
In order to avoid Kerberos issues, the application pool account (MBAM-IISAP-SVC) needs to be configured with a service principal name (SPN). If you wish to using an alternative host name for access, such as MBAM.SCConfigMgrLab.local you should ensure that you add the virtual hostname also during this process. Below is an example of registering the both the FQDN and hostname SPN’s;
setspn.exe -S http/MBAM.yourdomain.suffix YourDomain\MBAM-IISAP-SVC
setspn.exe -S http/MBAM YourDomain\MBAM-IISAP-SVC
SQL Server Preparation
MBAM stores its data in SQL, so obviously a SQL server instance should be available for this purpose. All SQL versions from 2008 R2 up to SQL 2017 (RTM) are supported for the database role, however SQL must be installed using the SQL_Latin1_General_CP1_CI_AS collation. SQL reporting services is also required for the reporting element of the installation, remember if you are using SQL 2017 for instance the SSRS installation is a separate install.
Note: Historically I have seen organisations using their systems center SQL instance for storing the database, this was due to past inaccuracies about the licensing rights for this, however Microsoft clarified the use rights in July 2018 in the following statement;
Approved use rights for the SQL capabilities with System Center Configuration Manager include:
Site database role
Windows Server Update Services (WSUS) for software update point role
SQL Server Reporting Services (SSRS) for reporting point role
Data warehouse service point role
Database replicas for management point roles
SQL Server Always On
IIS Preparation
When you run the MBAM server installation components the pre-requisite check will require you to have IIS and .Net Framework installed prior to installation. If you run the below PowerShell command, these components will be installed;
Add-WindowsFeature -Name "Web-Server", "Web-WebServer", "Web-Common-Http", "Web-Default-Doc", "Web-Dir-Browsing", "Web-Http-Errors", "Web-Static-Content", "Web-Health", "Web-Http-Logging", "Web-Performance", "Web-Stat-Compression", "Web-Security", "Web-Filtering", "Web-Windows-Auth", "Web-App-Dev", "Web-Net-Ext", "Web-Net-Ext45", "Web-Asp-Net", "Web-Asp-Net45", "Web-ISAPI-Ext", "Web-ISAPI-Filter", "Web-Mgmt-Tools", "Web-Mgmt-Console", "NET-Framework-Features", "NET-Framework-Core", "NET-Non-HTTP-Activ", "NET-Framework-45-Features", "NET-Framework-45-Core", "NET-Framework-45-ASPNET", "NET-WCF-Services45", "NET-WCF-HTTP-Activation45", "NET-WCF-TCP-Activation45", "NET-WCF-TCP-PortSharing45", "RDC", "WAS-Process-Model", "WAS-NET-Environment", "WAS-Config-APIs"
The ASP.NET MVC should then be installed prior to proceeding with the installation of the MBAM components.
SSL Certificate (Optional)
Should you wish to secure communications to your MBAM front end web servers, you can of course configure SSL assuming you have your PKI prepared. To create a template for your MBAM server(s) simple follow the below;
- Open the Certificate Authority console
- Right click on Certificate Templates and click on Manage;

- Right click on the Computer template and click on Duplicate Template;

- Give your template a name;

- Define your supported Operating Systems;

- In the Subject Name tab select the option “Supply in the request”

- On the Security tab, add your MBAM server or a security group containing your MBAM servers;

With the template created you can then request the certificate on your front end web server running IIS and apply accordingly.
Installation
Having downloaded the MDOP media, browse into the MBAM\MBAM 2.5 SP1\Installers\x64 directory and launch the MbamServerSetup.exe file on your database server.
- You should now have the following screen;

- Click on Next and then accept the EULA to continue;

- Select your preferred option on the Customer Experience page and click Next
- Click on the Install button;

- The MBAM installation process has now finished;

Servicing Release Install
Before we go ahead and configure MBAM it is important to install the latest servicing release;
- Having downloaded this from the before mentioned link, simply run the MBAM2.5_X64_Server_KB4340040.EXE;

- Click on Next and accept the EULA;

- Click Install to start the update process;

- Click on Finish to launch the Configuration Wizard

- Repeat this process on the Web Application server
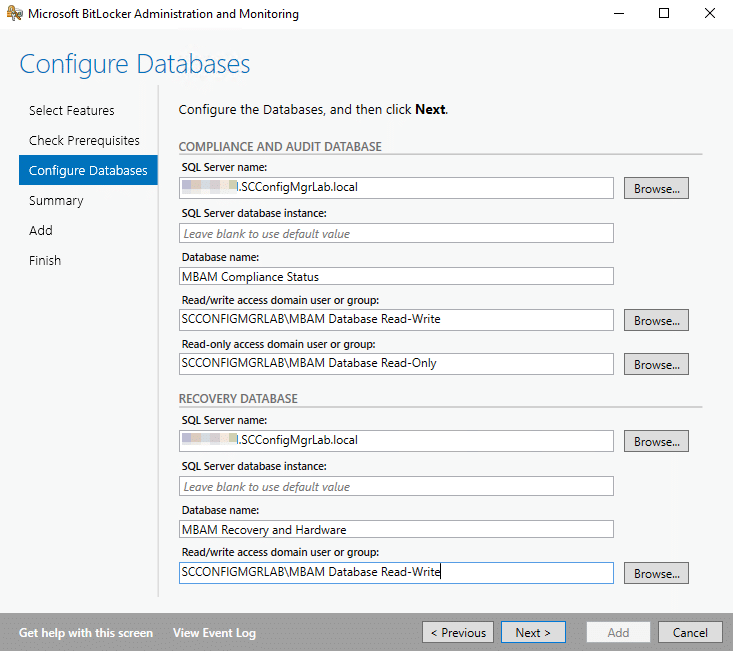
SQL Server Configuration – Databases
- Launch the MBAM Server Configuration on the SQL database server;

- Select both database options;

- If all pre-requisites have been installed you will see the below, otherwise go back and complete the outstanding items;

- Enter the required server names and security groups;
- Exporting the PowerShell setup file is a good idea as this will save you time should you need to reinstall MBAM or if an updated version is made available (as these typically require you to uninstall the previous version first);

- The databases have now been installed;

- Opening the SQL Management Studio console you should now see the following DB’s;

Installing Reports
MBAM reports as previously mentioned use SQL Server Reporting Services and the process of adding the reports is a straight forward process;
- Launch the MBAM Server Configuration again on the SQL database server
- Select Reports from the “Select features to add” screen;

- Enter the required SQL server address and credentials;

- Export the PowerShell script for backup purposes
- Once finished the installation you should receive confirmation of success;

Installing the IIS application components
- Launch the MBAM Server Configuration again on the IIS application server
- Select all of the Web Application options from the “Select features to add” screen;

- Enter the required IIS details and Web Application service account details (in this example I am setting up the IIS applications without SSL, however if you are using SSL you will need to select the security certificate to be used);

- Enter the SQL server details for access to both of the MBAM databases;

- Enter the Reporting group name along with the Reporting Services URL, Company Name (to be displayed on the self-service portal) and you can display terms and conditions of use via importing a text file (in this example I am opting not to);

- Export the PowerShell file
- Once installed you will receive confirmation;

NEXT STEP
In the next part of the series we will look at customisation of the self service portal and validating the IIS components are working.


Hi Maurice,
First of all, Great write-up. It’s really get into details of each sections.
Second, I wanted to know if there is any reason for installing MBAM setup on database server along with MBAM Database servers?
It’s nice to keep it all in one place.
Also keep in mind that the MBAM and specifically bitlocker services are being moved into the ConfigMgr toolset.
Any reason to not have one server with all of the components installed on it? Due to resource limitation in my environment.
Hi Jacob,
The reason that the components (web services and SQL) are separated is usually due to licensing. If you have a SQL server instance which is fully licensed already on your network, then housing another SQL instance on the MBAM app server for the purposes of keeping everything on the one box will cost you another copy of SQL. That’s really the only consideration.
Maurice