

The following post is all about a complete process automation of gathering and upload of a device Autopilot information to the Windows Autopilot service with an Azure Automation Runbook.
Table of content for easy navigation
- The Problem
- Architecture
- Autopilot Graph API
- How to do unattended authentication with the Intune API?
- Setup the Azure Automation environment
- Sample output of the Runbook
- Important observations during testing
- Further information
The Problem
Many organizations are still using Windows 7 and are on it’s way to Windows 10. Windows 10 is the new “baseline” in the Modern Management story. It provides the capability to join Azure AD and the usage of a Windows as a Service model.
How do we get to the new baseline?
If we purchase a new device, the OEM vendor takes care of installing Windows 10 with a signature edition or provisioning ready installation including all necessary drivers. If we buy new hardware the information for Autopilot can be synced into our tenant from the OEM vendor (Lenovo is already capable of doing that and others will follow). We will get the device information in Intune and we can start to assign an Autopilot Deployment Profile and start to enroll the devices.
What if we have a bunch of Windows 7 devices in the environment?
A way to handle this is that we are playing the role of the OEM vendor and do the install of a Windows 10 signature edition on the existing Windows 7 devices, gathering Autopilot information, and let Windows 10 start in the Out of Box Experience (OOBE) again for user enrollment. Depending what is available we can use ConfigMgr or MDT for this. My following example uses MDT to demonstrate this.
Now imagine a situation where a rollout team is preparing a lot of machines. We would end up in a lot of .csv files on different devices. To make this a little easier for IT to import the hardware information of new devices into the Autopilot service, we build up the following logic to automate the whole process.
Architecture
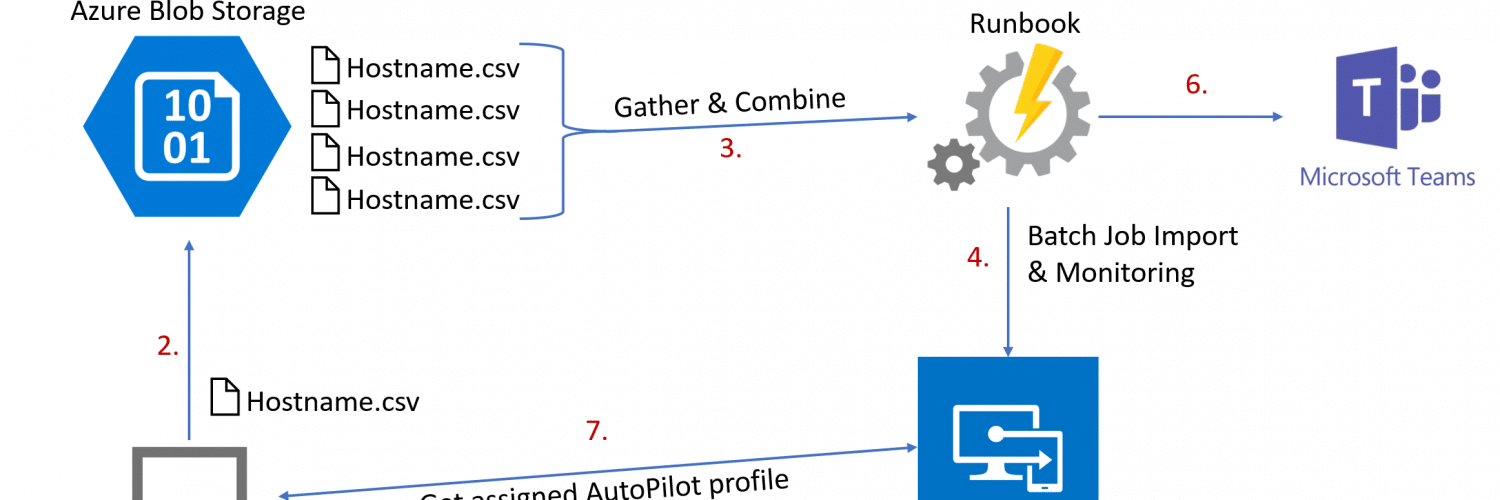
First, I will explain the architecture and how it works and then I’m going to describe the way to implement it (this is a fairly long post with many steps to follow). The overall architecture is based on an Azure Automation Runbook and looks like this:
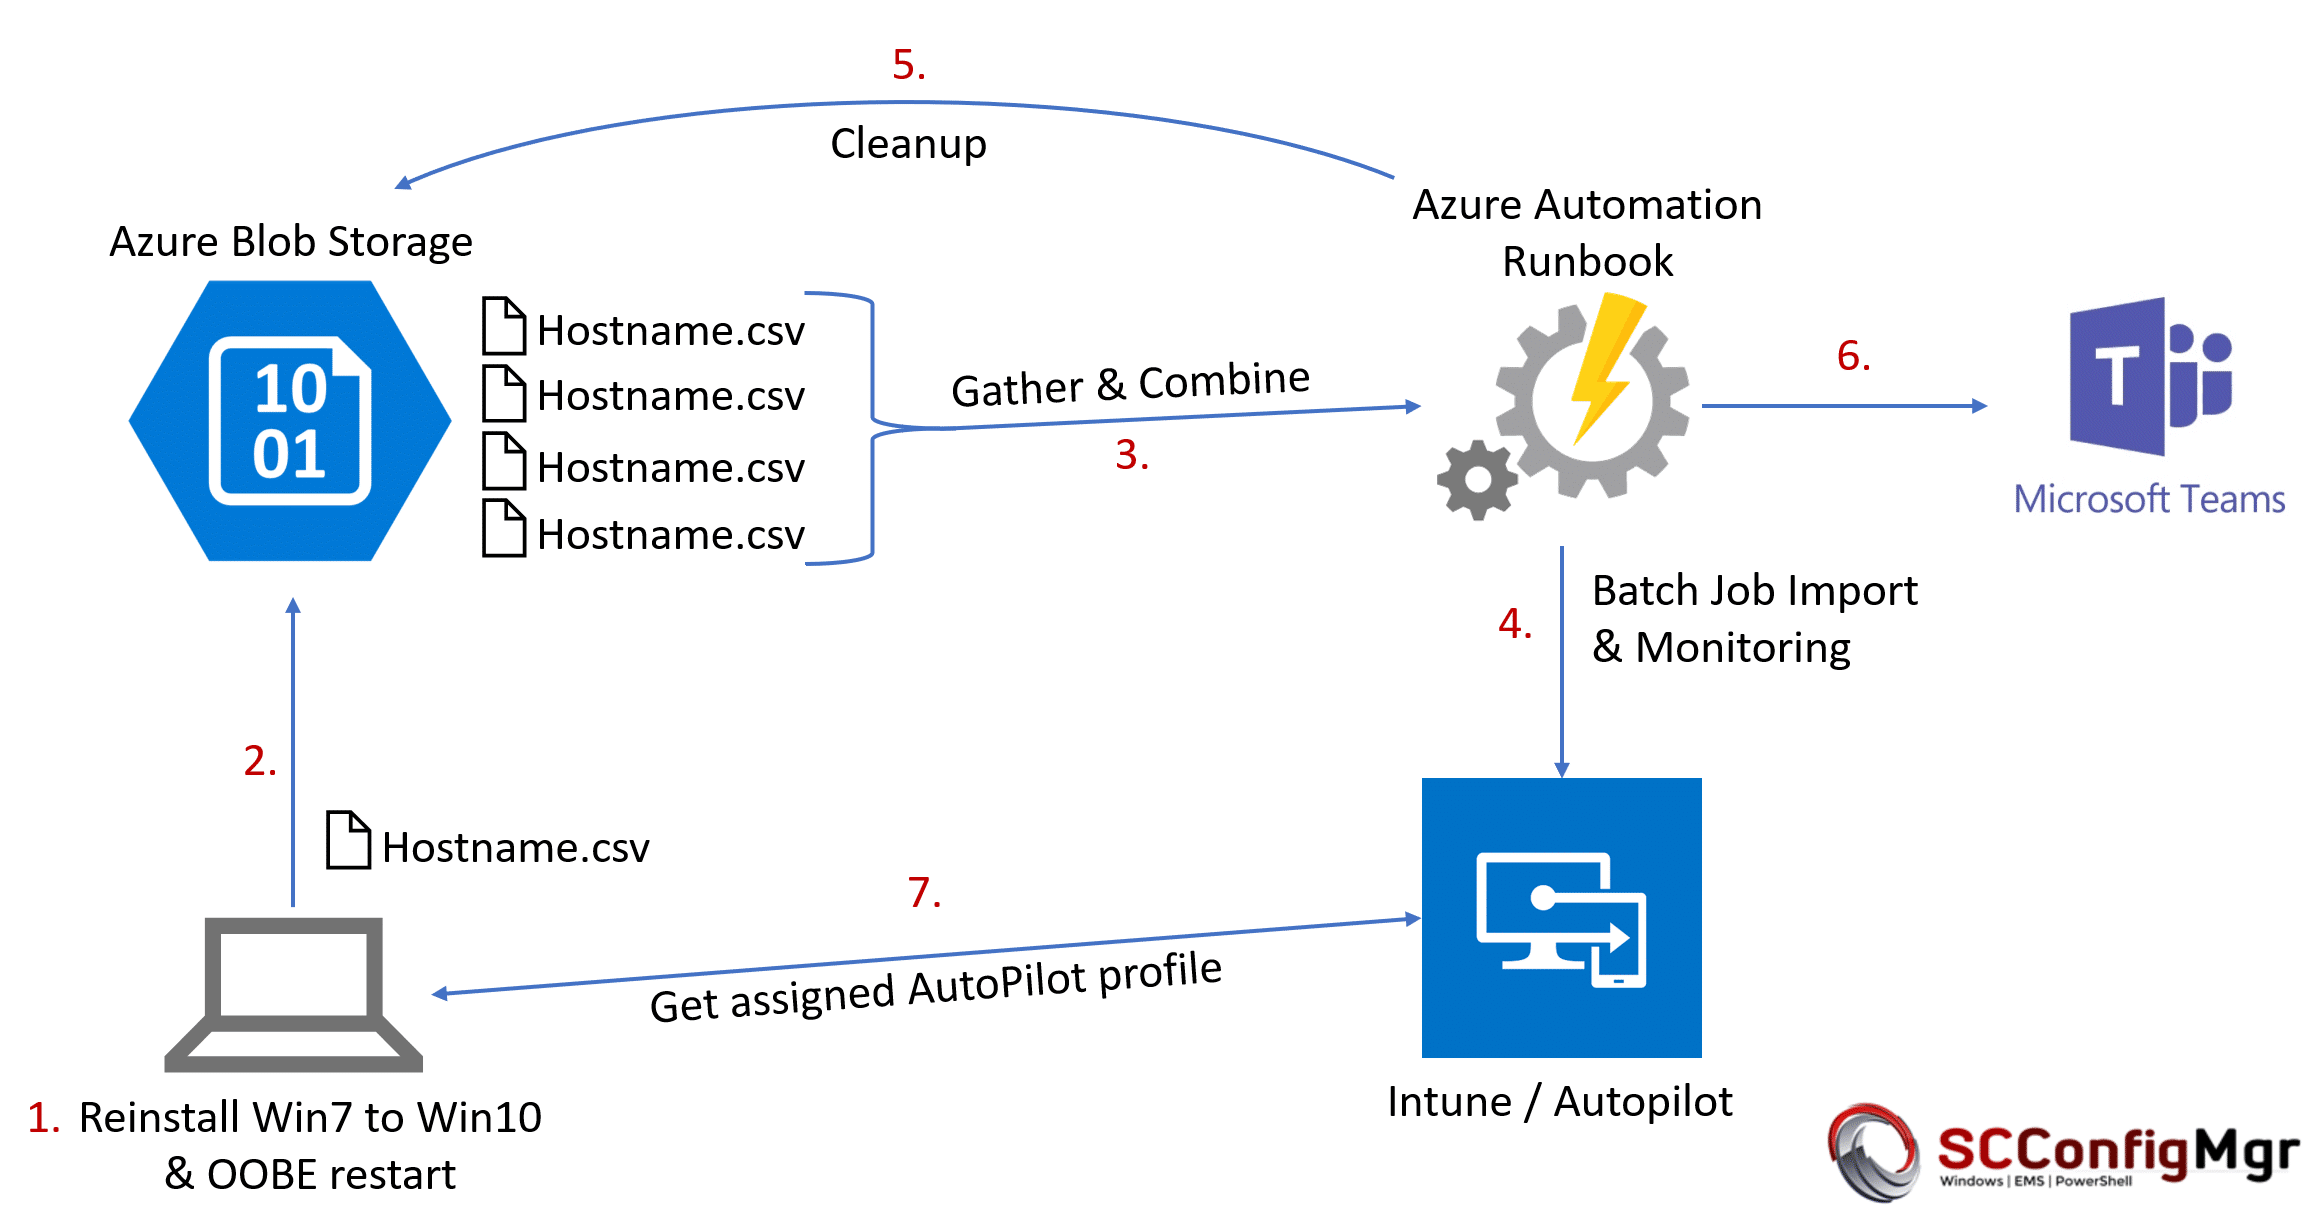
The procedure is as follows:
- Gather hardware information via PowerShell Script Get-WindowsAutoPilotInfo during wipe and reload scenario
- Upload .csv file via AzCopy and SAS signature to an Azure Blob Storage
- Gather .csv files from Azure Blob Storage and combine them into a single .csv file with the help of a scheduled Azure Runbook
- Upload combined .csv file information to Windows Autopilot service via PowerShell Script WindowsAutoPilotIntune running in an Azure Automation Runbook
- Cleanup Azure Blob Storage (delete all .csv files of successfully imported devices and delete all .csv files of already imported devices)
- Generate import notification and summary and post it to a Microsoft Teams channel
- Autopilot information is available for the OOBE user enrollment scenario with Autopilot. The Autopilot profile gets automatically assigned by a dynamic AzureAD device group membership.
- Device can be delivered to the end user like it where shipped by the OEM vendor
I’ve chosen the copy via AzCopy of individual .csv files to the Azure Blob Storage approach as we can then limit the access quite well via shared access signature and we can easily limit permission to write blob objects only. No need to provide credentials or Blob Storage keys on the client side. Sure, we could build up a more advanced HTTP endpoint to gather device information, but this approach is quick and simple. I’m pretty sure that the complete solution of this automation task is something which we do not need in future when devices are Windows 10 migrated and we then buy Autopilot ready hardware only.
Autopilot Graph API
The Autopilot Graph API is an API with focus on batch processing. This means we import new device information into a kind of staging area and the Windows Autopilot service will pick up the new device information and starts importing it. This process varies in the amount of time it takes and we have to check the status of all devices to get the import result. As soon as the devices are processed we can clean up the staging area and the import is done. Normally we would do this by wrapping the Graph API calls (REST) into some PowerShell functions and build the logic for the described process. Luckily Microsoft released a new PowerShell Module WindowsAutoPilotIntune (thx to @mniehaus) based on the Graph API to import new AutoPilot information into Intune.
I use an unattended authentication technique to utilize the PowerShell Module WindowsAutoPilotIntune to import the device information into Autopilot service in the following Runbook. Additionally, the Runbook is built to protect concurrent execution (thx to Tao Yang, I used his implementation for it) to ensure a sequential processing and to keep track of current running imports. If we would design this as a concurrent solution it would get much harder in terms of monitoring and reporting in the end. In addition, there is a max import of 175 devices into the staging area of the API which we are taking care of by limiting the Runbook import to 175 devices during one run.
How to do unattended authentication with the Intune API?
The problem with the Intune API and Microsoft Graph is, that we can’t authenticate as an application as this is not supported at the time of writing. See section here Intune Device Management permissions > Application permissions: None.
https://developer.microsoft.com/en-us/graph/docs/concepts/permissions_reference#intune-device-management-permissions.
We need to authenticate as an user (service account). This requires additional credentials and a secure storage of them to automate. Microsoft has a good guide how to set up an Azure application to support this scenario: How to use Azure AD to access the Intune APIs in Microsoft Graph. One aspect is that the Microsoft How-To guide will end up in a scenario which still prompts for credentials with a input form. This is because of the usage of:
AuthenticationContext.AcquireTokenAsync
For Azure Automation we need to change this behavior a bit to support credentials within our code:
AuthenticationContextIntegratedAuthExtensions.AcquireTokenAsync
We can use the How-To guide or the official GitHub Intune sample scripts which have the following lines of code:
$authContext = New-Object "Microsoft.IdentityModel.Clients.ActiveDirectory.AuthenticationContext" -ArgumentList $authority
$platformParameters = New-Object "Microsoft.IdentityModel.Clients.ActiveDirectory.PlatformParameters" -ArgumentList "Auto"
$userId = New-Object "Microsoft.IdentityModel.Clients.ActiveDirectory.UserIdentifier" -ArgumentList ($User, "OptionalDisplayableId")
$authResult = $authContext.AcquireTokenAsync($resourceAppIdURI, $clientId, $redirectUri, $platformParameters, $userId).Result
The lines of code need to be changed to support our new AcquireTokenAsync call to specify UserPasswordCredentials as additional parameter:
$intuneAutomationCredential = Get-AutomationPSCredential -Name automation

$authContext = New-Object "Microsoft.IdentityModel.Clients.ActiveDirectory.AuthenticationContext" -ArgumentList $authority
$platformParameters = New-Object "Microsoft.IdentityModel.Clients.ActiveDirectory.PlatformParameters" -ArgumentList "Auto"
$userId = New-Object "Microsoft.IdentityModel.Clients.ActiveDirectory.UserIdentifier" -ArgumentList ($intuneAutomationCredential.Username, "OptionalDisplayableId")
$userCredentials = New-Object Microsoft.IdentityModel.Clients.ActiveDirectory.UserPasswordCredential -ArgumentList $intuneAutomationCredential.Username, $intuneAutomationCredential.Password
$authResult = [Microsoft.IdentityModel.Clients.ActiveDirectory.AuthenticationContextIntegratedAuthExtensions]::AcquireTokenAsync($authContext, $resourceAppIdURI, $intuneAutomationAppId, $userCredentials);
The credentials will be received from the Azure Automation account in PowerShell via Get-AutomationPSCredential. We will provision the service account credentials securely for the Azure Automation account via Credential assets.
Setup the Azure Automation environment
The following steps must be followed to setup the Azure Automation environment:
- Creation of a native application in Azure AD
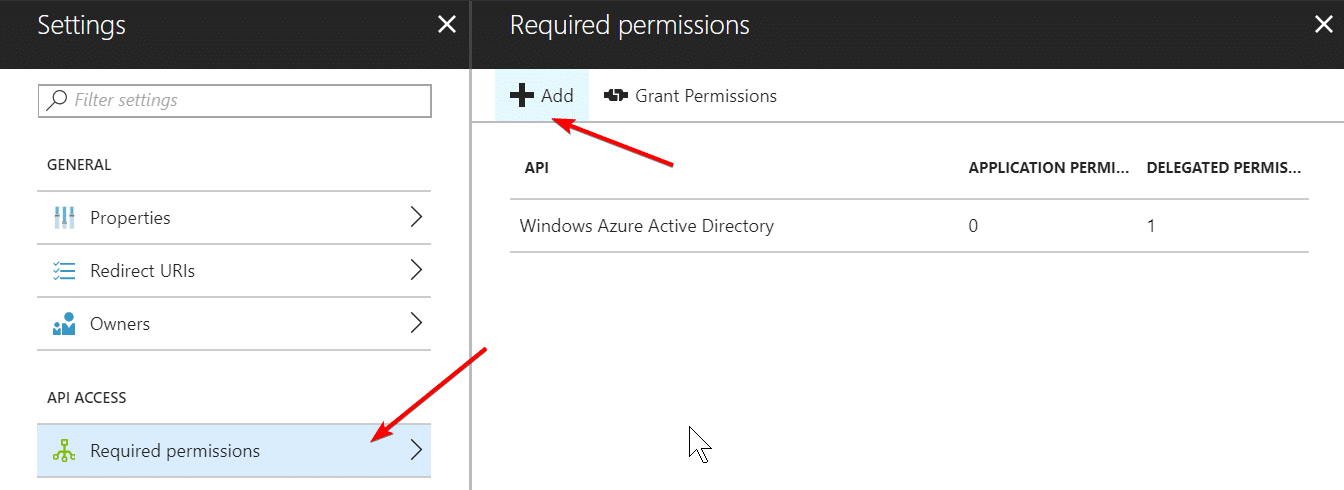
- Assigning permissions to the registered application
- Grant permissions (administrator consent)
- Create Azure Automation Account
- Add credentials to the Azure Automation account
- Add variables to the Azure Automation account
- Add Runbook to the Azure Automation account
- Edit Runbook
- Create Azure Blob Storage
- Client-side gather script
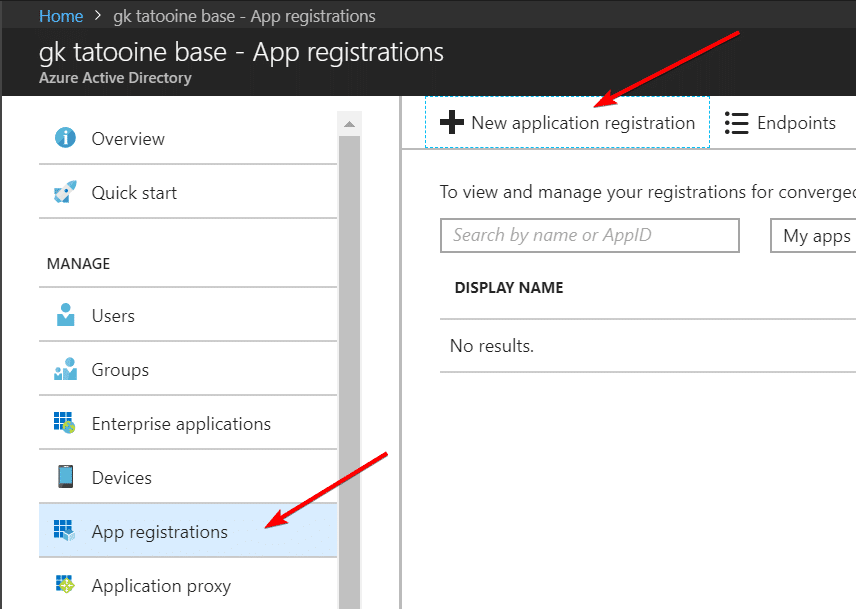
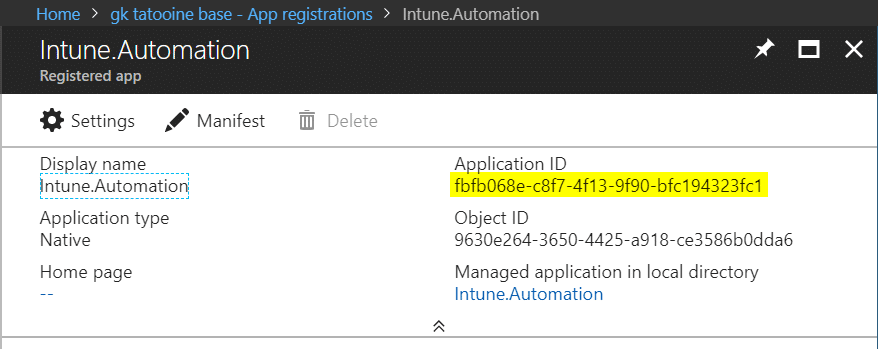
1. Creation of a native application in Azure AD
The best description for a native application is found in the Intune documentation for the Intune API here: How to use Azure AD to access the Intune APIs in Microsoft Graph. I will outline the necessary steps to setup the environment.
New application registration
fill out the details and give it a name, create a native application with redirect URI: urn:ietf:wg:oauth:2.0:oob
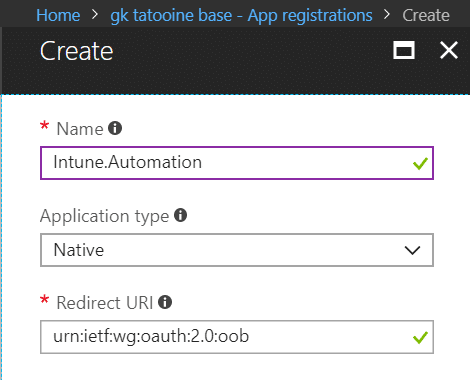
in the end a new registered application is available. Important is to copy the application id as we need it in our PowerShell script Runbook later.
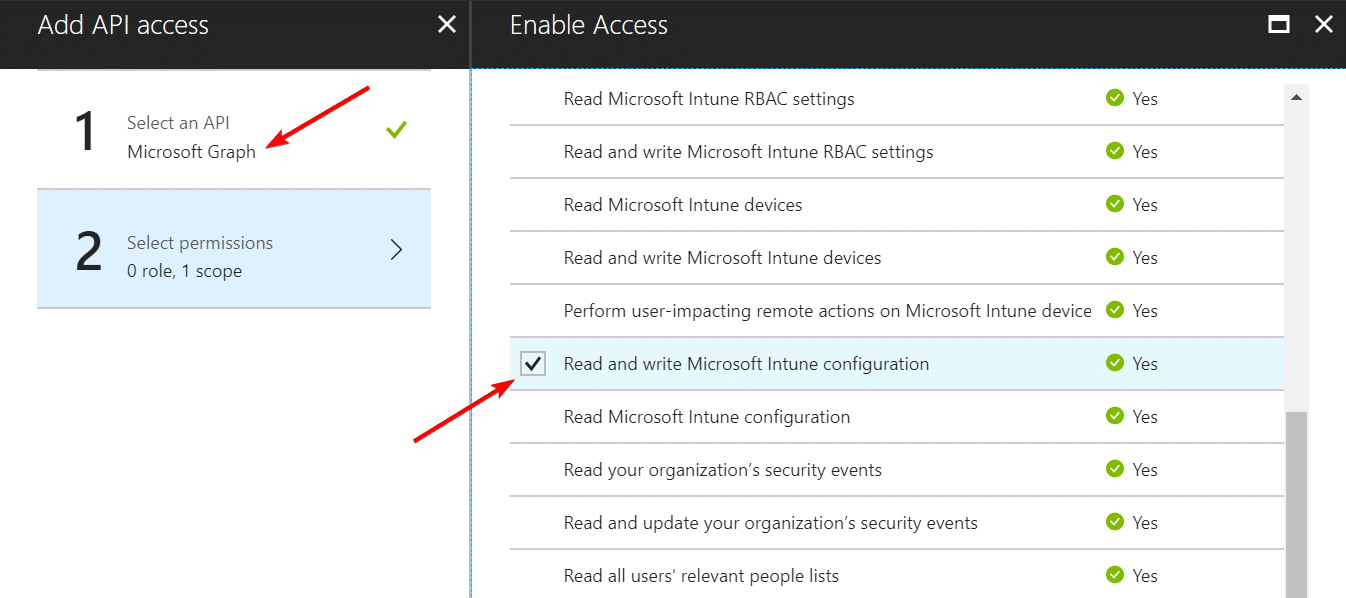
2. Assigning permissions to the registered application
The registered application must have Intune Configuration Read and Write permissions.
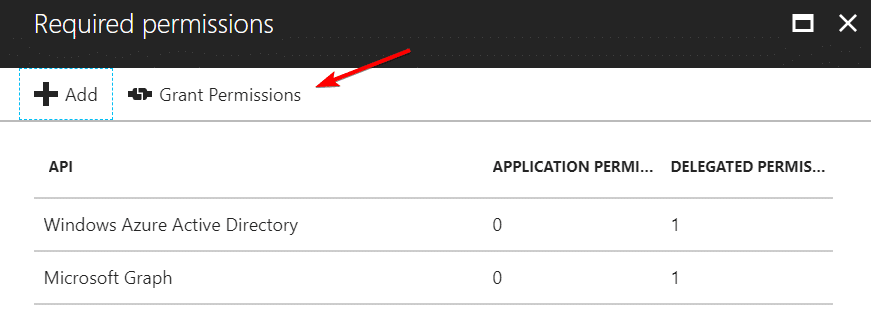
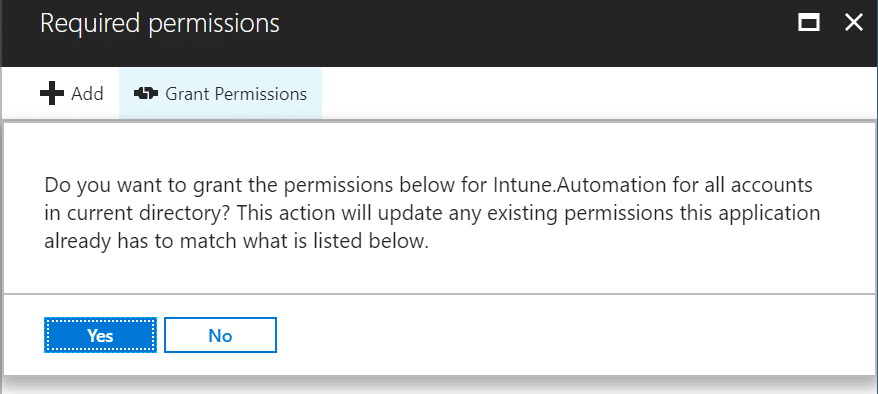
3. Grant permissions (administrator consent)
Finally we grant the selected permissions to the newly registered application.
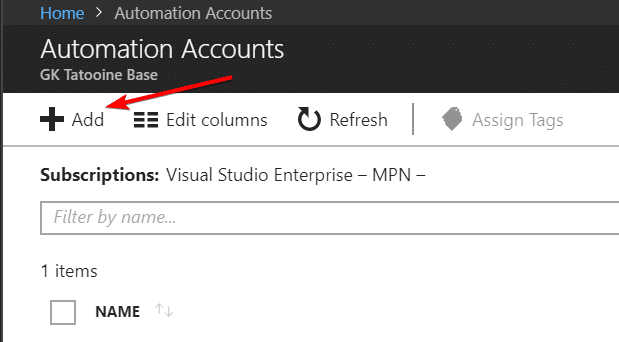
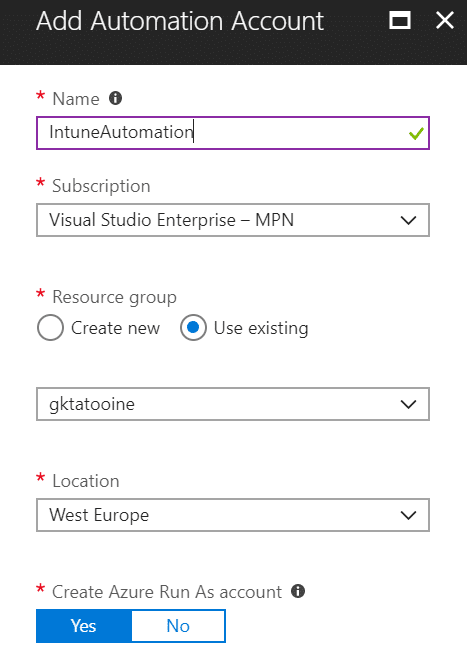
4. Create Azure Automation Account
Creation of the Azure Automation Account in a existing or new resource group.
5. Add credentials to the Azure Automation account
Go to Azure AD and create a new user, in my case user automation with Display Name Intune Automation and use a complex password for it.
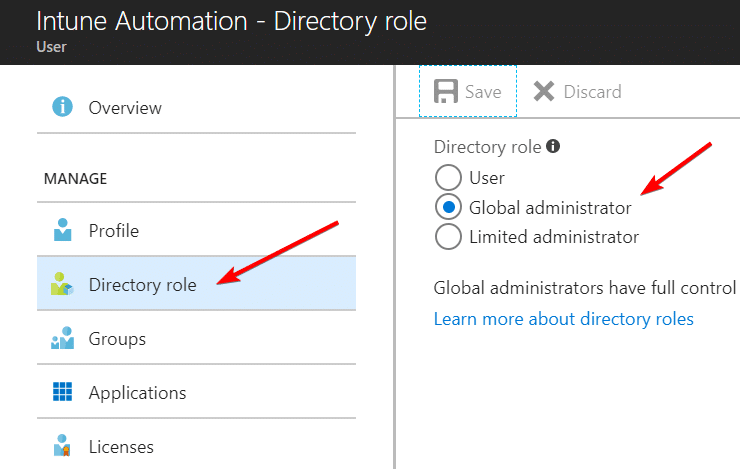
The service account credentials can even be limited to the necessary permission needed to write the Autopilot device information. I’ve not done this as the Global Administrator account credentials are very well protected, but it’s certainly possible.
Note from Credential assets in Azure Automation:
Secure assets in Azure Automation include credentials, certificates, connections, and encrypted variables. These assets are encrypted and stored in Azure Automation using a unique key that is generated for each automation account. This key is stored in Key Vault. Before storing a secure asset, the key is loaded from Key Vault and then used to encrypt the asset.
For the concurrent execution protection of the Runbook, we need our automation credential to have Reader permission and for Blob Storage access we need Contributor permissions on the subscription. As the result we grant Contributor permission to the automation account:
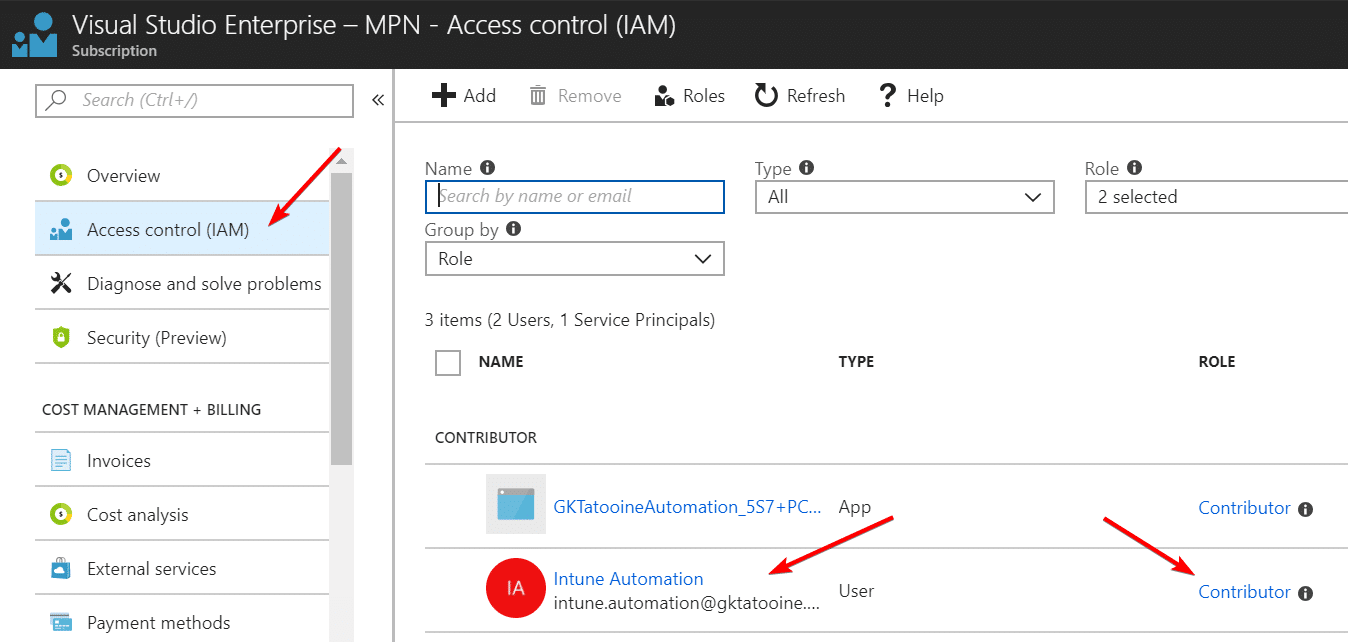
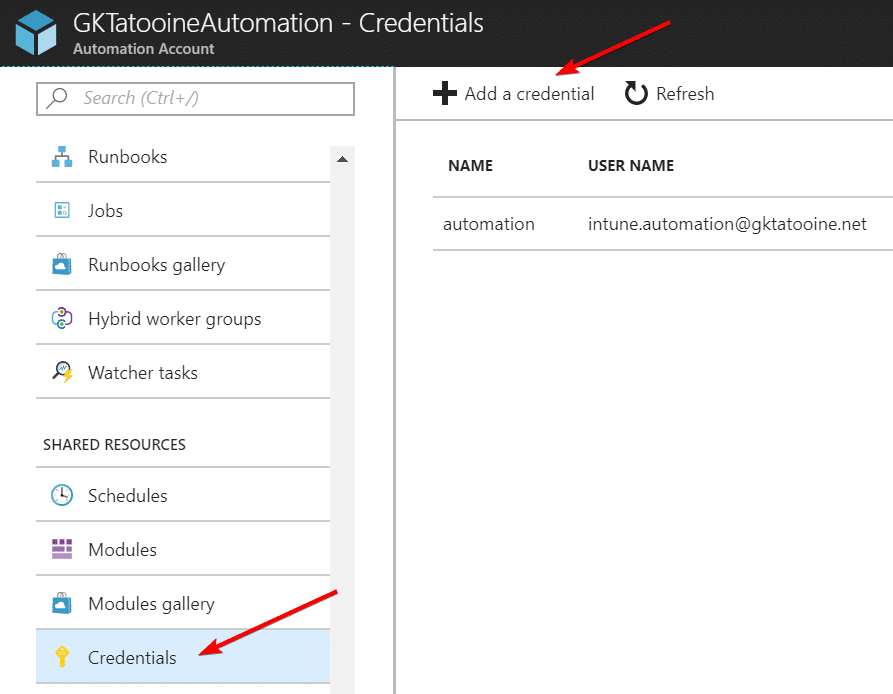
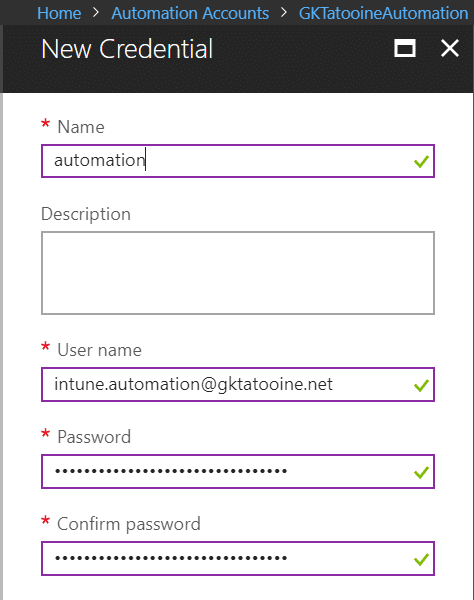
After user creation we add the credential to the Azure Automation account.
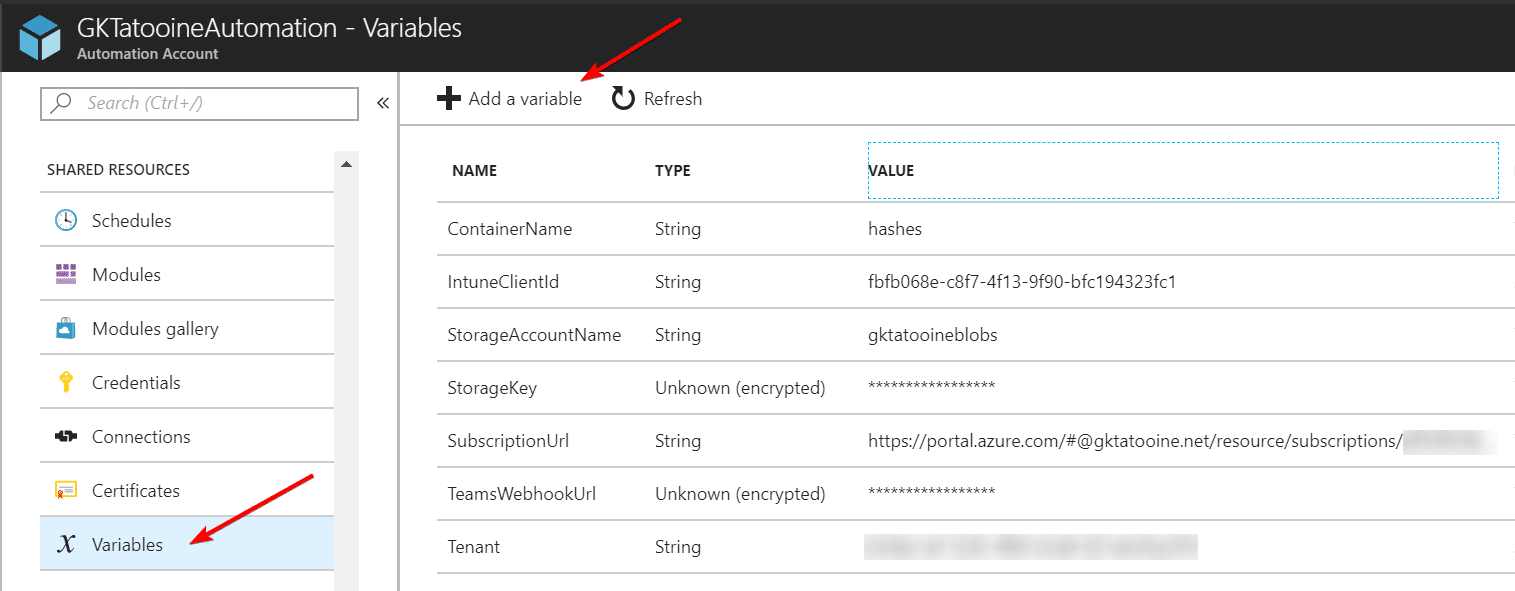
6. Add variables to the Azure Automation account
The PowerShell Runbook needs the native registered application ID also called Client ID. Therefore we create an Azure Automation variable IntuneClientId and we need the tenant ID as a variable, we use Tenant as identifier:
| IntuneClientId | <your-applications-id> |
| Tenant | <your-tenant-id> |
Additional variables needed for Azure Blob Storage access:
| ContainerName | <your-blob-storage-containername> |
| StorageAccountName | <your-blob-storage-account> |
| StorageKey | <your-blob-storage-secret-key> * |
| * as encrypted variable |
Additional variables needed for Microsoft Teams Channel notification:
| SubscriptionUrl | <your-subscription-url> |
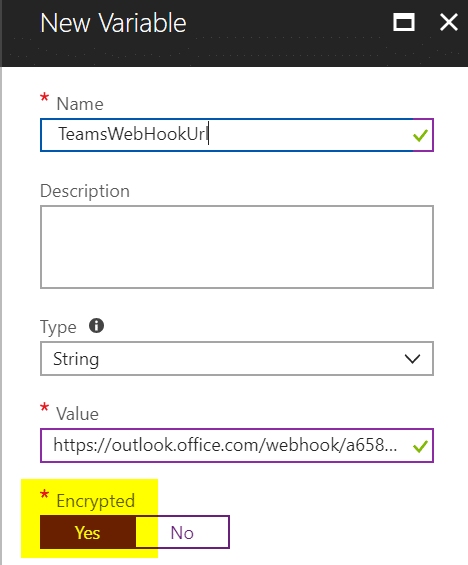
| TeamsWebHookUrl | <your-ms-teams-webhook-url> * |
| * as encrypted variable |
These are the added variables to the Automation Account, remember to add the StorageKey and TeamsWebhookUrl as encrypted variables for further protection:
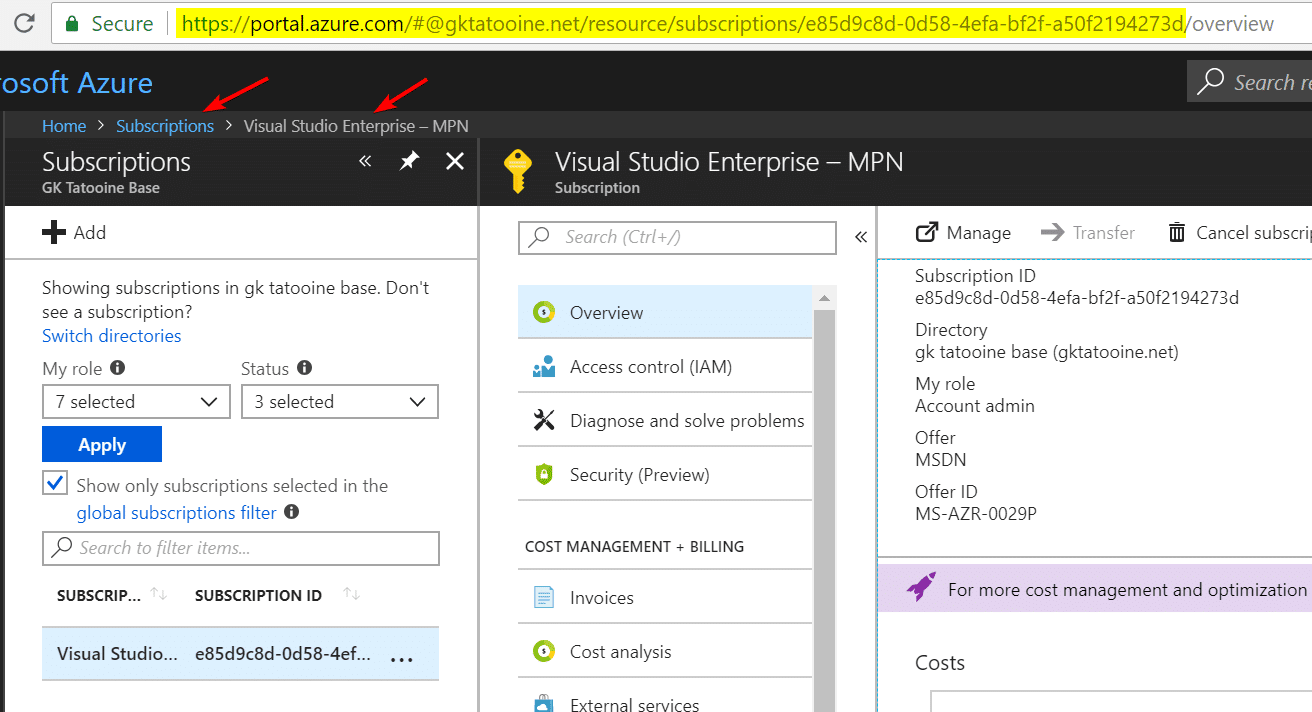
The subscription URL can be found as shown below:
Please do not copy the /overview end of the URL. The URL should end with the subscription GUID only (like highlighted):
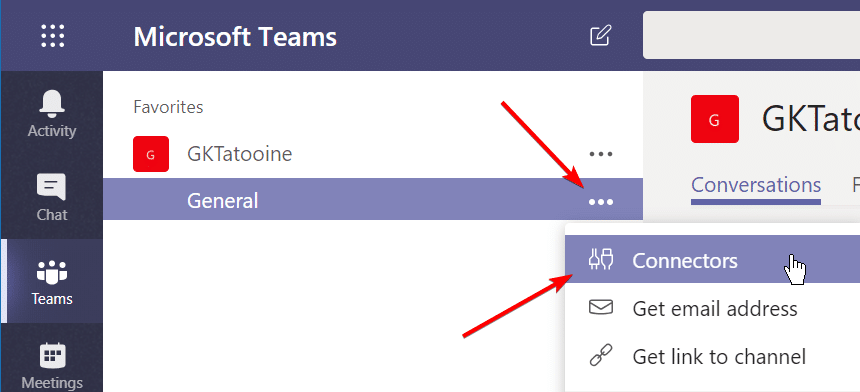
The Teams Webook URL can be found as shown below:
Open MS Teams and choose a Channel where the Autopilot notification from the Azure Runbook should be displayed. Click on the three dots and choose Connectors:
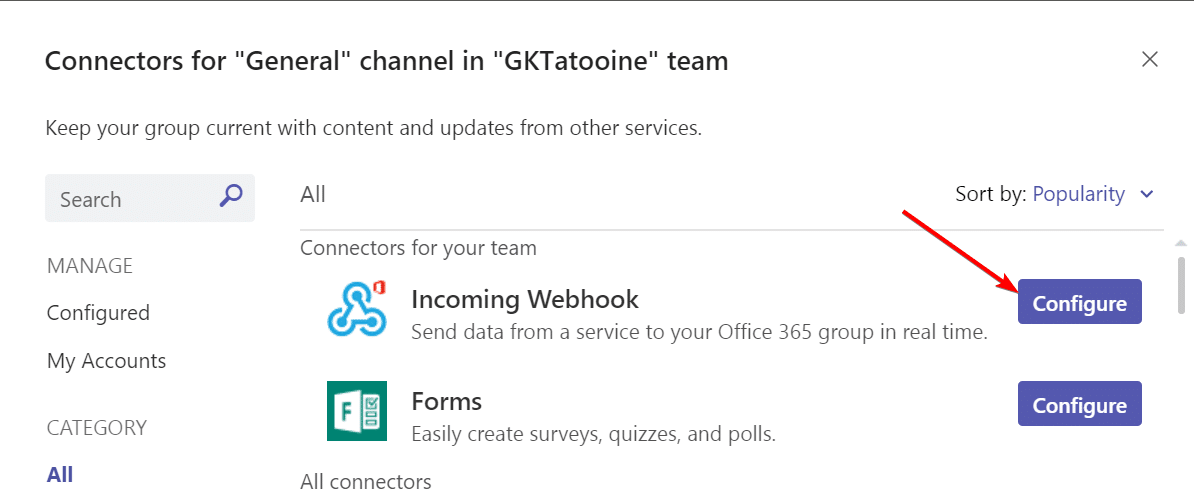
Look for Incoming Webhook and click Configure
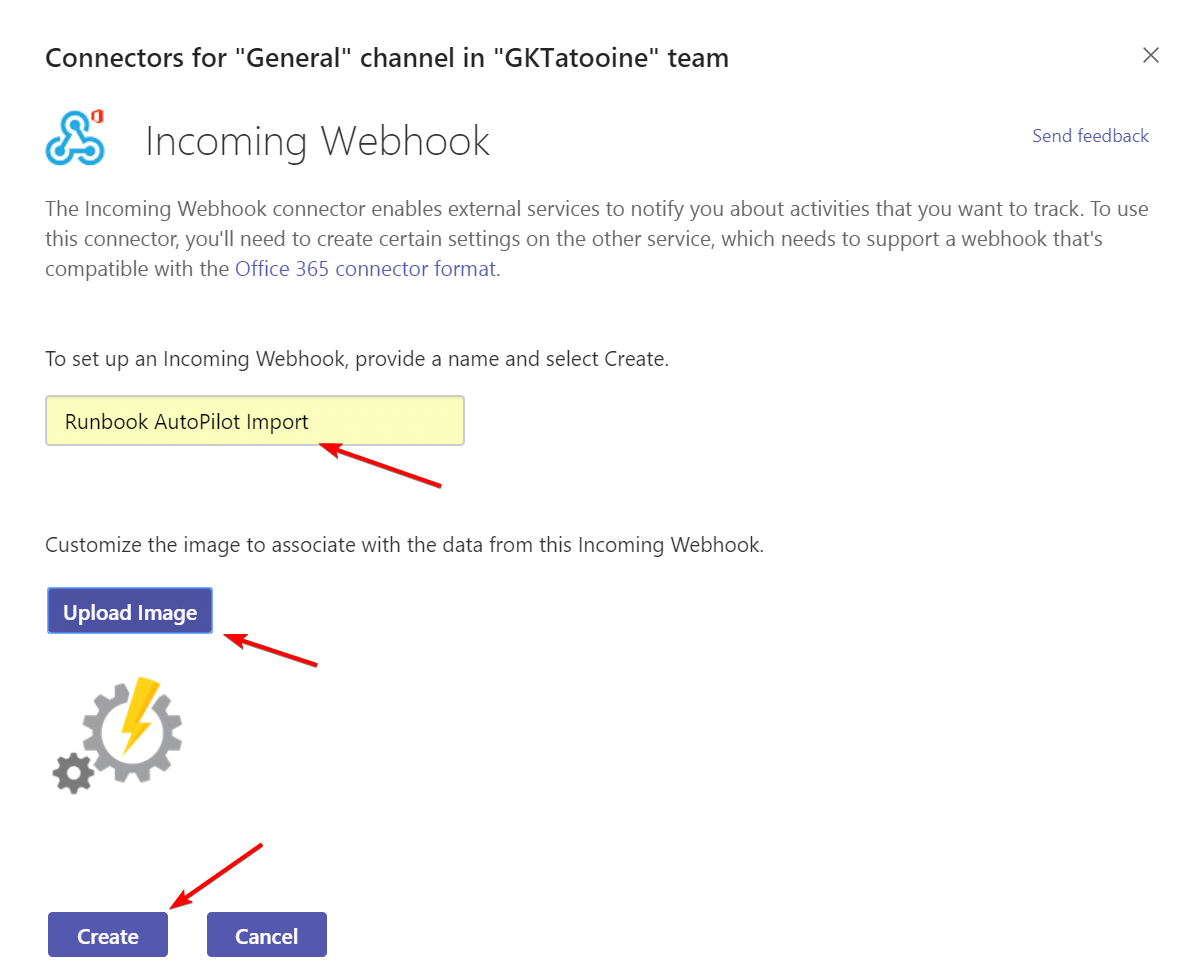
Type in the details and upload a icon and click Create
Finally copy the Webhook URL:
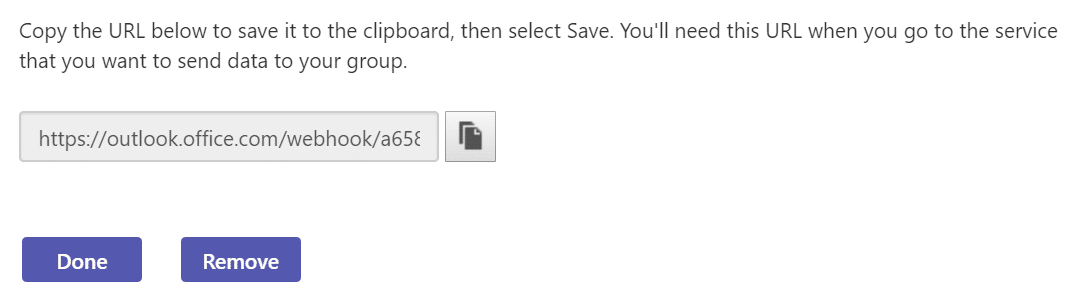
Paste it into the Azure Automation variable TeamsWebHookUrl and set encrypted value to Yes
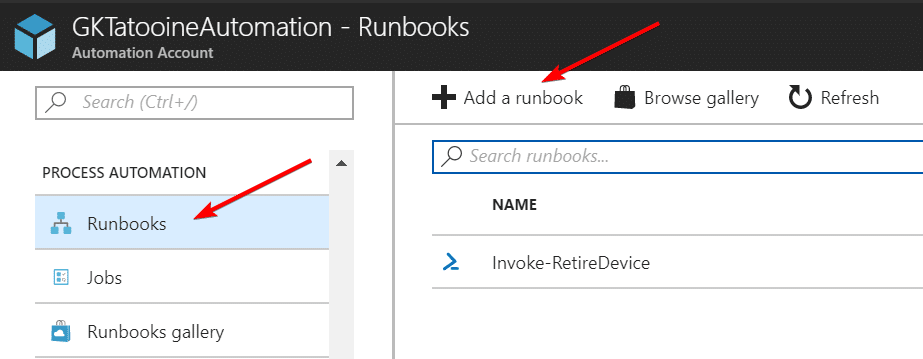
7. Add Runbook to the Azure Automation account
Adding a Runbook with the name Import-AutopilotInfo as type PowerShell

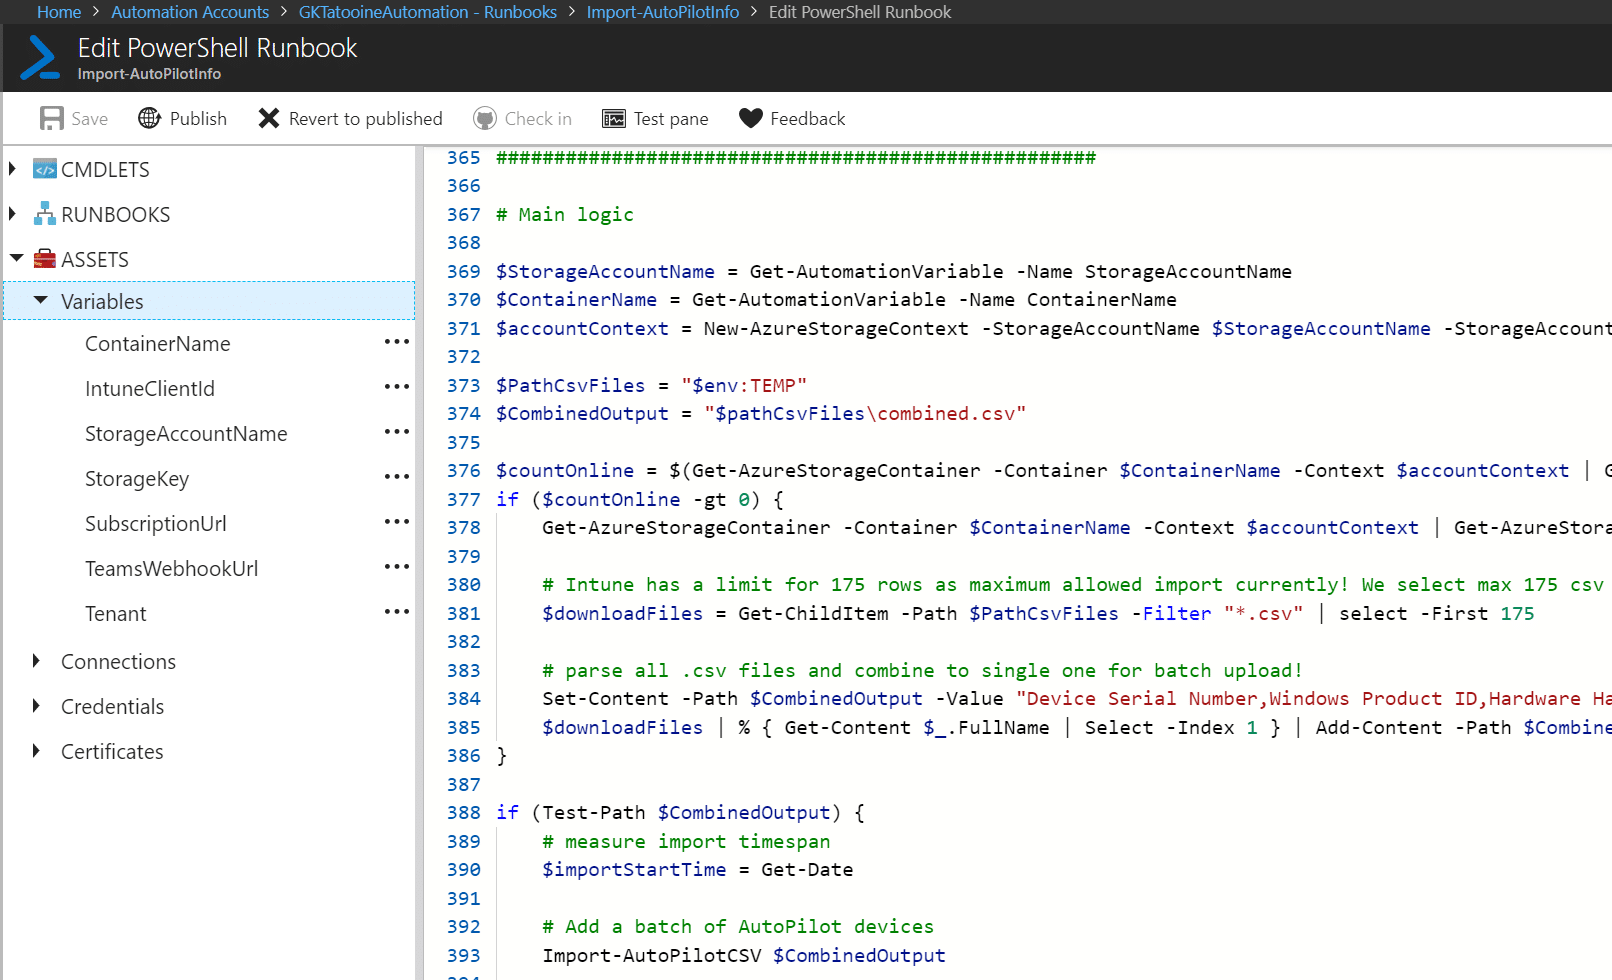
8. Edit Runbook
Finally, we can implement the complete Runbook which can be found on my GitHub account here:
The Runbook is written in PowerShell and follows the logic described in the beginning of this post – section architecture.
Edit the PowerShell Runbook and paste-in the code:
9. Create Azure Blob Storage
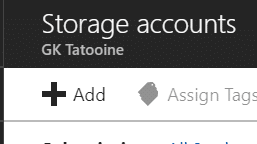
Login to Azure portal and click on “Storage accounts”

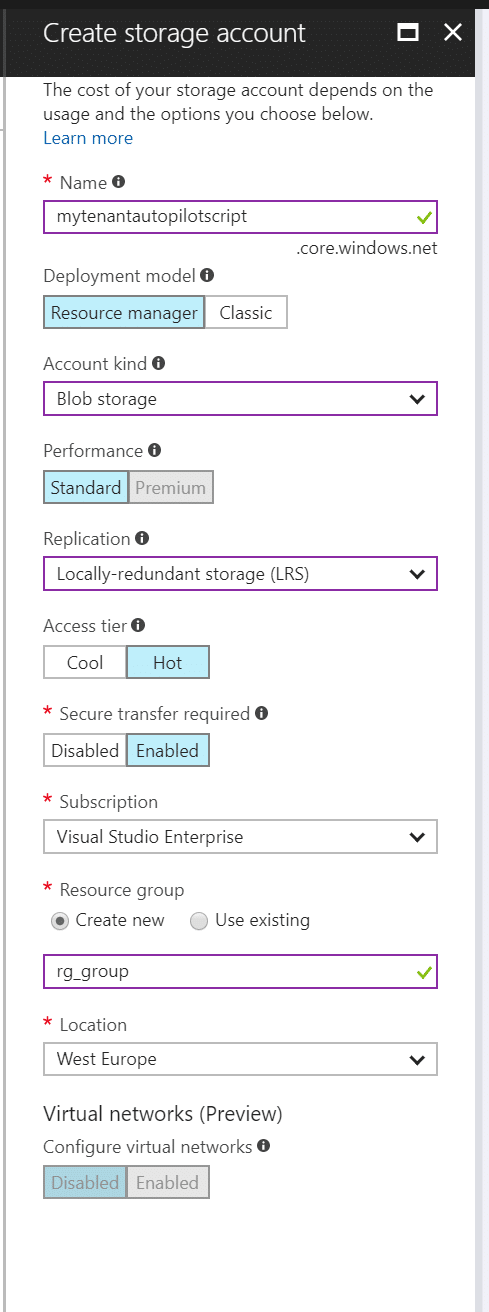
Click Add
fill out name, Account kind: Blob storage
after creation you should see the storage account
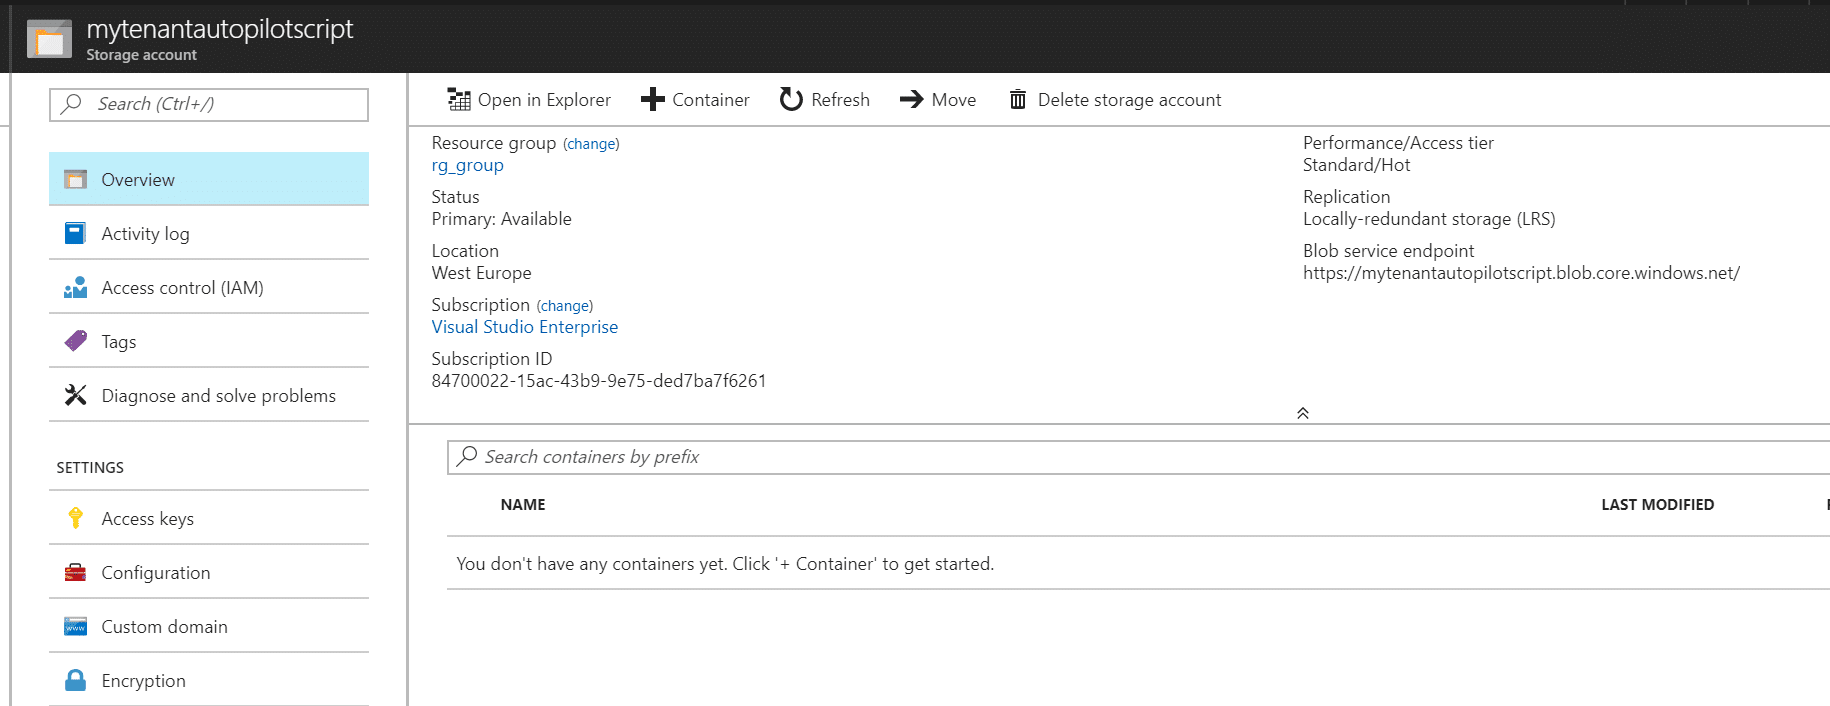
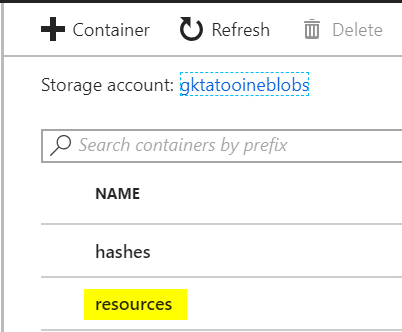
create a container called hashes
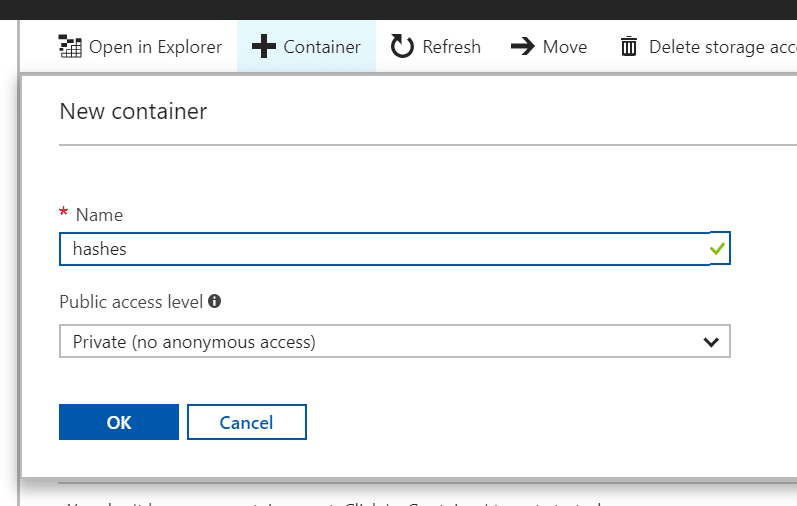
create a shared access signature for Blob | Write | an extended expiry date/time | HTTPS only and create a SAS token. Shared Access Signature is used to limit the permission and the limit the period of time to access the account. See Delegating Access with a Shared Access Signature
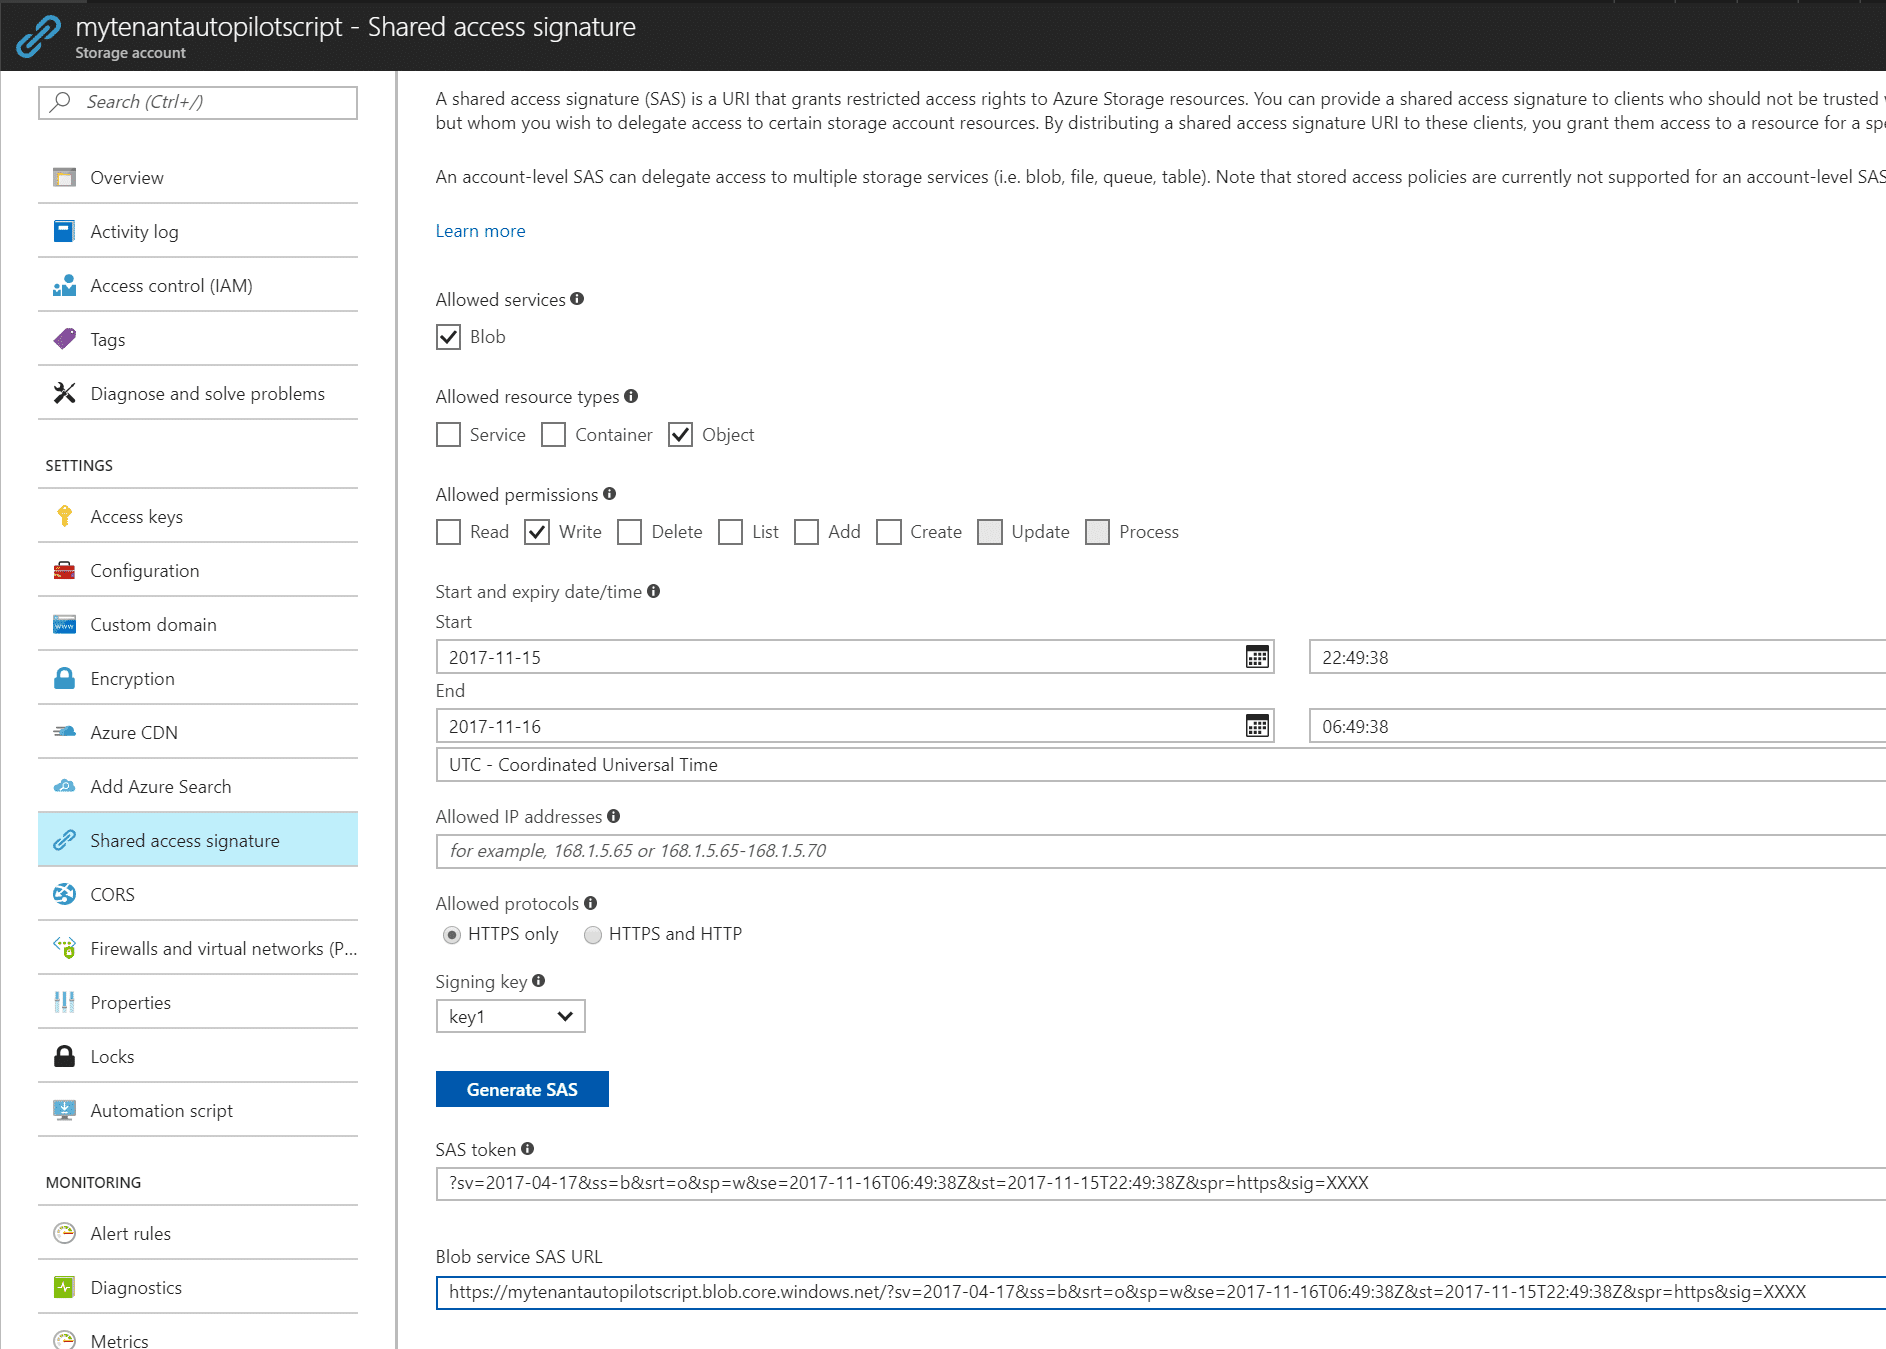
Copy the SAS token as we need it in the gathering script.
10. Client-side gather script
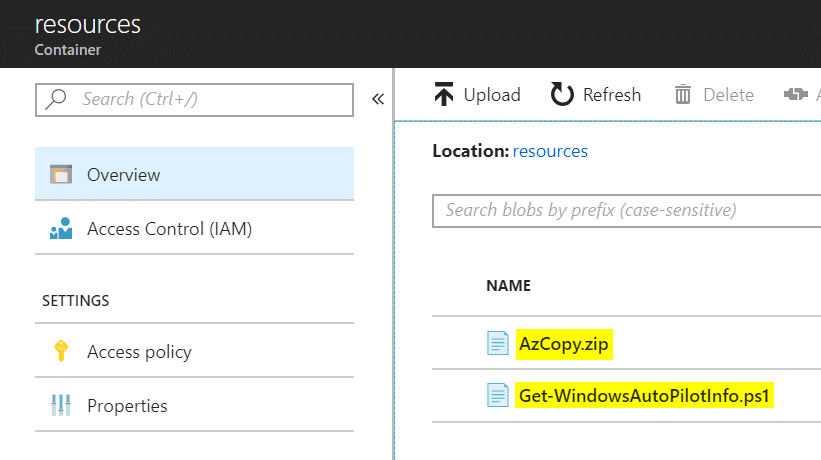
The client-side script uses AzCopy.exe (incl. dependency files) and Get-WindowsAutoPilotInfo.ps1 to gather and upload the .csv file via SAS to the Blob Storage. Both dependencies can be in the same execution directory or if not available they are downloaded from an additional Blob Storage container named resources. The additional container resources must be created and the AzCopy.zip and Get-WindowsAutoPilotInfo.ps1 must be uploaded there to successfully run the script:
The client-side gather script can be found on my GitHub account here:
Replace ZZZZ with your Blob Storage account name and ZZZZ with your SAS signature in the script above. See here Delegating Access with a Shared Access Signature for more SAS signature details.
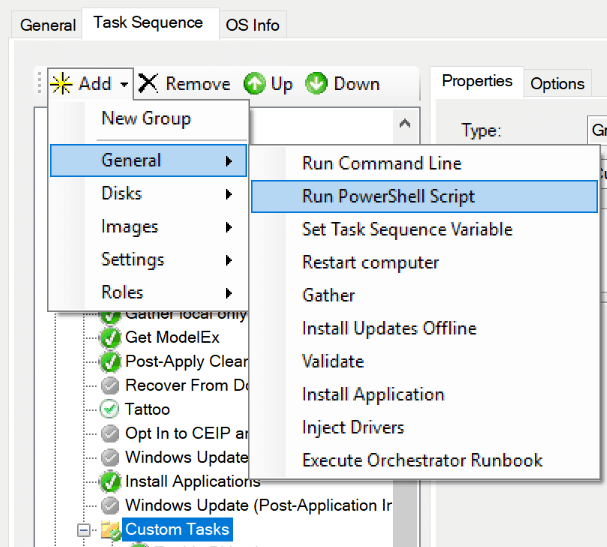
I assume the MDT share is built and a Standard Task Sequence for a vanilla Windows 10 installation is available. We should take care of the right drivers (have a look at our Modern Driver Management for Intune) and in the end we let the device start the OOBE again (sysprep.exe /oobe /reboot|shutdown). Then we add a task sequence step “Run PowerShell Script” to the folder “Custom Tasks“:
and configure the Get-WindowsAutoPilotInfoAndUpload.ps1 script:
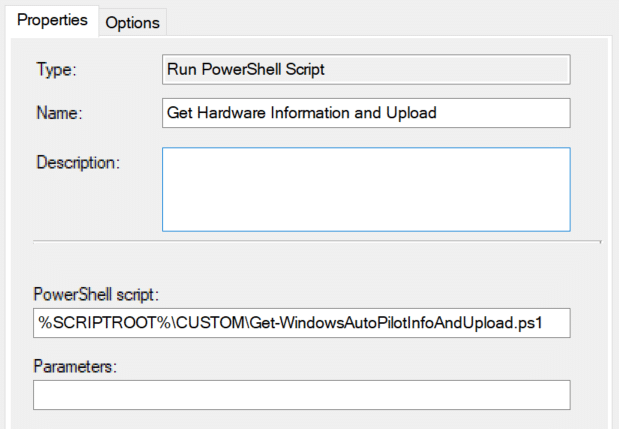
Now you are ready to run a MDT deployment of a Windows 10 with an automatic upload of the hardware information to the Azure Blob Storage.
This script can also be used to be executed via Microsoft Intune Management Extension to run it on existing Windows 10 devices. It is possible to collect all targeted device information and the Runbook will import the device information. Already imported devices will be skipped. This way we can make sure every device is imported to the Autopilot service.
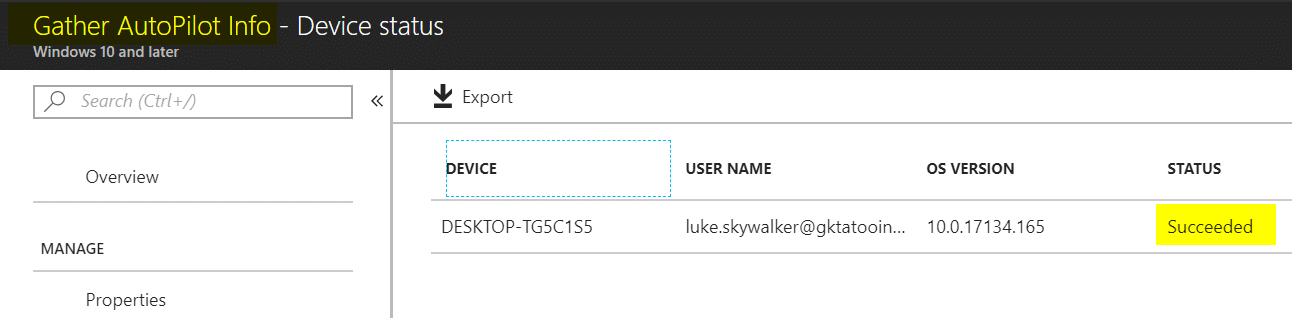
Sample output of the Runbook
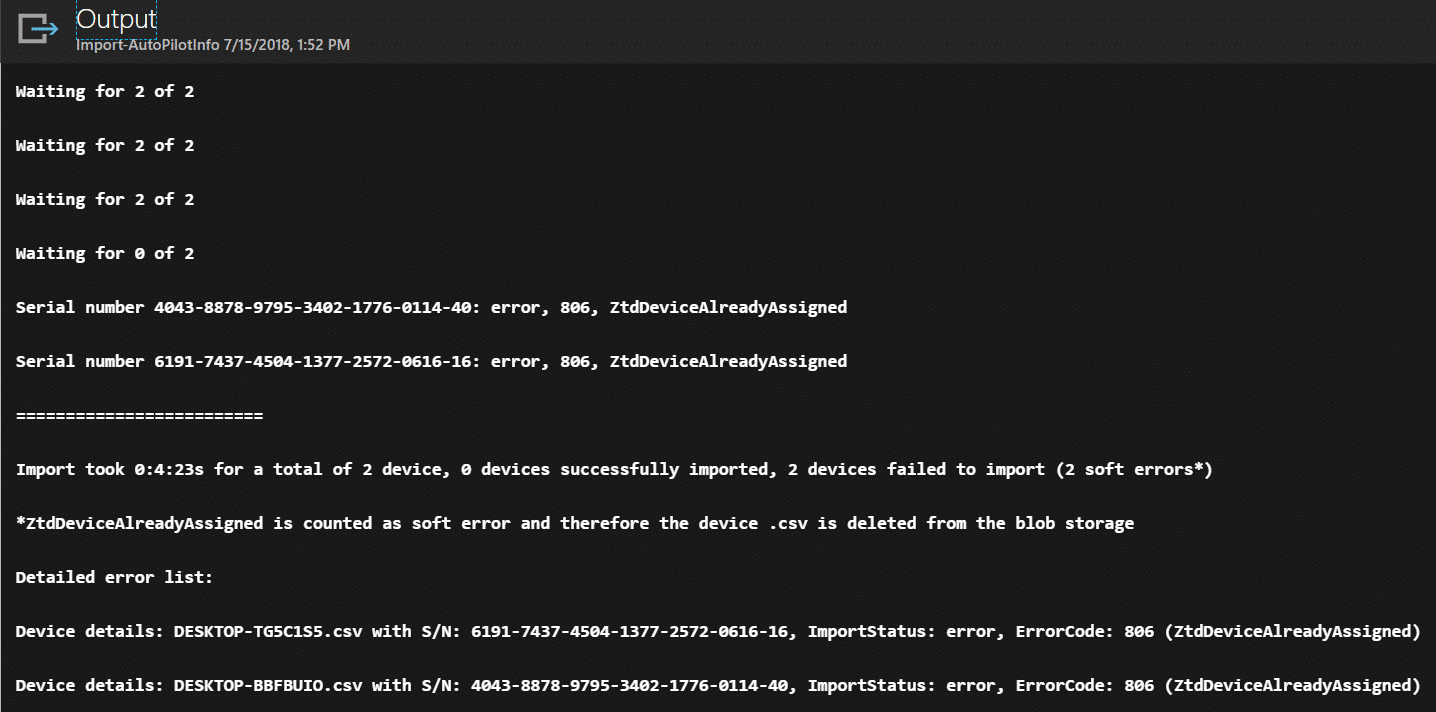
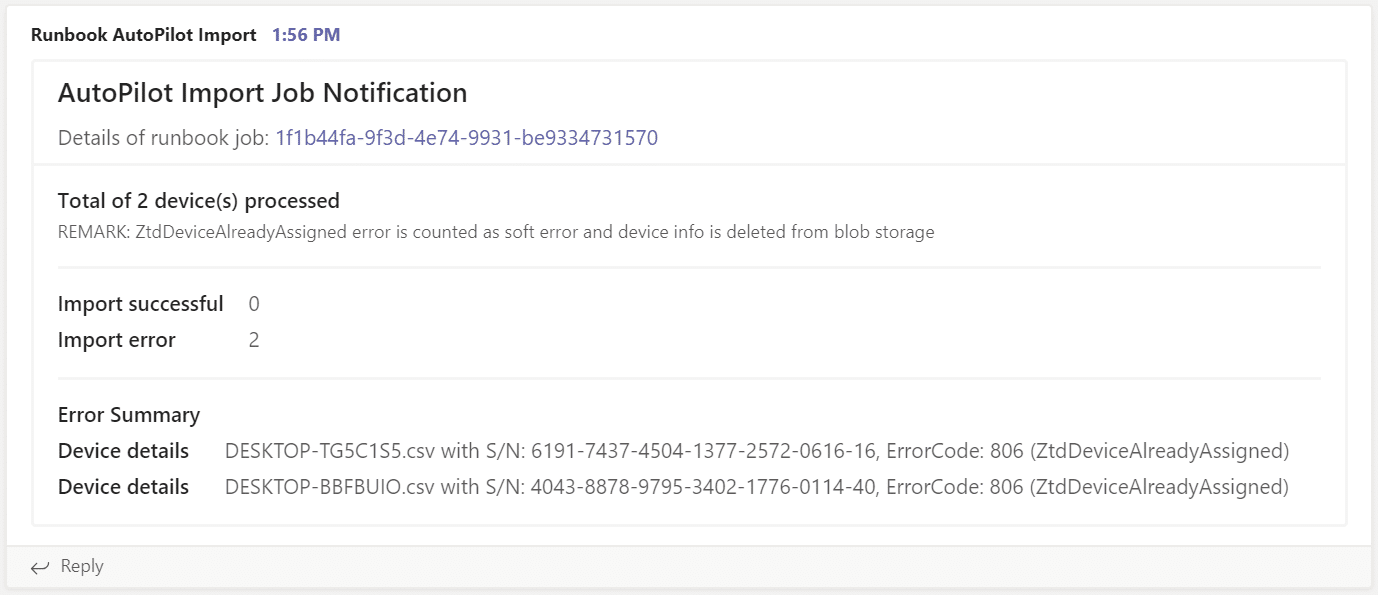
If a device information <hostname>.csv is successfully imported the .csv files will be deleted from the Azure Blob Storage. In case of an error it will be left there untouched but reported via Runbook output and Teams notification. There is one case where the Runbook will delete the .csv file from the Azure Blob Storage also. This is if the Runbook detects an error 806 – ZtdDeviceAlreadyAssigned. In that case we can delete the .csv as it has no consequences. In every other error situation someone needs to resolve the error manually. The Teams notification is only generated if there is some device information in the Azure Blob Storage. The normal procedure would be if operations gets an import notification it should check and in case of errors they should be resolved manually.
Important observations during testing
The Autopilot import via Graph API takes some time and it may also timeout. So, it is not a typical request response REST API in this case. Remember all device information is staged and then the devices are monitored for their success or error state. This led to situations where I had to wait up to 1 hour to get a successful import, even when the UI in Intune tells us it takes up to 15 min. So be prepared that it might take longer or fails during the run. I chose this approach as it is the same procedure as the Azure Portal does the import. In fact, we really automated the import process in Intune but did not invent a complete different process which might cause different problems of device tracking or concurrency and so on. Depending on the use case you can run the Runbook on a recurring schedule. My normal use case for this scenario is to support people who are preparing older devices when they are getting reinstalled from Windows 7 to Windows 10. If someone expects immediate availability of Autopilot information after such a reinstall this might be problematic as the API is not designed for this. Another fact is that the Autopilot Deployment Profile assignment using Intune does take some time also at the moment. I observed that it took several hours sometimes. I suggest to re-arrange the operational processes and hand out reinstalled Windows 10 devices after some additional time and not directly after reinstalling, as this increases the possibility that the Autopilot information is not imported and profile assigned yet.
To run the Runbook on a recurring schedule just go to the Runbook and add a schedule. The max recurrence is limited to every hour.
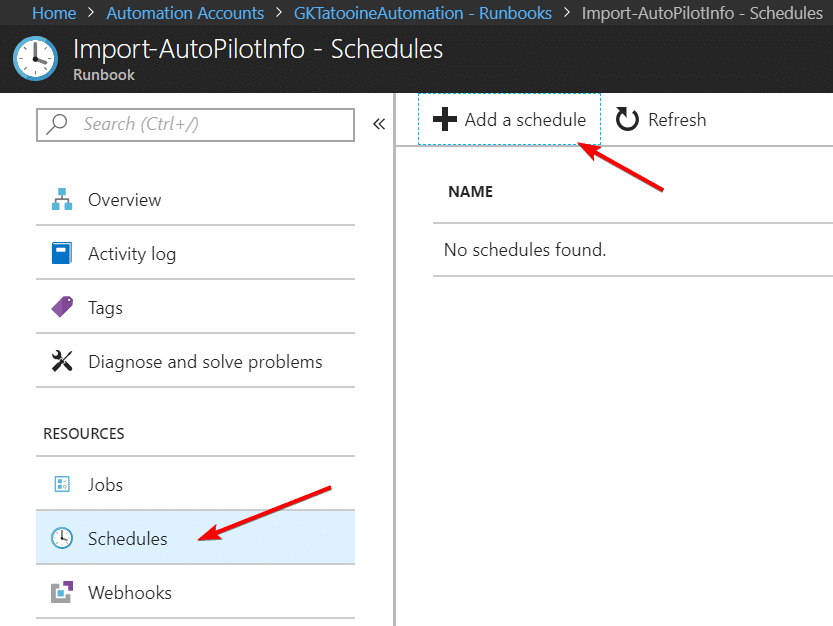
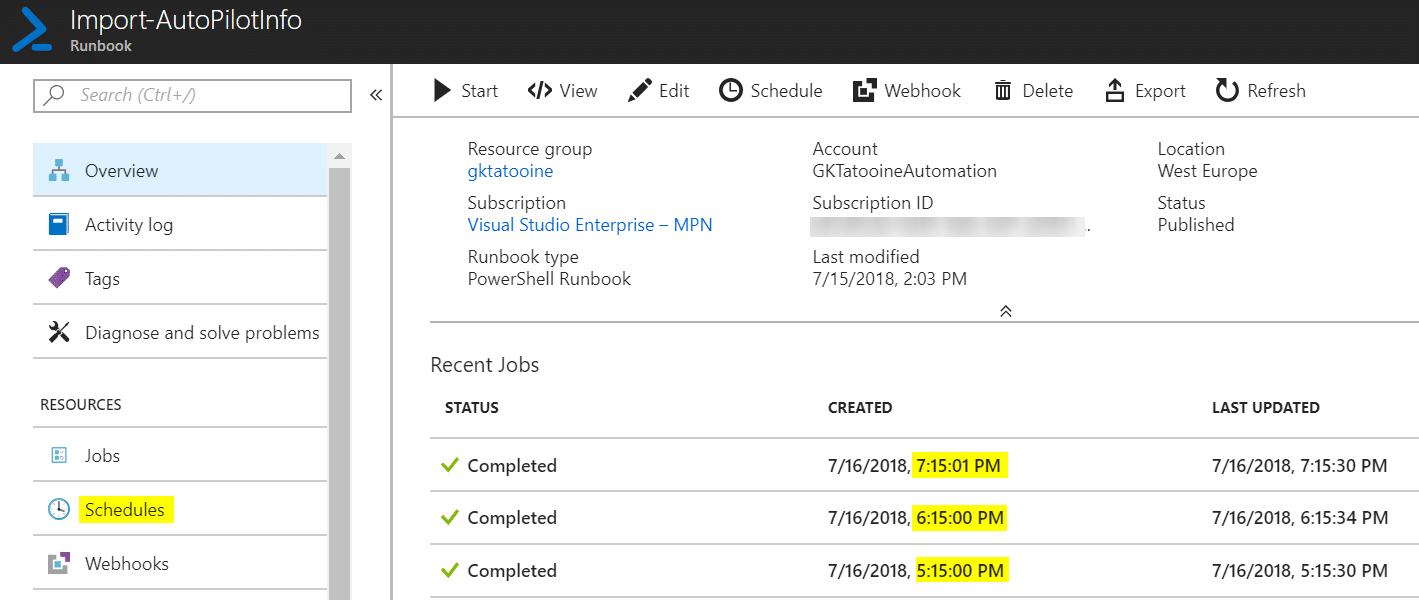
Just define a schedule (max once per hour – this should be enough as the API and the AutoPilot Profile assignment are not that fast in the moment) and monitor the recent job overview if it works:
Should we see an improvement in processing and it may be needed to run the Runbook more often, the schedule can even be enhanced by using a simple Logic App and not using the Azure Automation Runbook schedule at all:
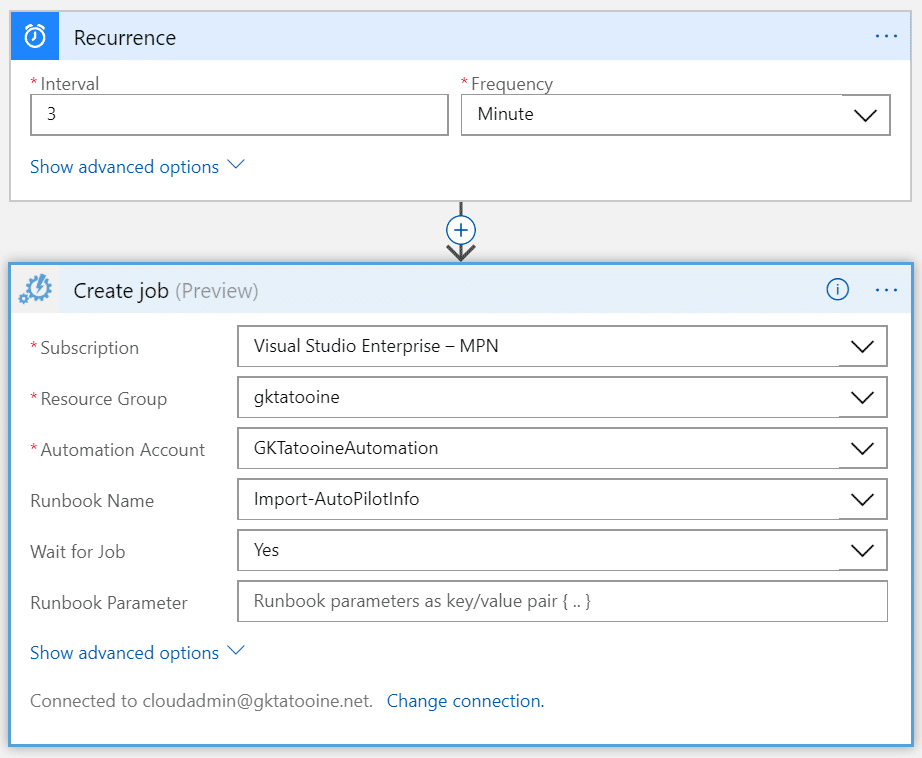
Please see Stefan Strangers post for detailed instructions how to implement a simple Logic App to trigger an Azure Automation Runbook:
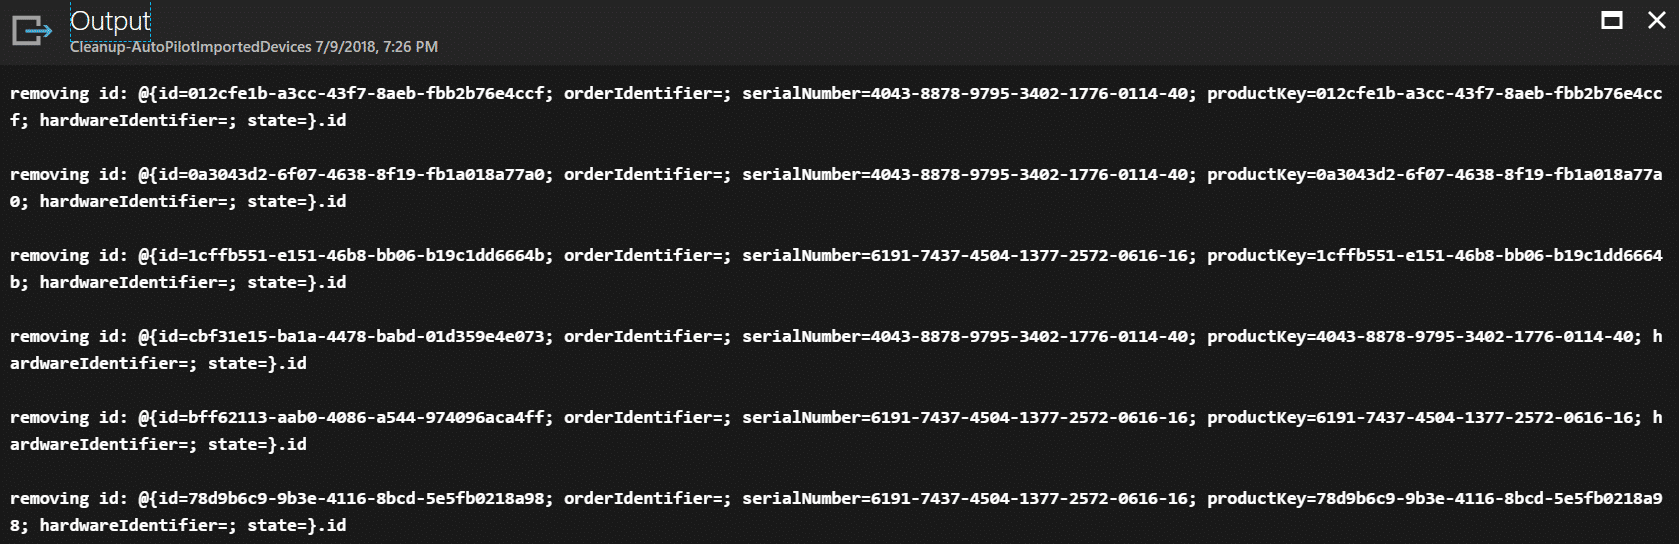
In case something goes wrong I have created a second Runbook to clean up the staging area of the Autopilot Graph API. Get it from my GitHub account and run it in case of fatal errors where you might want to clean up the staging area:
Here is a sample output of the Cleanup Runbook:
Further information
Azure Logic Apps – Schedule your Runbooks more often than every hour
https://blogs.technet.microsoft.com/stefan_stranger/2017/06/23/azur-logic-apps-schedule-your-runbooks-more-often-than-every-hour
Preventing Azure Automation Concurrent Jobs In the Runbook
https://blog.tyang.org/2017/07/03/preventing-azure-automation-concurrent-jobs-in-the-runbook
Post notifications to Microsoft Teams using PowerShell
https://blogs.technet.microsoft.com/privatecloud/2016/11/02/post-notifications-to-microsoft-teams-using-powershell
importedWindowsAutopilotDeviceIdentity resource type
https://developer.microsoft.com/en-us/graph/docs/api-reference/beta/resources/intune_enrollment_importedwindowsautopilotdeviceidentity
Autopilot profile assignment using Intune
https://blogs.technet.microsoft.com/mniehaus/2018/06/13/autopilot-profile-assignment-using-intune
Adaptive Cards Designer
https://acdesignerbeta.azurewebsites.net
Thanks for reading this fairly long post, I hope this can increase your throughput on the way to an Autopilot Windows 10 modern management environment.
When someone finds bugs or problems with the solution let me know and leave a comment. I will do my best to fix them as it should be a reliable part during preparing old devices with Windows 10.


Hello
I’ve attempted to implement this, but running into various issues, sorry I can’t be more specific, I’m away from my pc right now, but this is guide still valid? There’s been some changes to storage accounts and app registrations since…
Hi,
yes can be implemented still. You’re right, some dialogs/UI has changed in the meantime but still working. Depending what you trying to achieve, but there is an option meanwhile to convert existing devices to Autopilot devices. It can be found on the Autopilot profile. So you can get the devices into Autopilot even without a runbook.
best,
Oliver
Hi Oliver,
Thanks for your response. I didn’t get a notification email event though it was checked.
I ended up scheduling your cleanup job once a week, which fixed it right away.
Interesting thing about the AutoPilotConfiguration.json. I’ll have to look into that – sounds like one could skip the whole ‘upload to blob and wait for the runbook’ part?
The reason why i put your solution to use, is that the costumer wan’t the ability for an employee to grab a laptop from a random local store (the have offices around the world) and join the domain with it. In this case using a bootable USB with a customized TS.
/Morten
Hi Morten,
as long as you are not using Enrollment Restrictions on Windows 10 for personal devices you could use the AutopilotConfiguration.json and convert them afterwards to AP devices with the new convert setting on the AP profile. As soon as you have enrollment restrictions to block personal Windows 10 devices you need to be registered as AP to be white listed to enroll successful. So again without restriction you could go this way now. At the time of writing this was not possible and my solution is necessary if you have enrollment restrictions. With restrictions my solution makes sure your device gets registered during the reinstall and can fulfill the AP register requirement to go through the enrollment restriction for personal Windows 10 devices.
best,
Oliver
Hi Oliver,
First of all, thanks for sharing this.
I’ve been using this since December last year and on the 6. January the import seems to keep failing/timeout. In line 283 where you loop through the deviceImportStatus i made some extra logging to see what’s happening and I have about 1000 objects with the status of error, and 100 with pending. But only got 10 CSV files on the blob.
Do you know if anything has changed in the API?
Hi Morten,
looks like something went wrong and maybe the import is blocked by the pending error devices in the stating area. Do you know if the devices are already installed which are running in error? If so, we could resolve the situation by cleaning up the import staging space with something like this:
Function Cleanup-AutoPilotImportedDevices(){
$deviceStatuses = Get-AutoPilotImportedDevice
# Cleanup the imported device records
$deviceStatuses | ForEach-Object {
Write-Output “removing id: $_.id”
Remove-AutoPilotImportedDevice -id $_.id
}
}
Then activate the new option on the Autopilot profiles to convert all existing devices to Autopilot devices. In general this is a good idea as it will make sure all your devices are covered in Autopilot. My solution would bring the benefit that shortly after installation the device will be an Autopilot device and the user can go through AP experience. If you reinstall with MDT/SCCM you could also use the new option with the AutopilotConfiguration.json to instruct the OOBE to behave like AP but without actually being registered. Afterwards the AP convert feature would kick in and gather the AP info of the device. So, to summarize my solution is only useful wen you didn’t order your devices with AP integration in your tenant and you won’t reinstall with the new AutopilotConfiguration.json or you have Enrollment restrictions in place to block if not an AP device. Hope this makes sense :-).
best,
Oliver