


With the announcement made recently that Intune on Azure is generally available, we can now fully leverage the Intune Graph API for automation. We’ve had access to the Intune Graph API for some time now during it’s preview phase without any scopes or permissions. This has now changed, and we therefor need to create an App Registration in Azure AD to configure who can access Intune resouces through the Intune Graph API.
Accessing resources through Intune Graph API
Accessing Intune resources by using for instance PowerShell has a list of requirements:
- An App registration (Azure AD Application) with access to Azure AD and Graph API, in addition to permissions scopes relevant to the operation performed by the application (Azure AD Application)
- User credentials with permissions to access the tenant associated with the Azure AD Application and role permissions required to support the permission scopes of the Application
In this post we’ll cover the bullets mentioned above, especially how to create the App registration and configure the permission scopes.
A couple of weeks ago I wrote a blog post about how to get started with Microsoft Intune and PowerShell using the Intune Graph API. When that post was written, we could only access the Beta reference of Intune Graph API making it irrelevant for setting up an App registration, now on the other hand things have changed and it’s time to learn how it actually works.
Intune permission scopes
Before we continue, I’d like to highlight the importance of Permission scopes. They’re what actually grants access to different resources and their properties in Intune. For instance, you may want to limit the kind of access users would have when accessing corporate resources in Intune. In such a scenario, you’d only enable specific permission scopes for your application that covers the required operations.
Below is a list of the current available permission scopes:
- Perform user-impacting remote actions on Microsoft Intune devices
- Read and write Microsoft Intune
- Read Microsoft Intune devices
- Read and write Microsoft Intune RBAC settings
- Read Microsoft Intune RBAC settings
- Read and write Microsoft Intune apps
- Read Microsoft Intune apps
- Read and write Microsoft Intune Device Configuration and Policies
- Read Microsoft Intune Device Configuration and Policies
- Read and write Microsoft Intune configuration
- Read Microsoft Intune configuration
These becomes essential when we get further in this blog post as we get configure the kind of access to Intune resources the application we’re about to create will get. For a more details about the different permission scopes, see the Intune Graph documentation:
https://docs.microsoft.com/en-us/intune/intune-graph-apis#user-content-intune-permission-scopes
Create an App Registration
Why do we need to create an App registration in Azure AD for accessing the Intune resources? Simply put, the App registration is what controls the access for users within your directory and the given permissions scopes of that application outlines the actions that can be carried out on the Intune resources. Now that we understand why need an App registration, let’s see how we can create one using the Azure portal.
- Log in to portal.azure.com with a Global Admin account
- Locate the Azure Active Directory blade and click on App registration.

- Click on New application registration.

- In the Create blade, enter the following details:
- Name: <name of the application>
- Application Type: Native
- Redirect URI: urn:ietf:wg:oauth:2.0:oob
- Click Create.

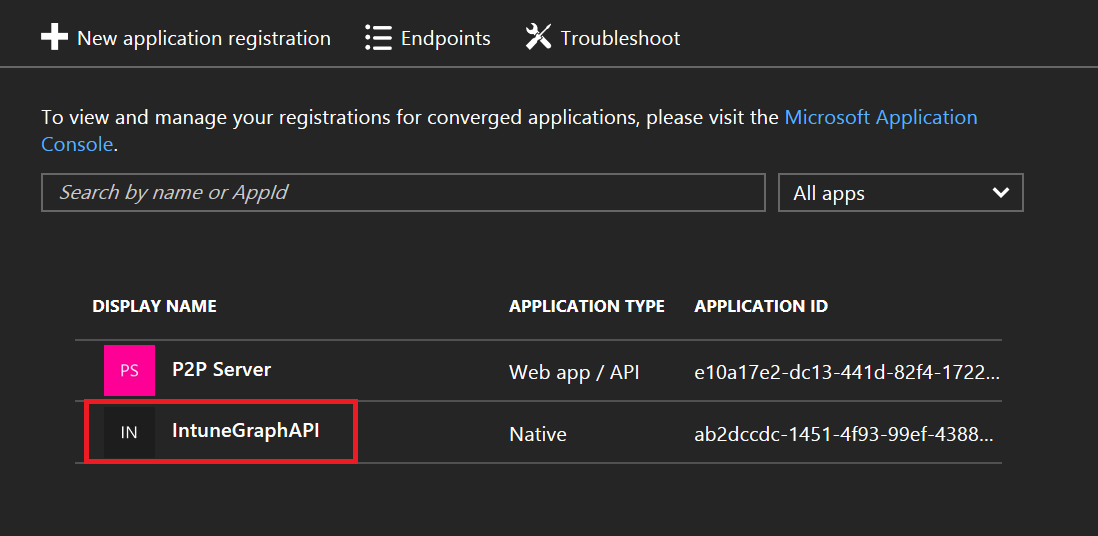
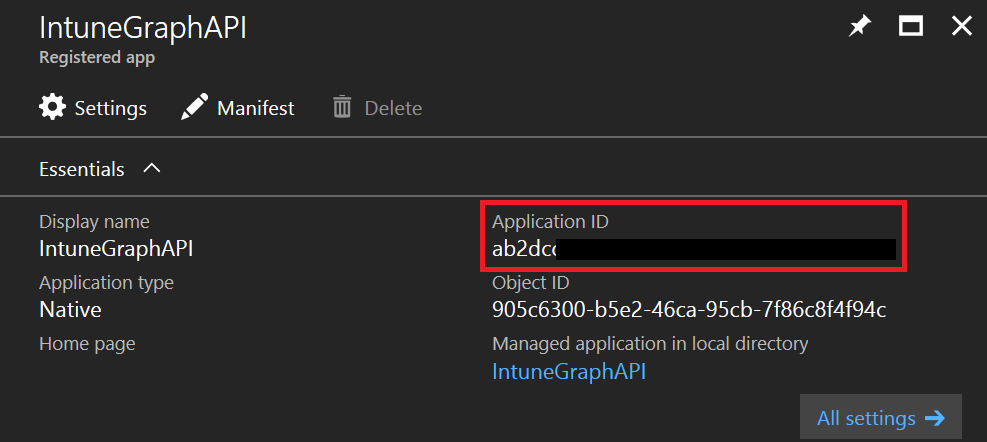
- From the App registration blade, select the newly created application.

- Make a note of the Application ID. This will be used in the scripts to grant an access token when authenticating against Azure AD.

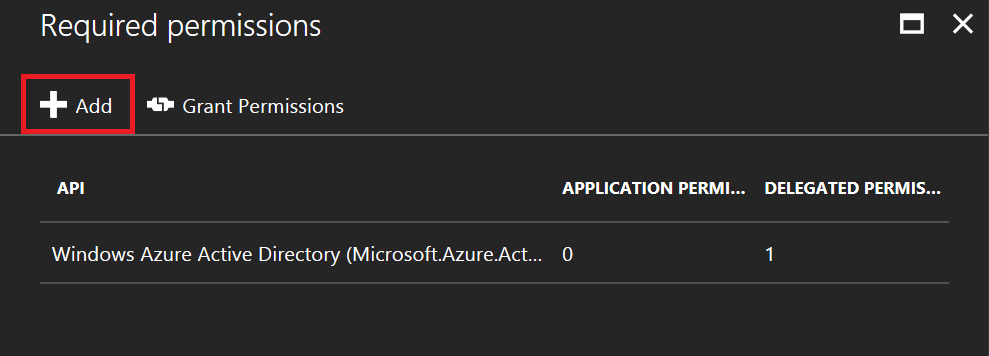
- Click on Settings and under API Access click on Required permissions.

- From the Required permissions blade, click Add.

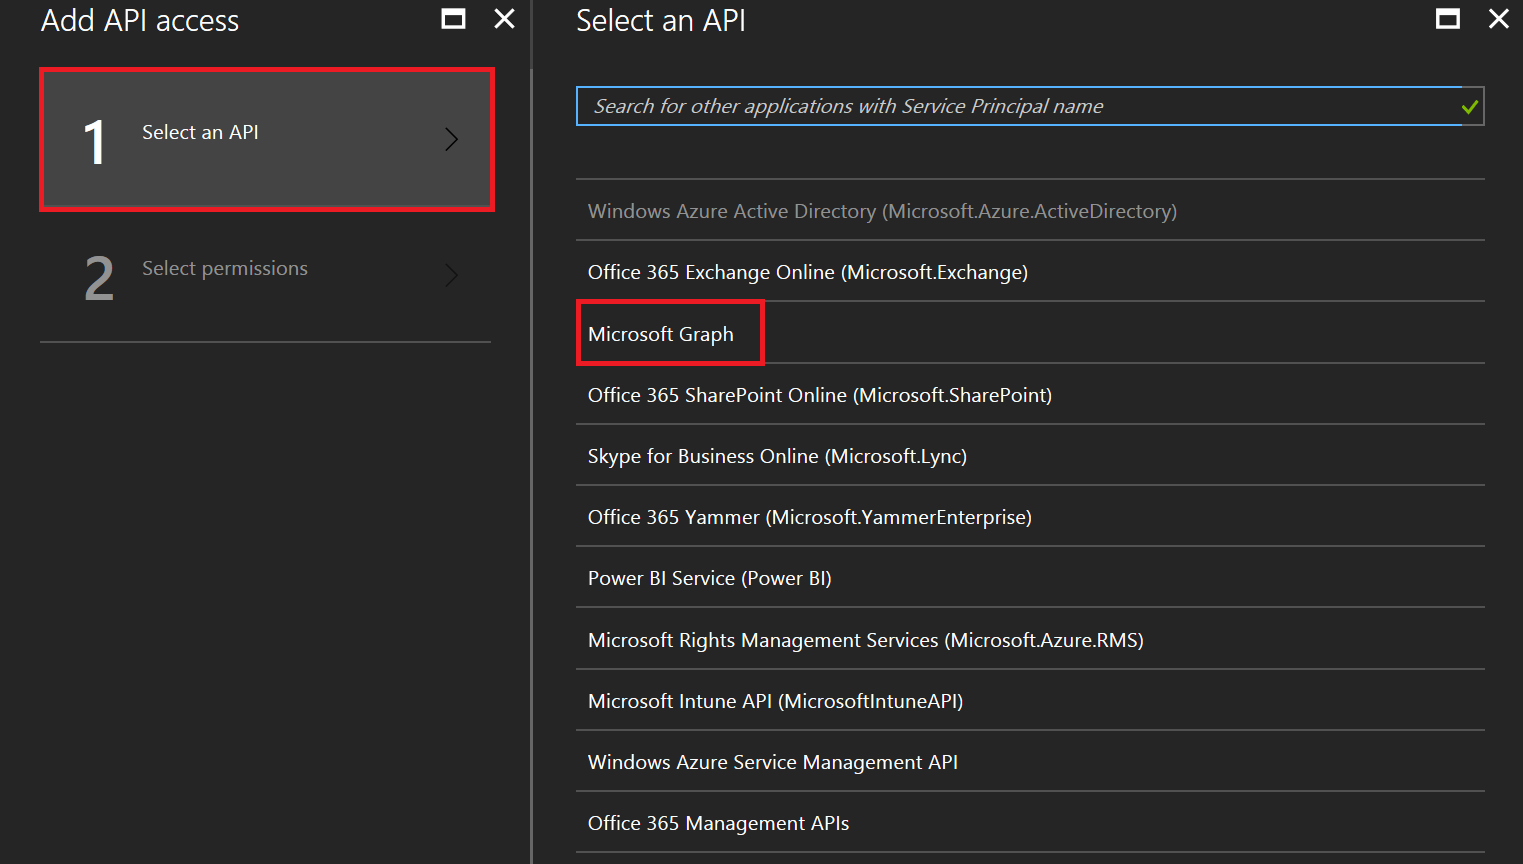
- From the Select an API blade, select Microsoft Graph and click Select.

- From the Select permissions blade, select the desired permissions this application should have and click Select. Read the next section of this blog post depending on the

- Click Done.
- Permission scopes are now configured for this application. If you’ve selected all of the currently available permissions scopes, you should see something like below.

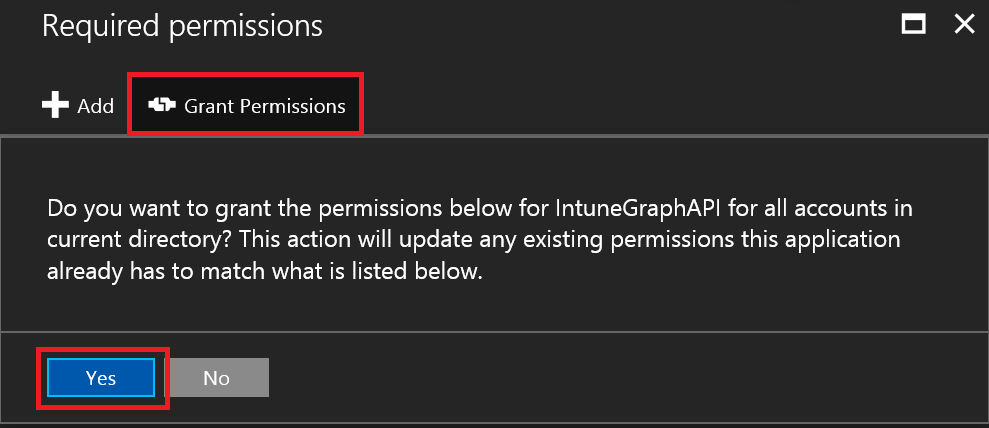
- Select the application, click Grant Permissions and then click Yes.


The App registration has now successfully been configured. Depending on the use case for the application that you’ve created, I recommend that to take a look at the different permission scopes available and what they give allow access to in terms of corporate resources.


Add comment