


If you have been using your Microsoft Account to logon onto Windows, you’re likely familiar with the fact that you can synchronize user and application settings across your devices. This has been around since Windows 8, and is a great feature for consumers. However, up until now, there has been little or no capabilities for enterprise users to leverage the same capabilities, synchronizing their settings with the cloud. But things are about to change, since Microsoft has just recently made a new feature available to Azure AD in a public preview called Enterprise State Roaming.
In this post I cover what Enterprise State Roaming is, how it can be configured in your Azure AD tenant in addition to enabling synchronization on a Windows 10 device.
NOTE! Enterprise State Roaming is currently in public Preview – hence there might be some issues along the road
What is Enterprise State Roaming
When Enterprise State Roaming is enabled in your Azure AD tenant, users that have joined their Windows 10 devices to Azure AD, gain the ability to securely synchronize their user and applications settings to the cloud with separation of personal and corporate data. This reduces the time needed for users when setting up a new device and enables an unified experience across all of the devices of that user. In addition to the personal synchronization in Windows, Enterprise State Roaming offers the following enhancements:
- Enhanced security – by encrypting data using Azure RMS before leaving the device. Data is also encrypted when stored in the cloud.
- Management and monitoring services – more control and visibility of users synchronizing their data and on which devices.
- Geographic location of data in the cloud – data will be stored in an Azure region based on the country of the Azure AD domain.
- Separation of corporate and personal data – organizations are in control of their data, and their is no mixing of corporate or personal data.
Enable Enterprise State Roaming in Azure AD
Enterprise State Roaming can be enabled by logging on to the traditional Azure portal.
1. Browse to manage.windowsazure.com and login with a Global Administrator account.
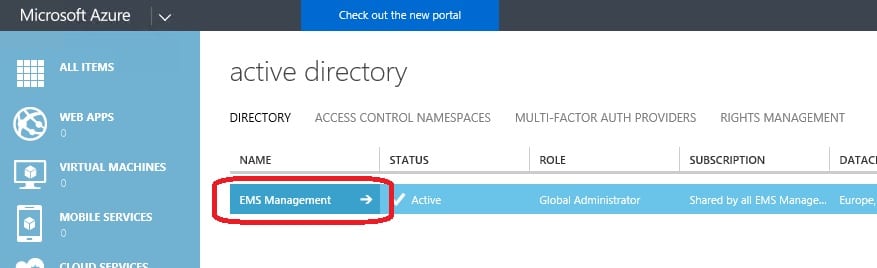
2. Go to Active Directory in the left menu and select your directory.
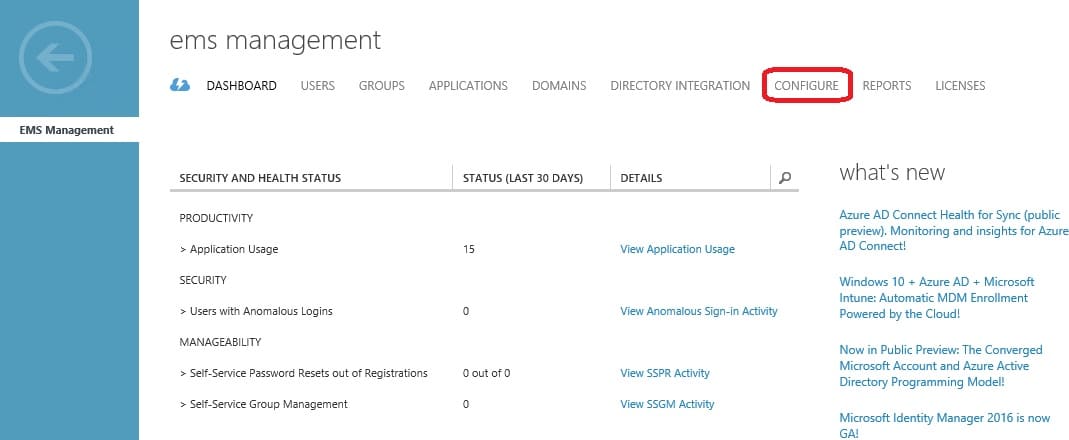
3. Click on Configure.
4. Scroll down to the device section and select whether to allow All or Selected users or groups to synchronize their settings. In this demonstration, I’ve selected a single user just to get going. I’d advise that you create an Azure AD group of pilot users and move on from there.
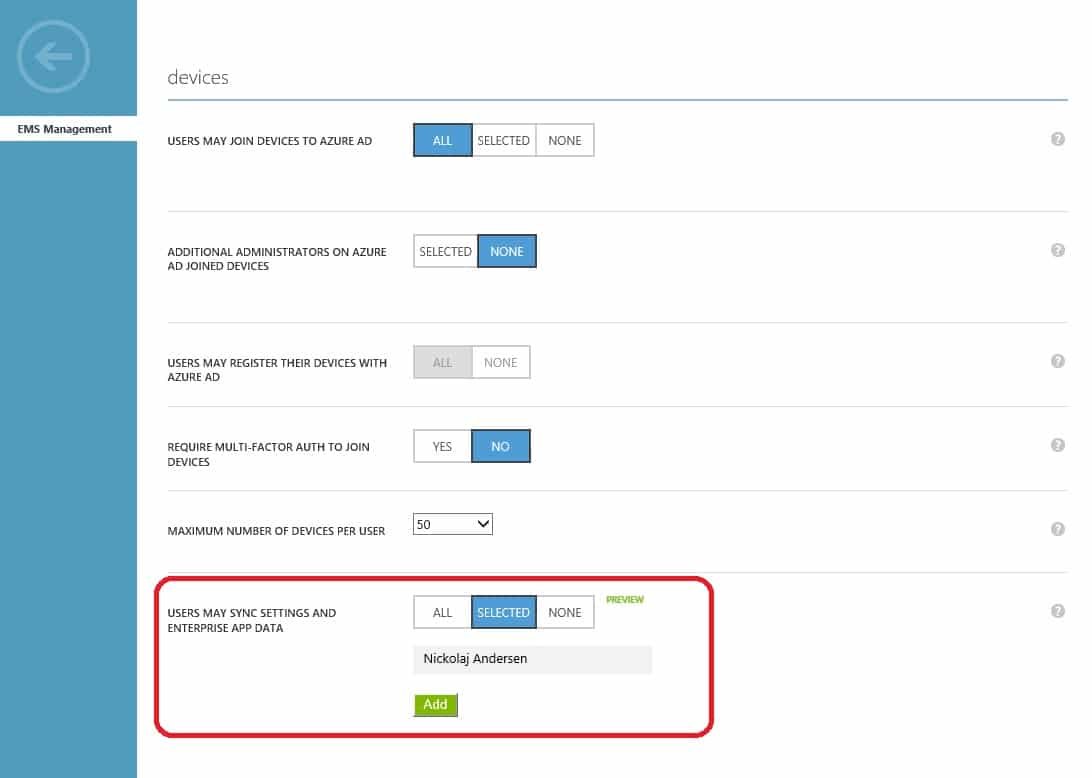
That’s it, you’ve now enabled your Azure AD tenant for Enterprise State Roaming.
Synchronization data, storage and retention
Since Enterprise State Roaming enables users to synchronize data from a corporate owned device, administrators should be familiar with what that data is and how the data being synced can be either removed or for how long it’s retained. In terms of where the data synced is being hosted, it’s determined by the country value configured for the Azure AD tenant. So if you’ve configured the country value to be Sweden, the synced data will be stored in one or more data centers in within Europe. You can view where your tenant is being hosted if you go to the traditional Azure portal, click on Active Directory in the left menu and then Directory. The Country or Region column shows what was selected upon the creation of your tenant:

If you’d like to read more about data retention and storage location, continue to read the documentation here:
https://azure.microsoft.com/en-us/documentation/articles/active-directory-windows-enterprise-state-roaming-enable/
We’ve now covered how to get started, how and where the roaming data is being stored. But what data is actually being roamed? You can divide the data into two different areas:
- Windows settings
- Application data
For Windows settings, these are settings that are built into the operating system, generally what personalize the users device. For an overview of what’s being roamed, see the list below:
- Theme – desktop theme, taskbar settings, etc.
- Internet Explorer settings – recently opened tabs, favorites, etc.
- Edge browser settings – favorites, reading list
- Passwords – Internet passwords, Wi-Fi profiles, etc.
- Language preferences – keyboard layouts, system language, dateand time, etc.
- Ease of access – high contrast theme, Narrator, Magnifier, etc.
- Other Windows settings – command prompt settings, application list, etc.
For a complete list of Windows settings that are can roam, see the following documentation:
https://azure.microsoft.com/en-us/documentation/articles/active-directory-windows-enterprise-state-roaming-windows-settings-reference/
As for Application data, only Universal Windows apps can leverage the Enterprise State Roaming capability. It’s up to the app developer to actually enable this functionality in the app, so don’t expect all Universal apps to have this functionality.
Configure Windows 10 to synchronize settings
In order to enable the synchronization of user and application settings data with Azure AD, for the user in question, you can easily set it up through the Settings app in Windows.
1. On your device that you want your settings synchronized, Open the Settings app
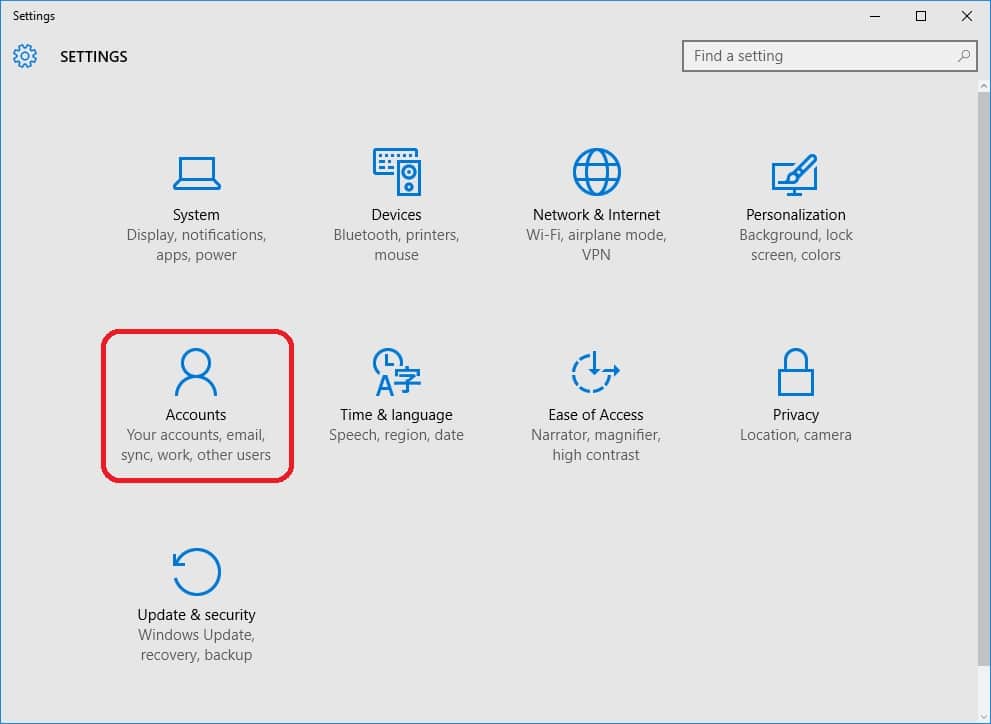
2. Click on Accounts.
3. Click on Sync your settings and turn on the slider called Sync settings.

4. Under Individual sync settings, you have the option to be more selective in terms of what’s being synced (roamed).
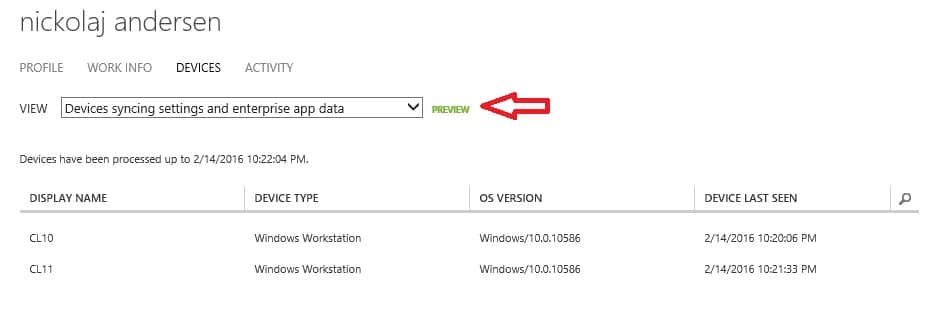
When users have configured their devices to roam, you as the administrator have the option to see what devices Enterprise State Roaming is enabled on. In the traditional Azure portal under a specific user, more specifically the under the Devices tab, there’s now a new view called Devices syncing settings and enterprise data. This view will show what devices are configured for Enterprise State Roaming.
End user experience with Enterprise State Roaming
Updated on 2016-02-22
It appears that some magic has happened over the weekend, since Enterprise State Roaming is now working in my lab environment. As promised, I’ve created a video of how I’m running Enterprise State Roaming in my lab environment showing two Windows 10 Enterprise 1511 virtual machines that are Azure AD joined, logged on with the same user account and where Sync settings is activated. In the video below I’ve edited for demonstration purposes by cutting it down to around 40 seconds. It should be said that the total time it took for the changes to appear on the second virtual machine was only about 1 minute, but instead of boring you with those extra 20 seconds I’ve simply removed them.
Enterprise State Roaming is a great addition to the whole provisioning scenario in regards to Windows 10 and Azure AD join with automatic Intune enrollment. Now that it seems to work, I’d recommend that you check it out!


Hi;
I am the PM from Enterprise State Roaming team. I am interested in knowing what’s in Enterprise State Roaming not working for you. I would love to offer my help. Can you please ping me directly on email or tweet on @gunjanjain123
[…] Source: Synchronize User and Application settings to Azure AD with Enterprise State Roaming | System Center … […]