


Before installing a ConfigMgr 2012 SP1 Central Administration Site (CAS) on Windows Server 2012, you should think about your hierarchy and if it’s really necessary. In order to give you a few good examples when to implement a CAS and when not, check out this excellent blog post. If your hierarchy will support more than 100.000 clients you’ll need a second Primary Site and therefor a CAS too. This blog post will guide you through the necessary steps to take in order to join your installed-to-be CAS with your existing ConfigMgr 2012 SP1 Primary Site.
Overview
- Configure the System Management container
- Add Site servers as local administrators
- Install a dedicated SQL Server for the CAS
- Install CAS prerequisites with PowerShell
- Install a ConfigMgr 2012 SP1 CAS
Configure the System Management container
1. Log on to DC01 (or one of your domain controllers).
2. Launch Active Directory Users and Computers.
3. Click View and then Advanced Features.
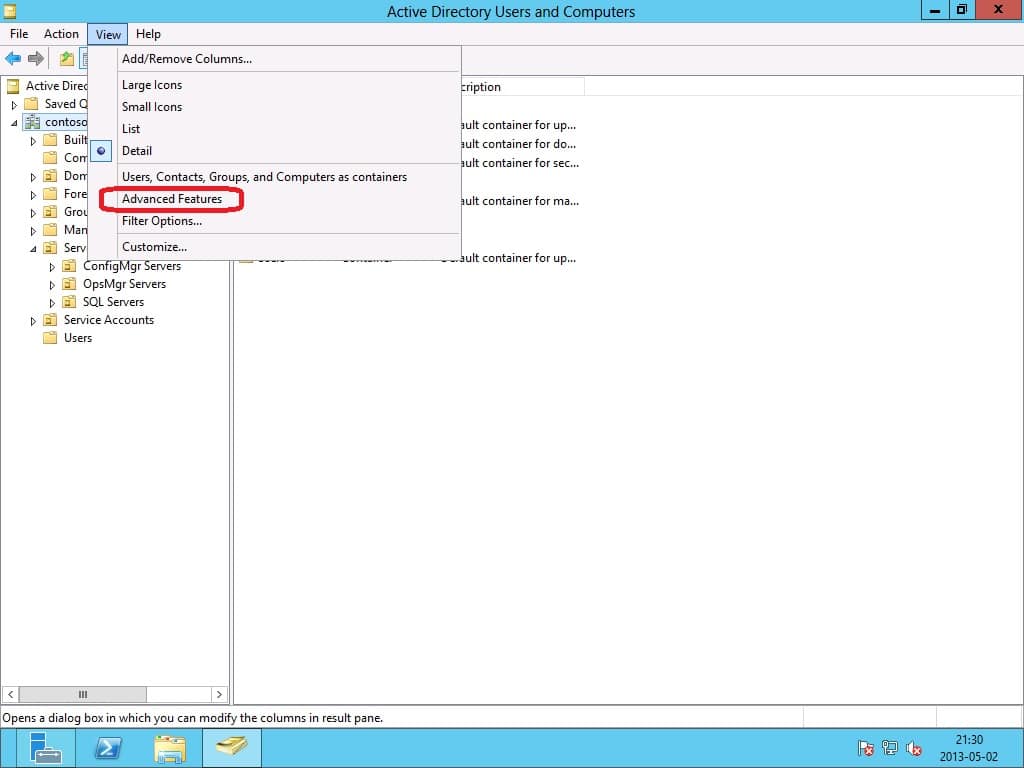
4. Expand System, right click on System Management and select Properties.

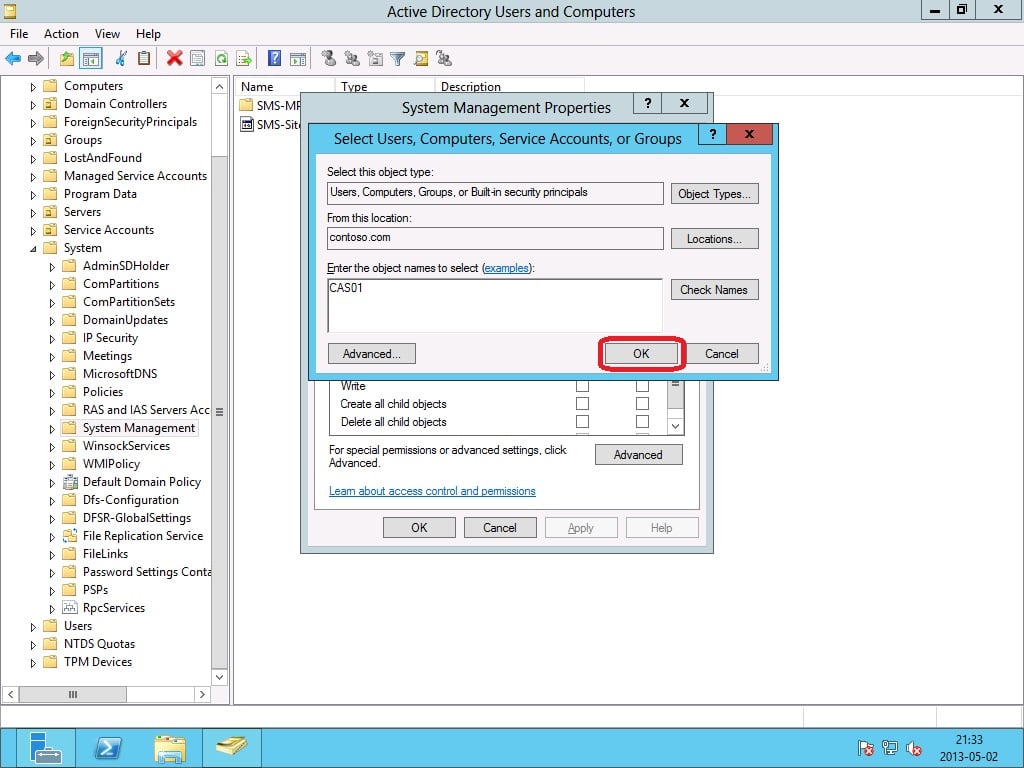
5. Go to the Security tab, click Add, click Object Types and select Computers. Type CAS01 and click OK.
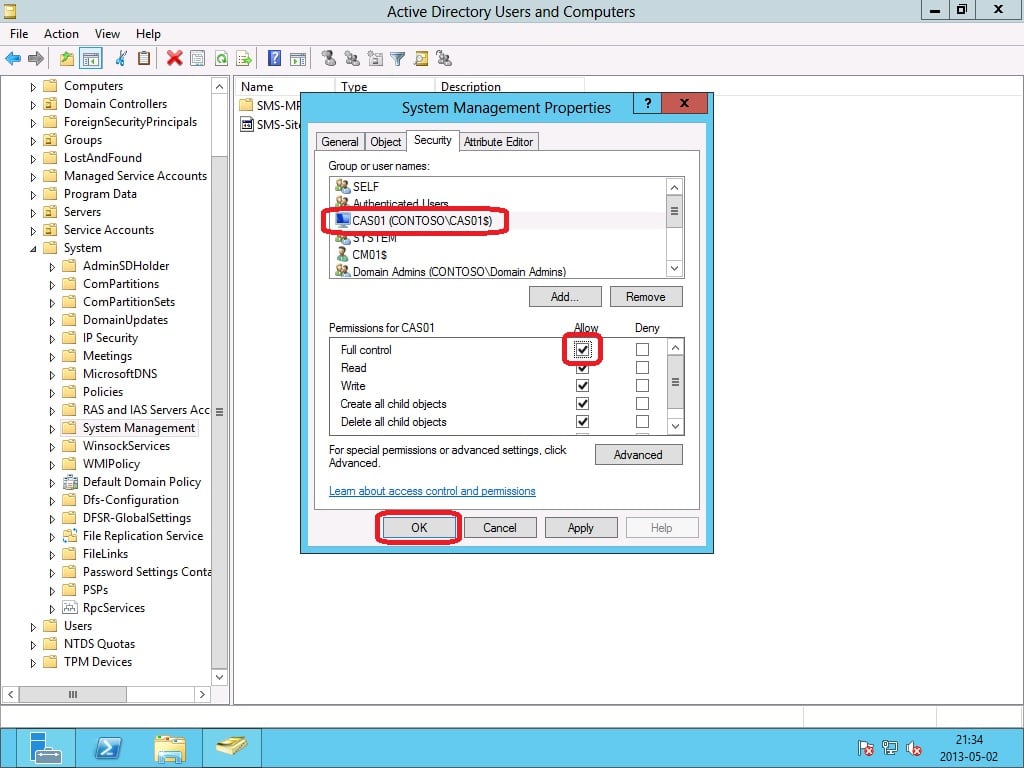
6. Give the CAS01 computer account Full control permissions and click OK.
Add Site servers as local administrators
We need to add CAS01 (computer account) as a local administrator on the dedicated SQL Server CMSQL02 for the CAS. In addition to that, CAS01 also needs to be added in the local administrators group on the stand-alone Primary Site server that will be expanded into a hierarchy together with the CAS.
1. Log on to CMSQL02 (or your dedicated SQL Server for the CAS) as an administrator.
2. Launch Computer Management, expand Local Users and Groups and select Groups.
3. Double click on Administrators and click Add.
4. Click on Object Types, select Computers and click OK.
5. Type CAS01 and click OK.
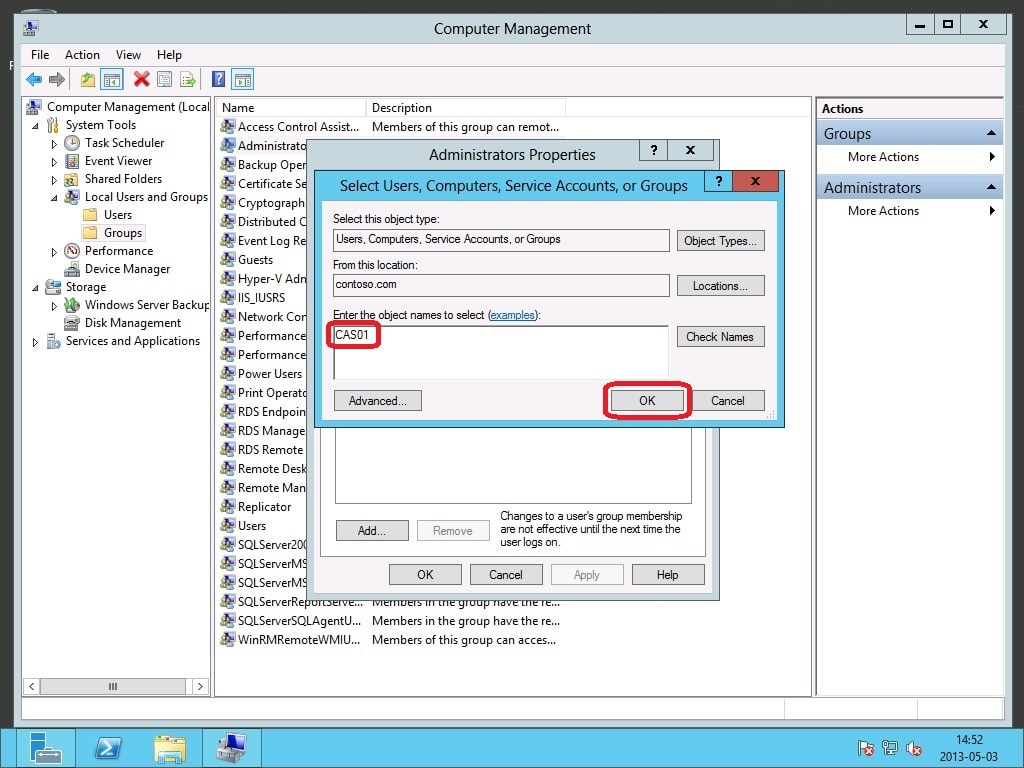
Perform the above steps on your Primary Site server, where you should add CAS01 to the local administrators group on CM01.
Install a dedicated SQL Server for the CAS
Follow this guide in order to install and configure a dedicated SQL Server for the CAS.
Install CAS prerequisites with PowerShell
1. Download my ConfigMgr 2012 SP1 prerequisites script and save it to C:\Scripts on CAS01.
2. Open an elevated PowerShell prompt.
3. Run the following command and wait for it to complete. Your attention is needed during the prerequisites installation.
Install-SCCMPrereq.ps1 -SiteType CAS
4. Run the following command and wait for it to complete.
Install-SCCMPrereq.ps1 -InstallWADK
Install a ConfigMgr 2012 SP1 CAS
The account that will perform the installation needs to have the sysadmin permission on the Primary Site SQL Server. We’ll log on and perform the installation with the CONTOSO\CMAdmin account created earlier in this series.
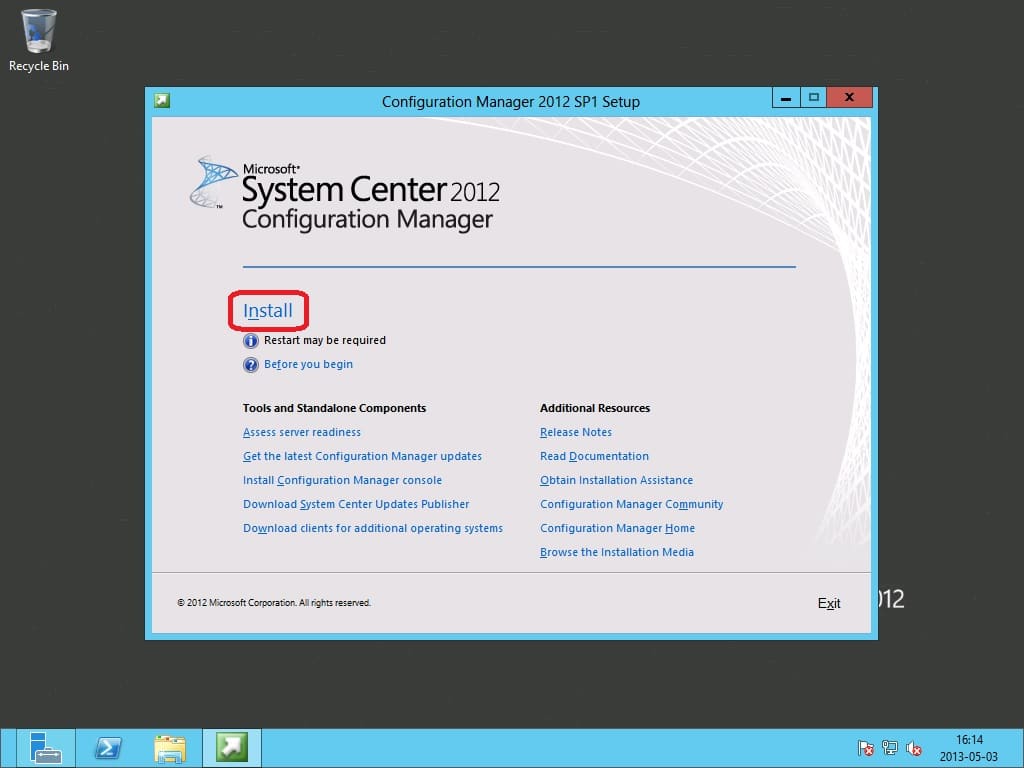
1. Mount the ConfigMgr 2012 SP1 ISO.
2. Launch the setup and click Install.
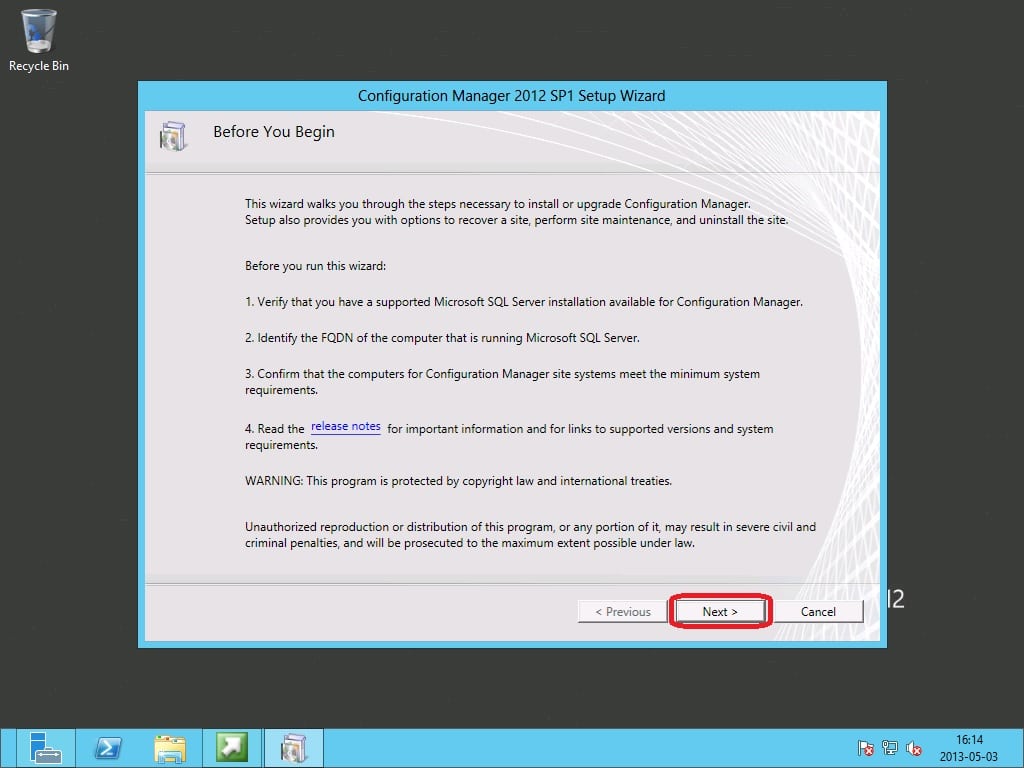
3. On the Before You Begin page, click Next.
4. On the Getting Started page, select Install a Configuration Manager central administration site and click Next.

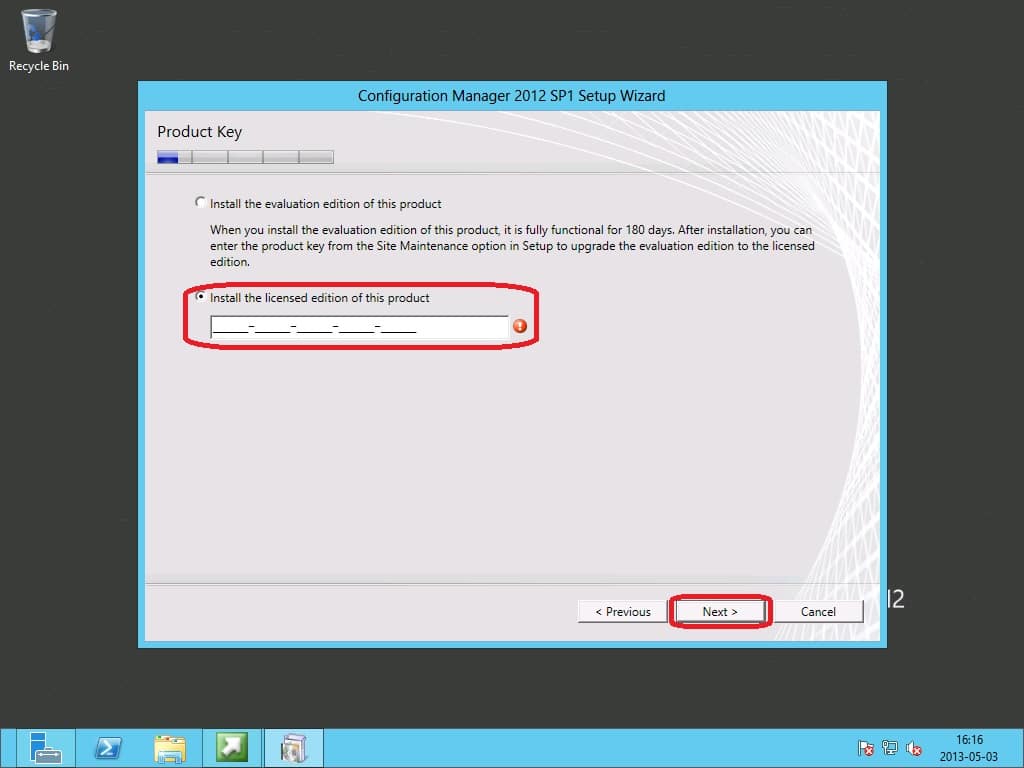
5. Enter your product key on the Product Key page and click Next.
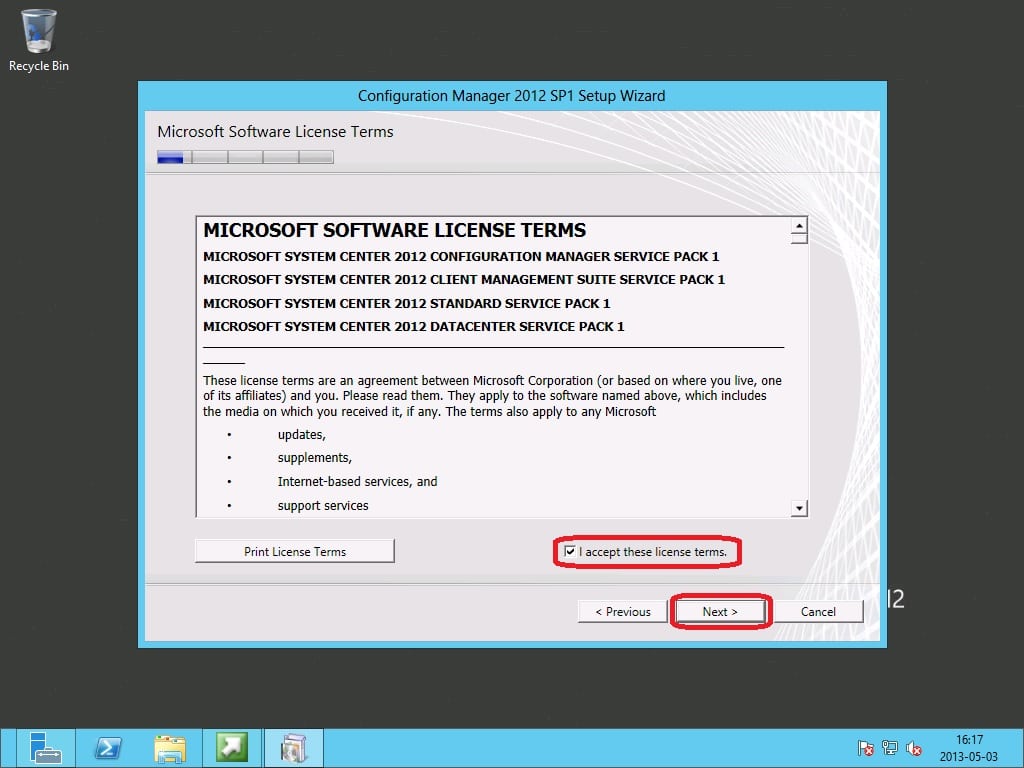
6. Accept the license terms and click Next.
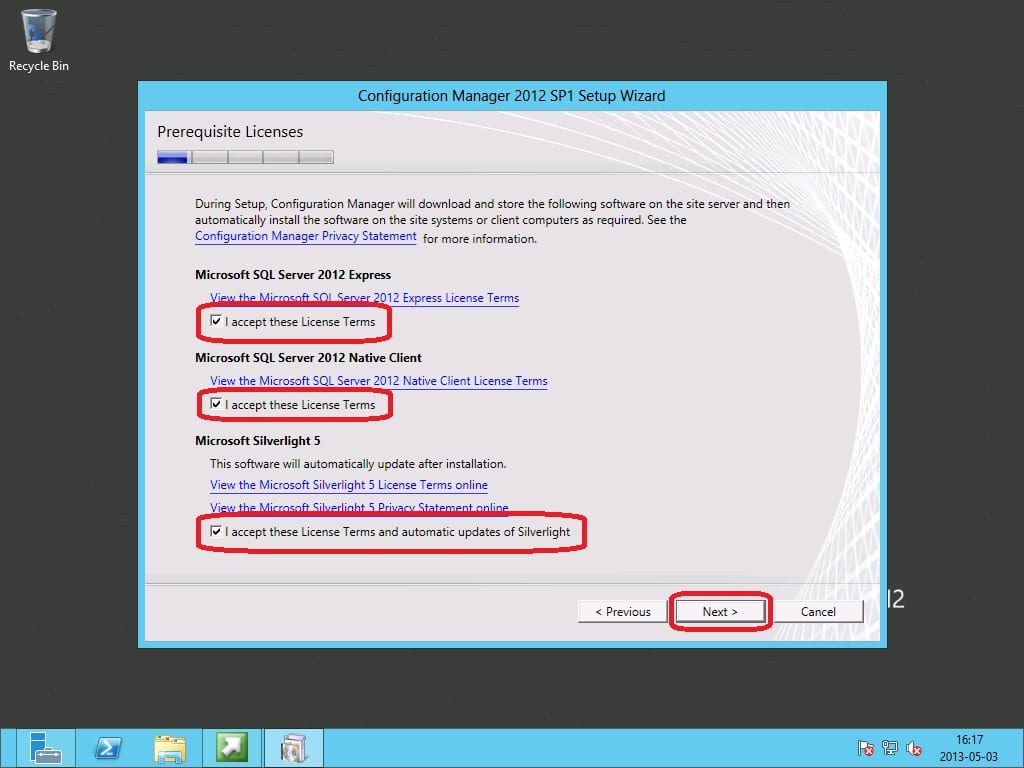
7. On the Prerequisite Licenses, accept all license terms and click Next.
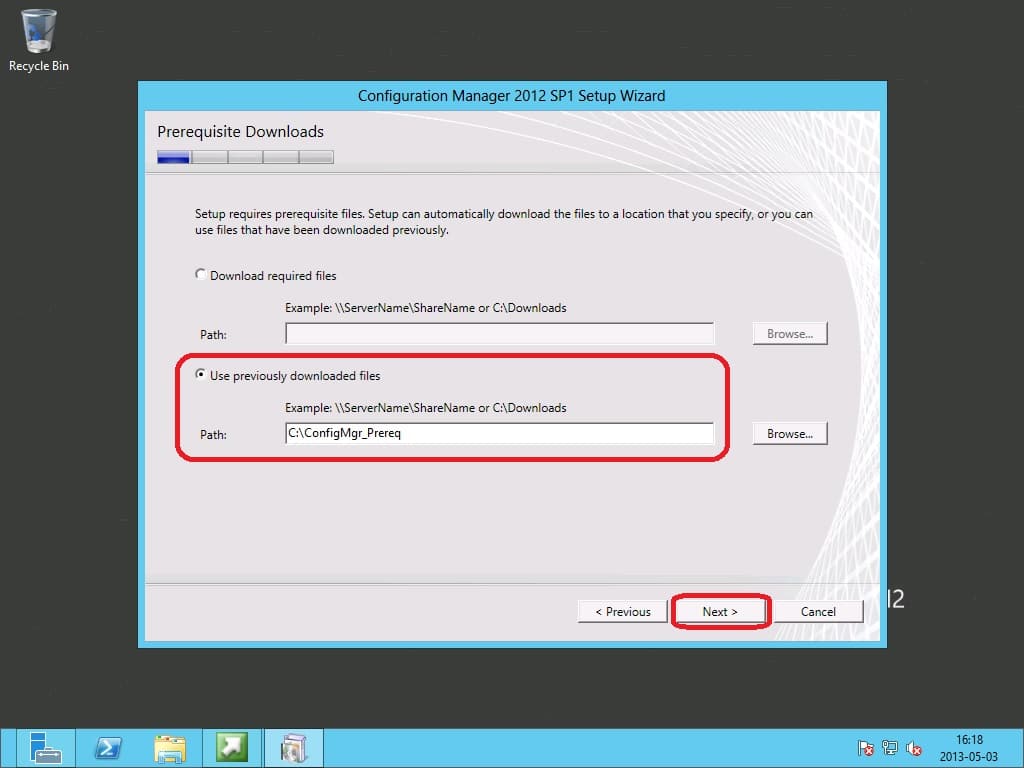
8. On the Prerequisite Downloads page, select Use previously downloaded files and enter C:\ConfigMgr_Prereq in the Path field. Click Next.
9. On the Server Language Selection page, choose the languages you’d like to support (default English) and click Next.

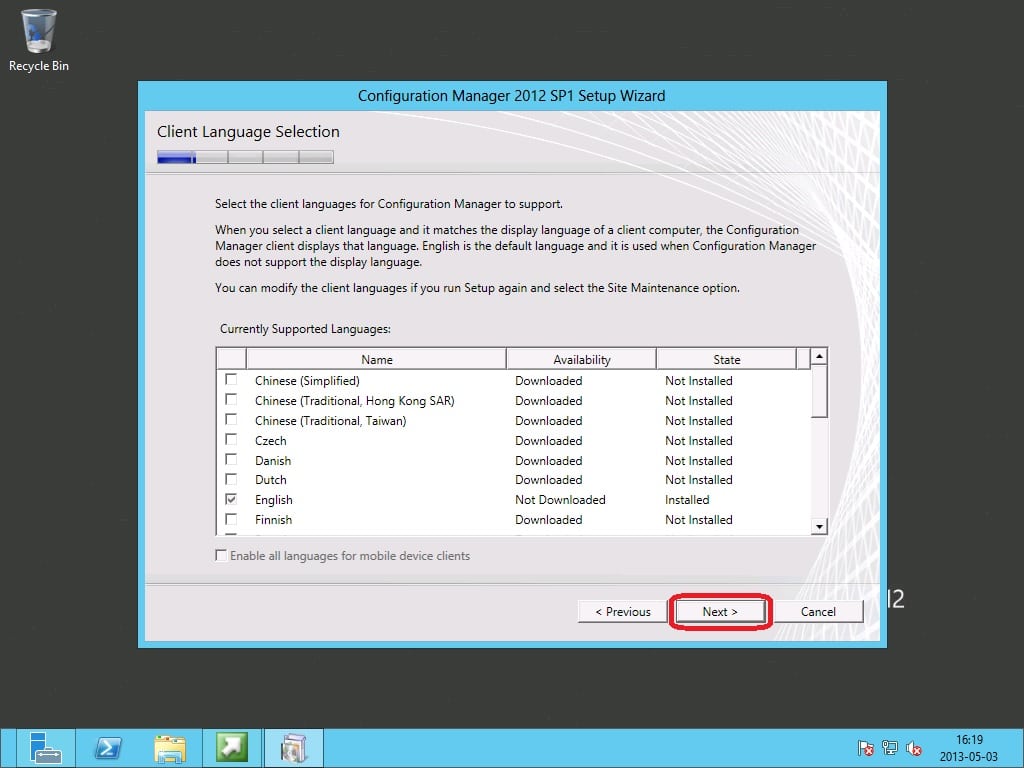
10. On the Client Language Selection page, choose the languages you’d like your clients to support (default English) and click Next.
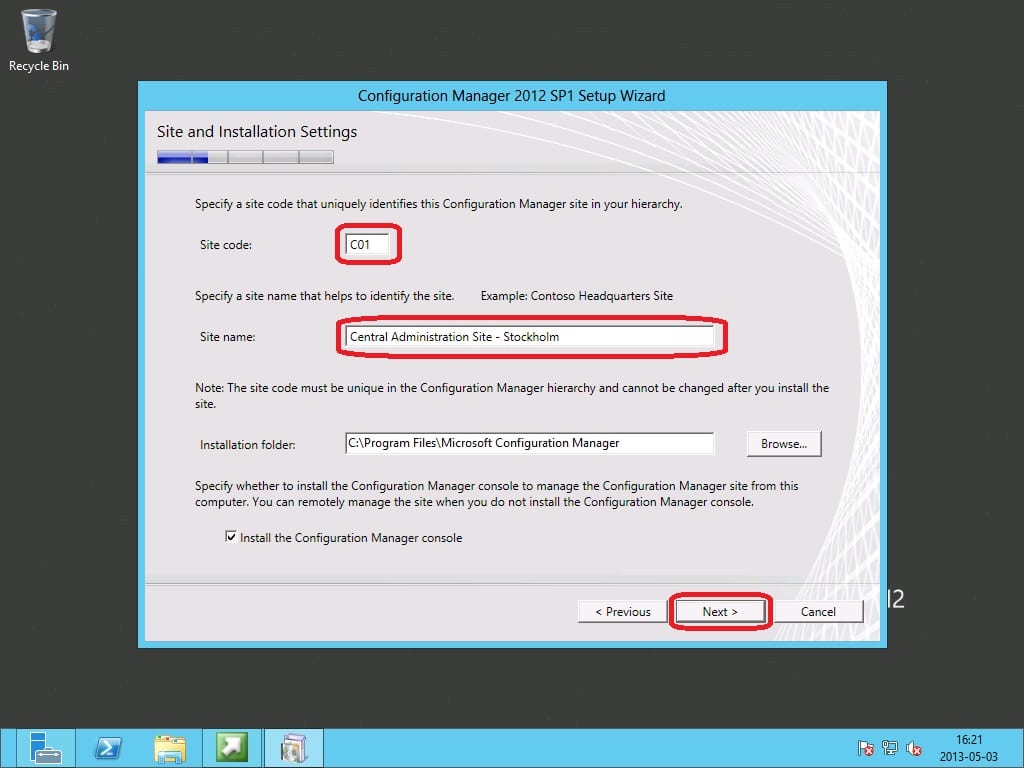
11. On the Site and Installation Settings page, enter a site code for the CAS. Remember that the site code needs to be unique and cannot be changed (in a supported way) once the installation is completed. In this post we’ll be using C01 as the site code for the CAS. In the Site name field, enter a custom name for your CAS (e.g. Central Administration Site – <location>). Click Next.
12. On the Central Administration Site Installation page, select Expand an existing stand-alone primary into a hierarchy and enter the FQDN of the stand-alone Primary Site server (in this case CM01.contoso.com). Click Next.

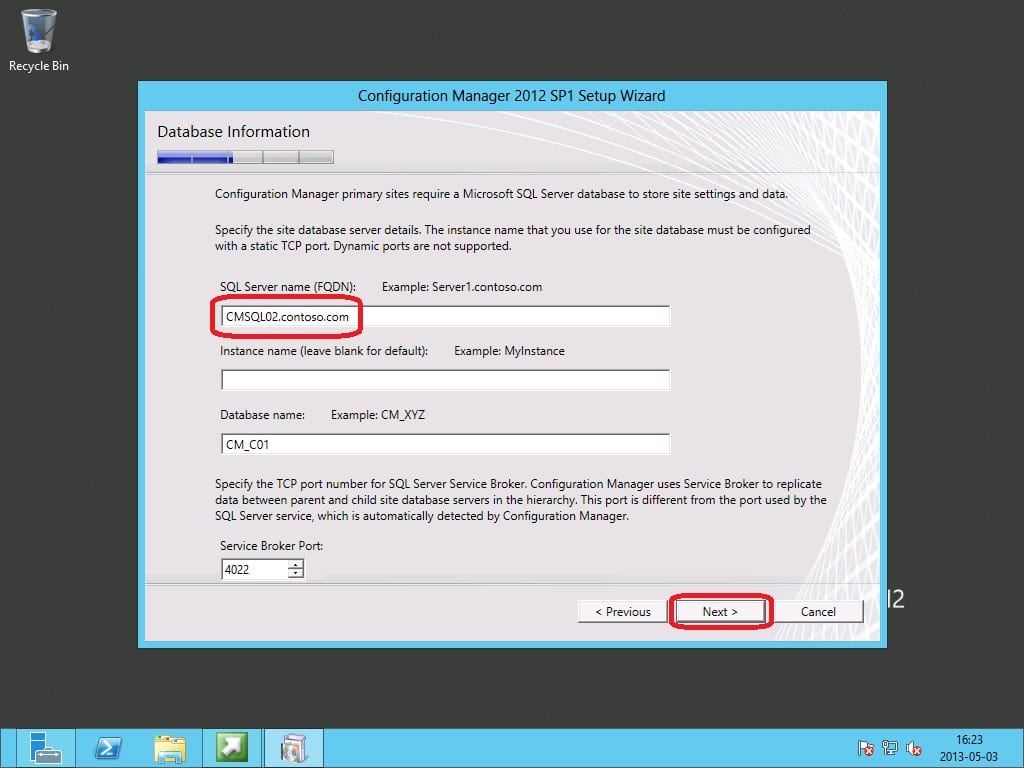
13. On the Database Information page, enter the dedicated SQL Server FQDN (CMSQL02.contoso.com) in the SQL Server name (FQDN) field. If you’ve followed my post on how to install the SQL Server for ConfigMgr 2012 SP1, you should leave the Instance name (leave blank for default) field blank. On the other hand if you’ve installed a SQL Server with a custom instance name, enter that name in the field. Click Next.
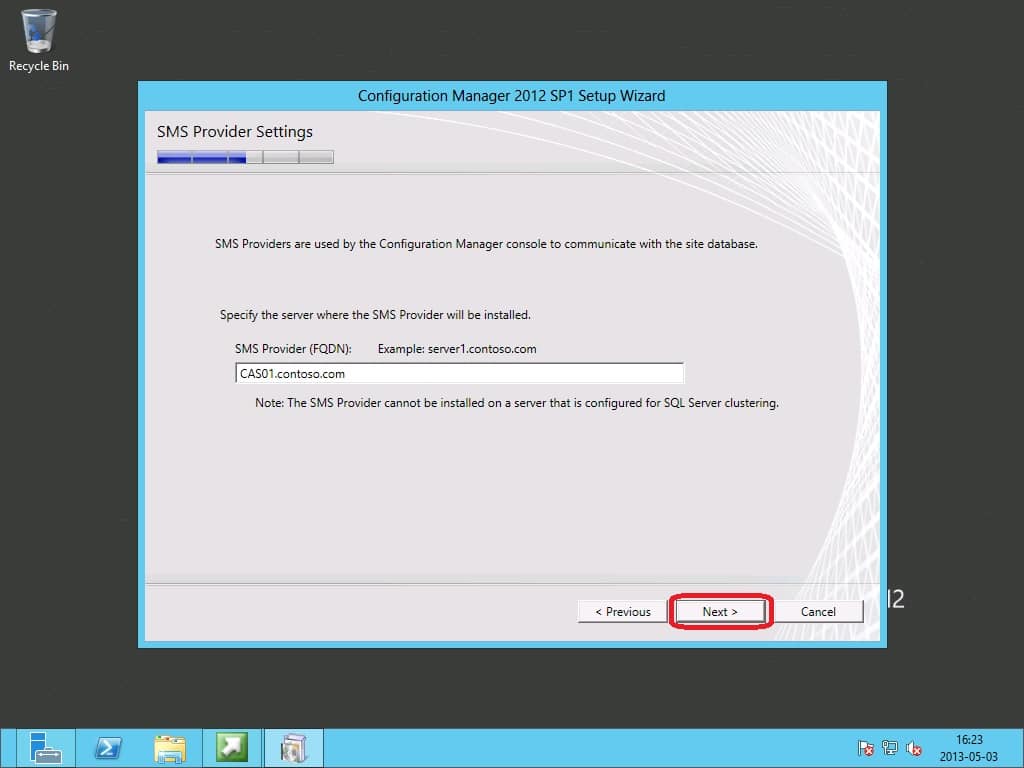
14. On the SMS Provider Settings page, enter the FQDN of the server where you wish to install the SMS Provider. This could be your Central Administration Site server, dedicated CAS SQL Server or a remote server. The SMS Provider is the component which the Configuration Manager console communicates with for database access. If you’re looking for performance in the Configuration Manager console, you should install the SMS Provider on the SQL Server. But if you’re looking to off-load your SQL Server, install the SMS Provider on the Central Administration Site server. I’ve always installed the SMS Provider on the CAS server instead of the SQL Server. Click Next.
15. On the Customer Experience Improvement Program page, choose if you’d like to participate or not. Click Next.

16. On the Settings Summary page, click Next.

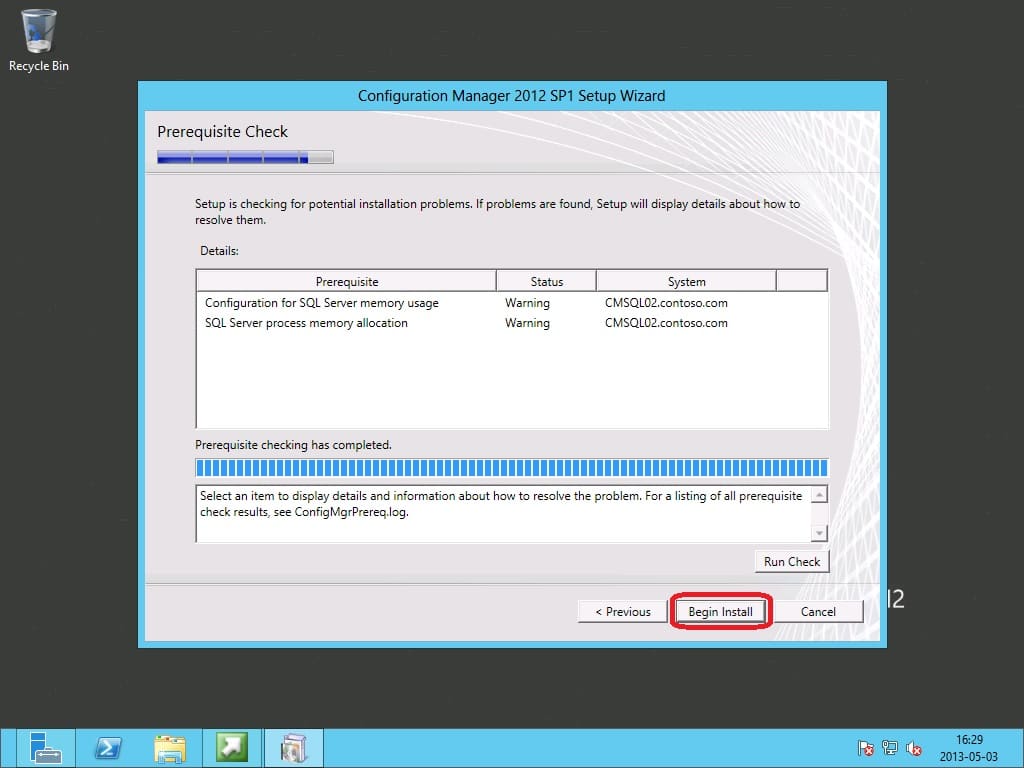
17. On the Prerequisite Check page, click Begin Install. The installation will now begin and take approximately 10-20 minutes depending on your hardware and environment.
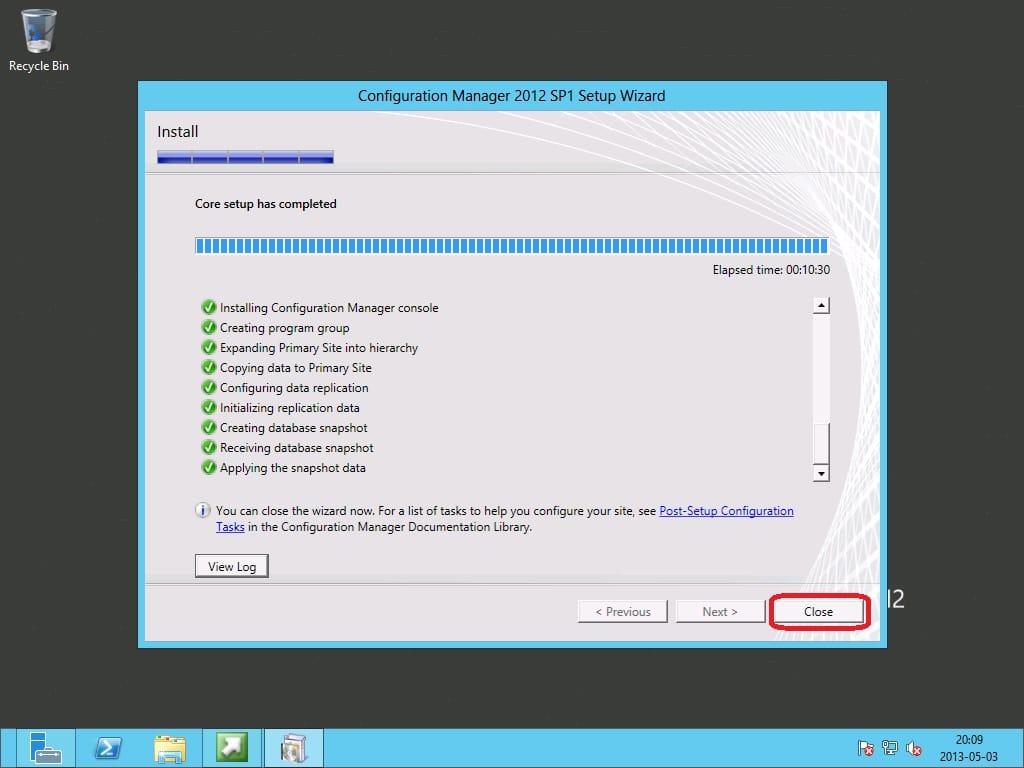
18. When the installation is completed, click Close.


Add comment