


In this blog post we’ll go through the necessary steps you need to take in order to install and configure a Reporting Services point on a remote Site system. Most of the time, a single Reporting Point is enough for the common setup of ConfigMgr 2012, but in some cases you’ll need a secondary Reporting Services point not running locally on your Primary Site server (since it’s best practice to run the SQL Server locally on the Primary Site server, that’s where you’d have the Reporting Point in the first place).
Overview
- Environment overview
- Requirements
- Install Windows Features
- Install SQL Server with SSRS
- Add a Site System server with Reporting Services point role
- Verify the Reporting Services point works
Environment overview
In my lab environment I’m running a CAS with two Primary Site servers. At my CAS I already have a Reporting Services point that is up and running on the local SQL Server on the CAS server. The goal with this post is to add a secondary Reporting Services point on a remote Site System server called RP01.contoso.com. RP01 is a clean install of Windows Server 2012 R2.
Requirements
The requirements for installing a remote Reporting Services point in ConfigMgr 2012 are not that extreme to be honest. You’ll need to install and configure the following before we can add the Reporting Services point Site System role:
- .NET Framework 3.5
- Supported version of SQL Server
In addition to the software and windows features that needs to be in place, service accounts for SQL Server and SQL Server Reporting Services needs to be created before hand but are not a requirement, although it’s considered a best practice. For this blog post I’ve created the following service accounts:
- SQL_SDE (used for the Database Engine)
- SQL_SA (used for the Server Agent)
- SQL_RS (used for Reporting Services)
- CM_RS (used for ConfigMgr to connect to the SQL database, although in this post I’ve used the SQL_RS for that purpose)
Install Windows Features
SQL Server requires .NET Framework 3.5 to be installed, so we need to install that before we continue. I prefer to do this with PowerShell, by running the following command:
Add-WindowsFeature -Name "NET-Framework-Core"
If the above command fails with an error complaining about that the source files are not available, run the command below instead. Here we specify the -Source parameter pointing to the DVD-drive with a mounted Windows Server ISO (in my case Windows Server 2012 R2):
Add-WindowsFeature -Name "NET-Framework-Core" -Source D:\sources\sxs
Install SQL Server with SSRS
Now that we’ve added the necessary windows features, we can continue with installing SQL Server on RP01.contoso.com. Before we start, mount the SQL Server ISO on the server or copy the installations files to a directory of your choice. In this tutorial we’ll perform a simple installation of SQL Server, so we will not split the different directories into separate volumes. Although it’s a good idea to scale your server from the start and plan for how much load there might be on the Reporting Services point.
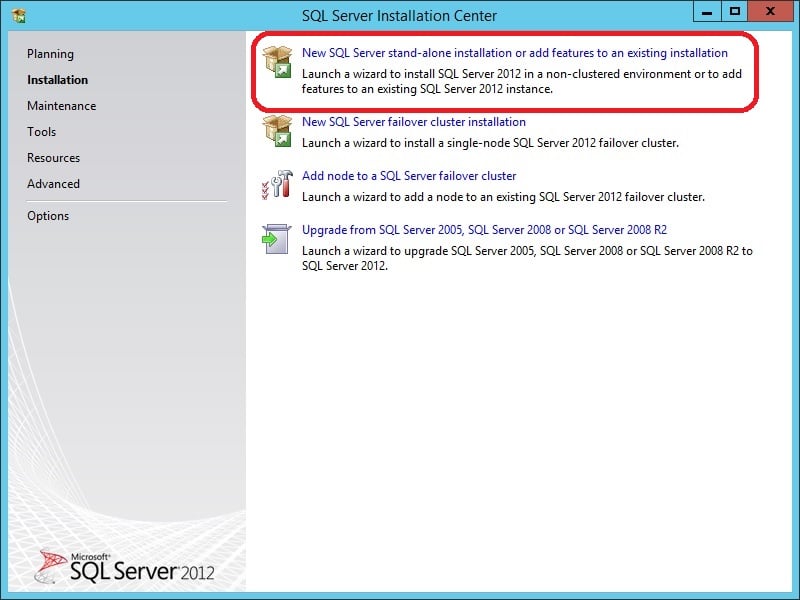
1. Launch the SQL Server installation from the ISO or source directory.
2. In the left pane, click on Installation and then choose New SQL Server stand-alone installation or add features to an existing installation.
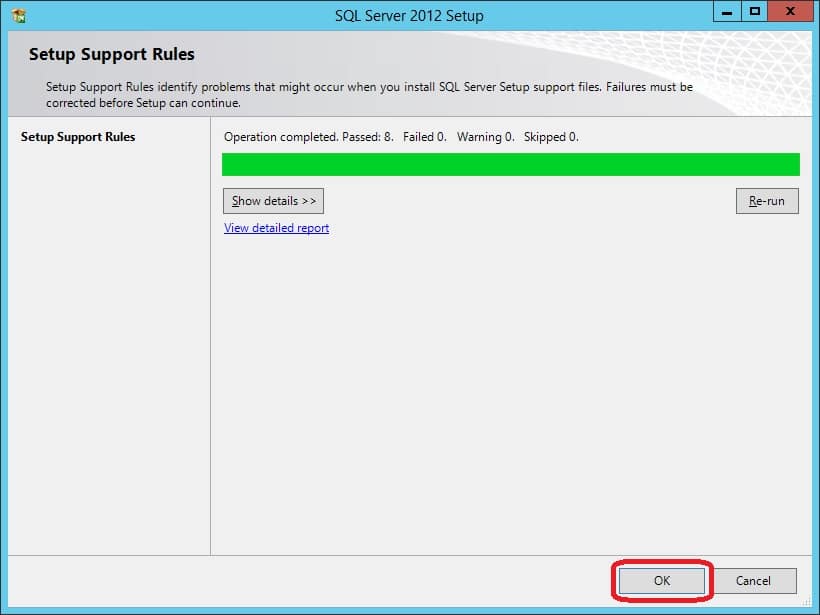
3. Click OK on the Setup Support Rules page.
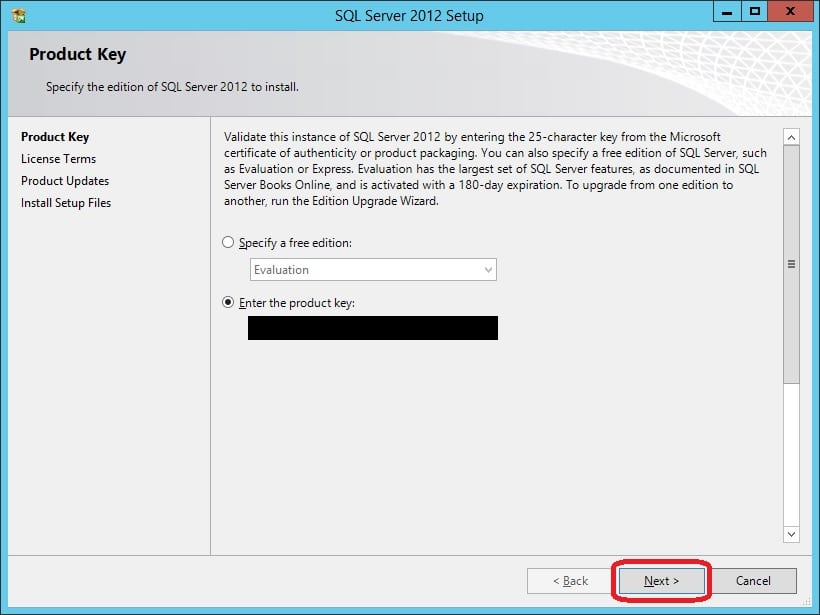
4. Either specify the Product Key or just click Next if it’s already pre-populated.
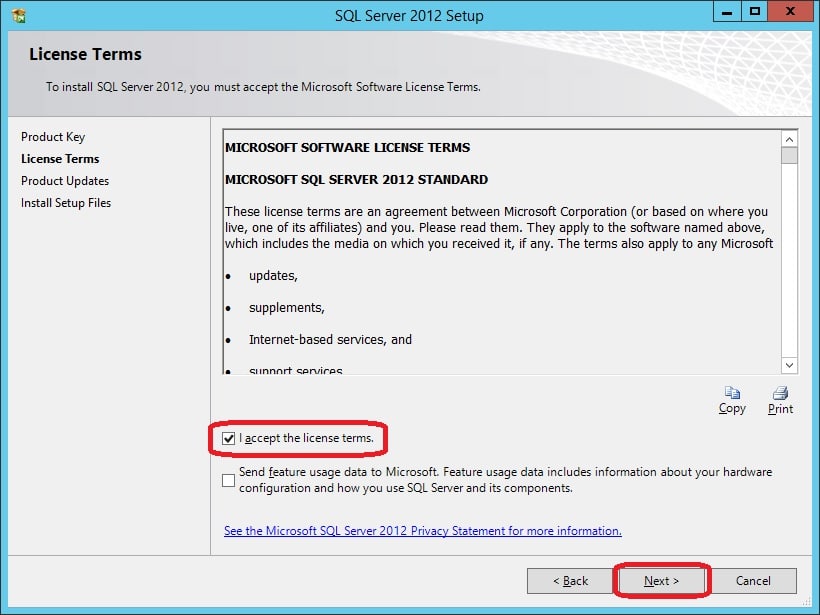
5. Accept the license terms and click Next.
6. Click Next on the Product Updates page and wait for it to update itself if necessary.

7. On the Setup Support Rules page, click Next.
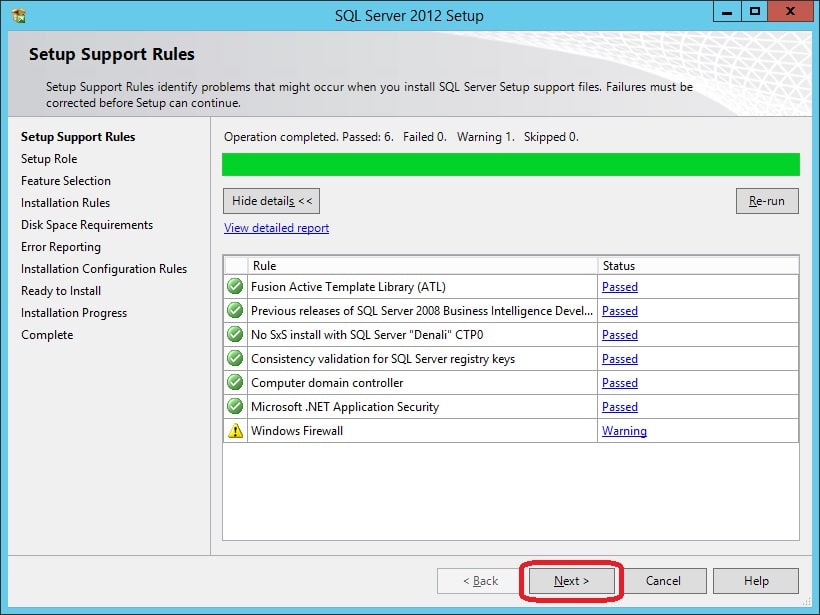
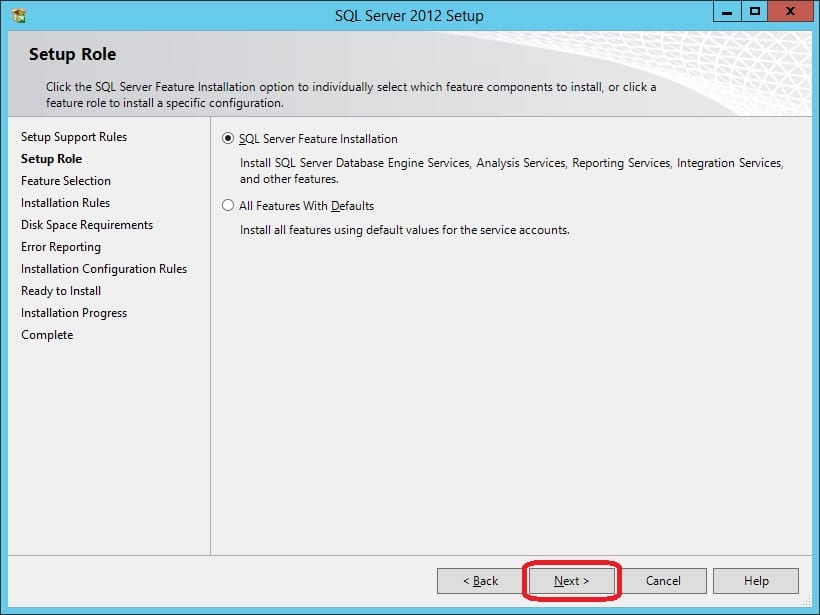
8. Make sure to select SQL Server Feature Installation and click Next on the Setup Role page.
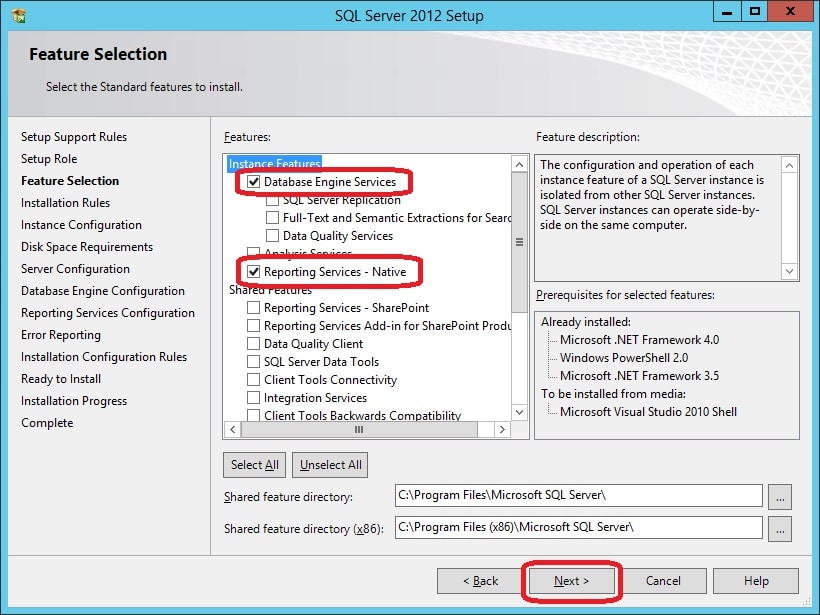
9. On the Feature Selection page, make the following selections:
- Database Engine Services
- Reporting Services – Native
In cases where you need to divide the load on your server, specify another location for the shared feature directories. Click Next.
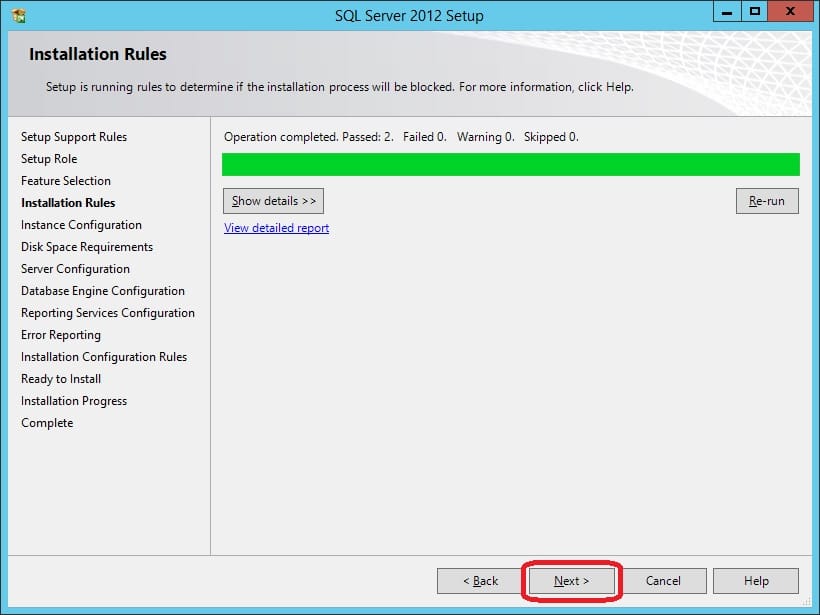
10. Click Next on the Installation Rules page.
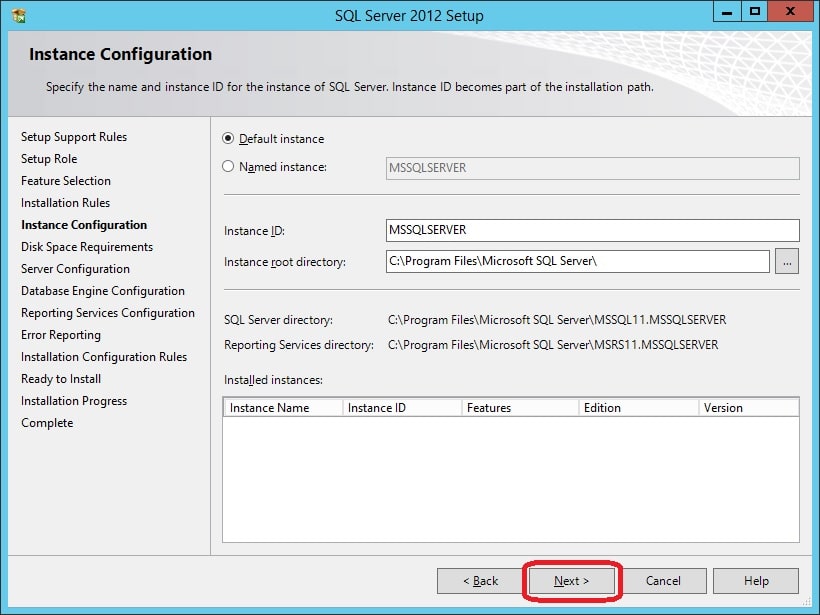
11. We’ll just use the default Instance Configuration options, click Next. I have to highlight though that you should take into account that it might be a good idea to scale your server depending on the expected load.
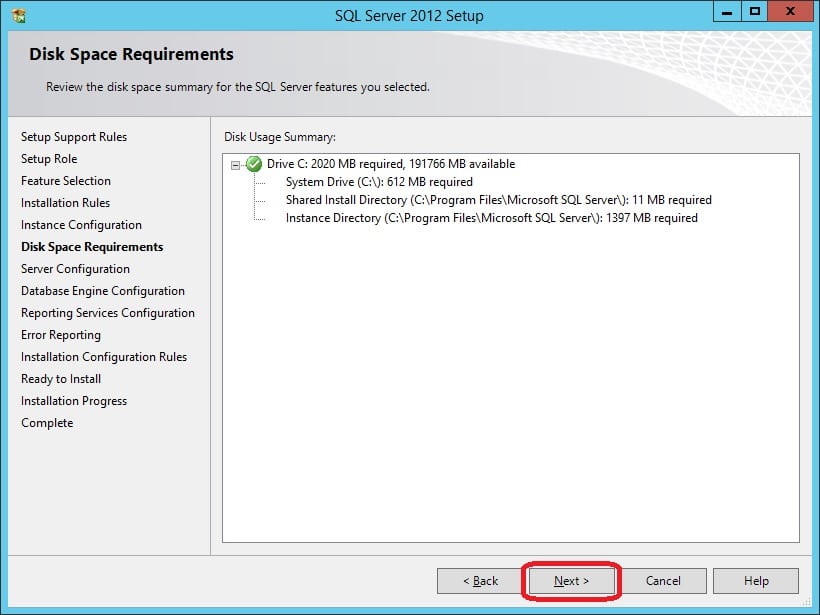
12. Acknowledge the Disk Space Requirements by clicking Next.
13. On the Server Configuration page under Service Accounts, enter the service accounts that we’ve prepared earlier. As you can see in the picture below, I’ve used a service account for all of the services except for the SQL Server Browser which runs fine as NT AUTHORITY\LOCAL SYSTEM.

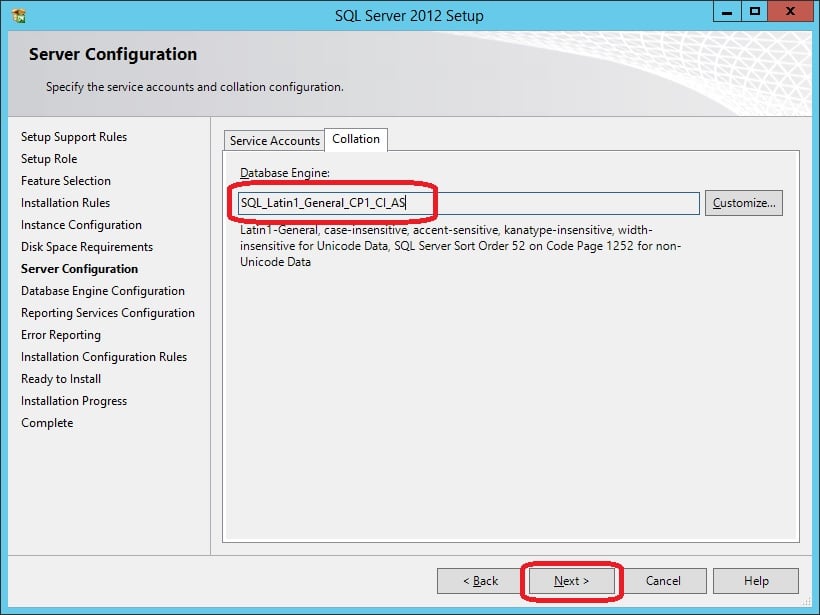
14. Before we click Next on the Server Configuration page, make sure that the Collation is set to SQL_Latin1_General_CP1_CI_AS, which can be done under the Collaction tab. Click Next.
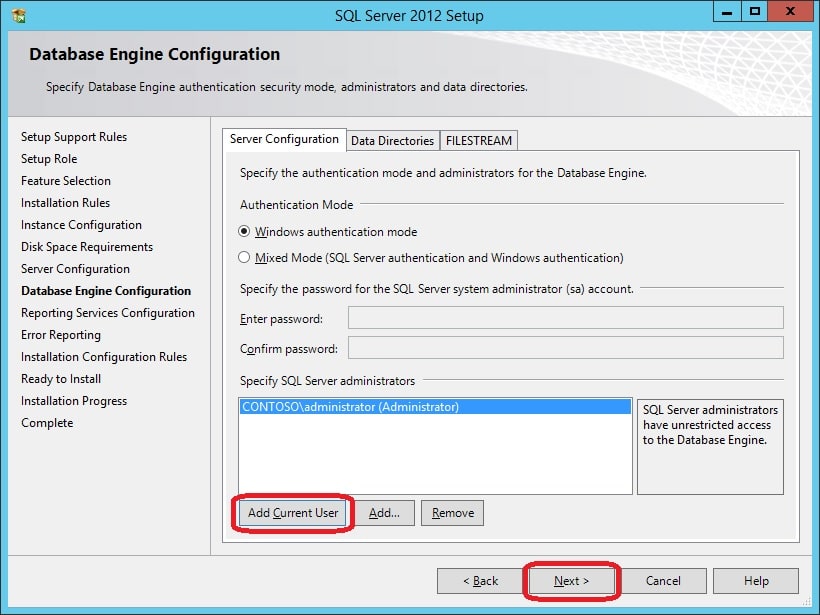
15. Click on Add Current User. As I pointed out during the Instance Configuration, you should think about how you scale your server from the start. If the default directory locations are not sufficient, go to the Data Directories tab and configure in accordance with your server volume configuration. It could be a good idea to split the tempDB and regular databases on separate volumes for instance. Click Next.
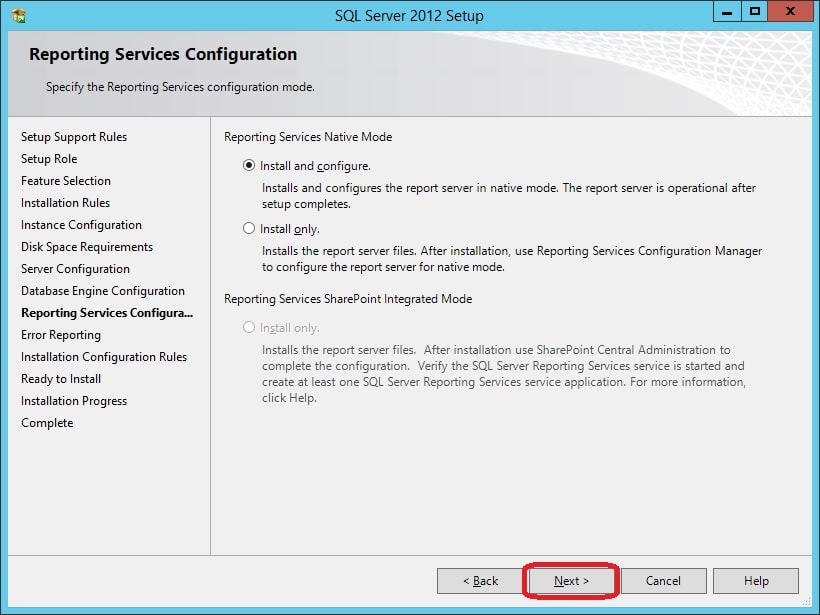
16. On the Reporting Services Configuration page, click Next.
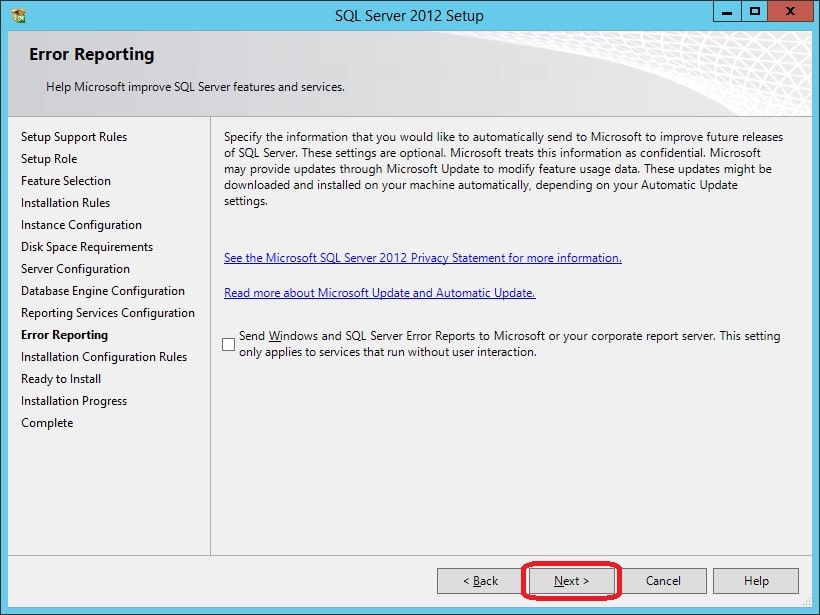
17. Click Next on the Error Reporting page.
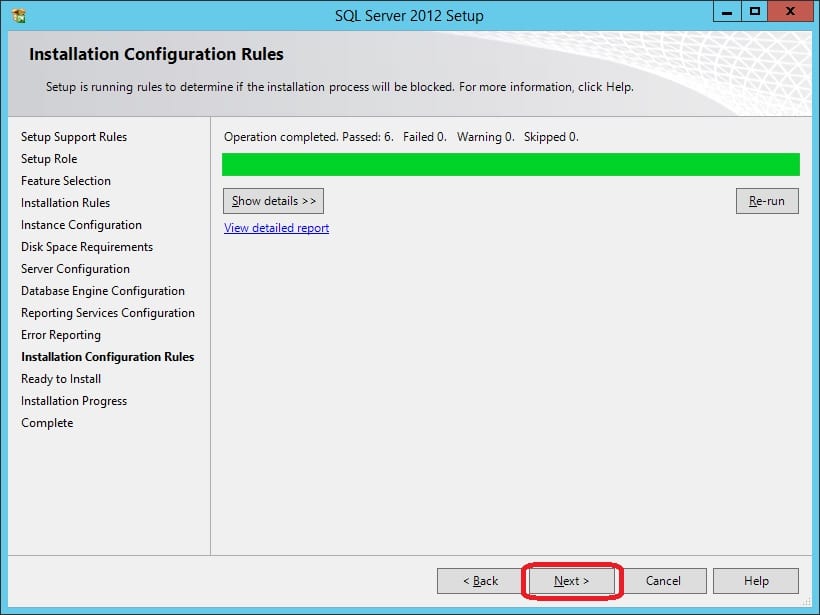
18. Click Next on the Installation Configuration Rules page.
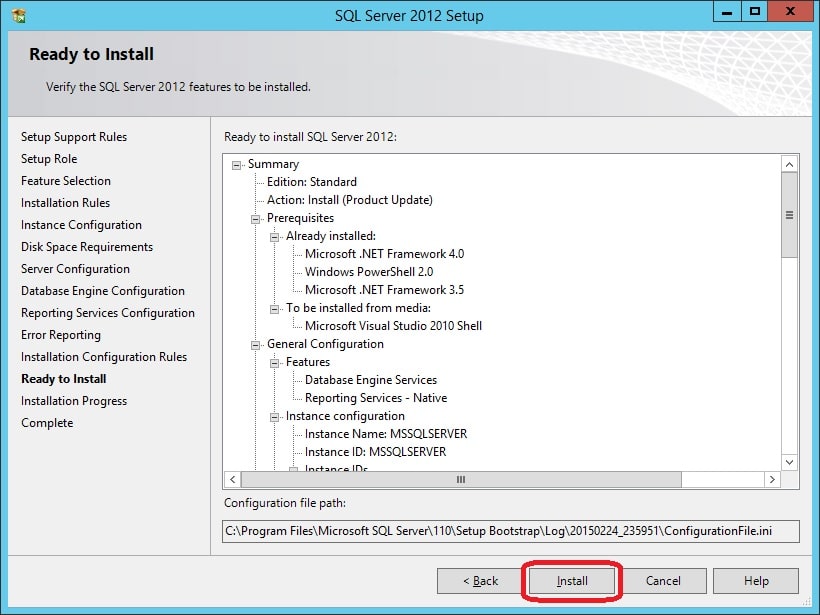
19. Now we’re ready to install, so click Install.
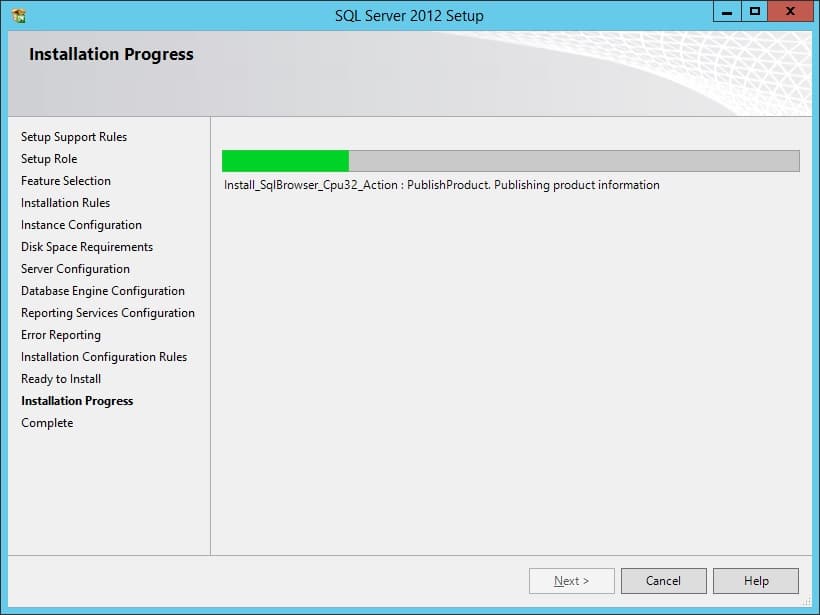
20. Wait a couple of minutes for the installation to complete.
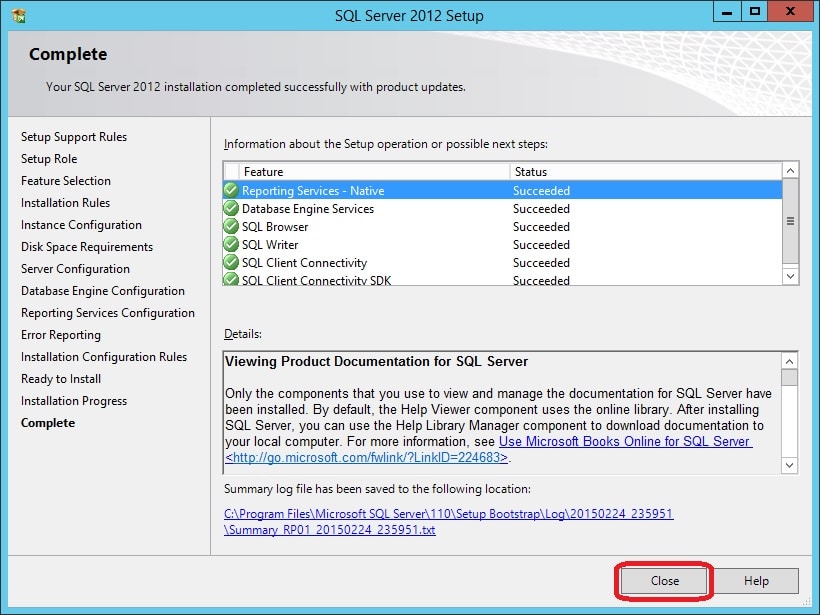
21. Once the installation has completed successfully, click Close.
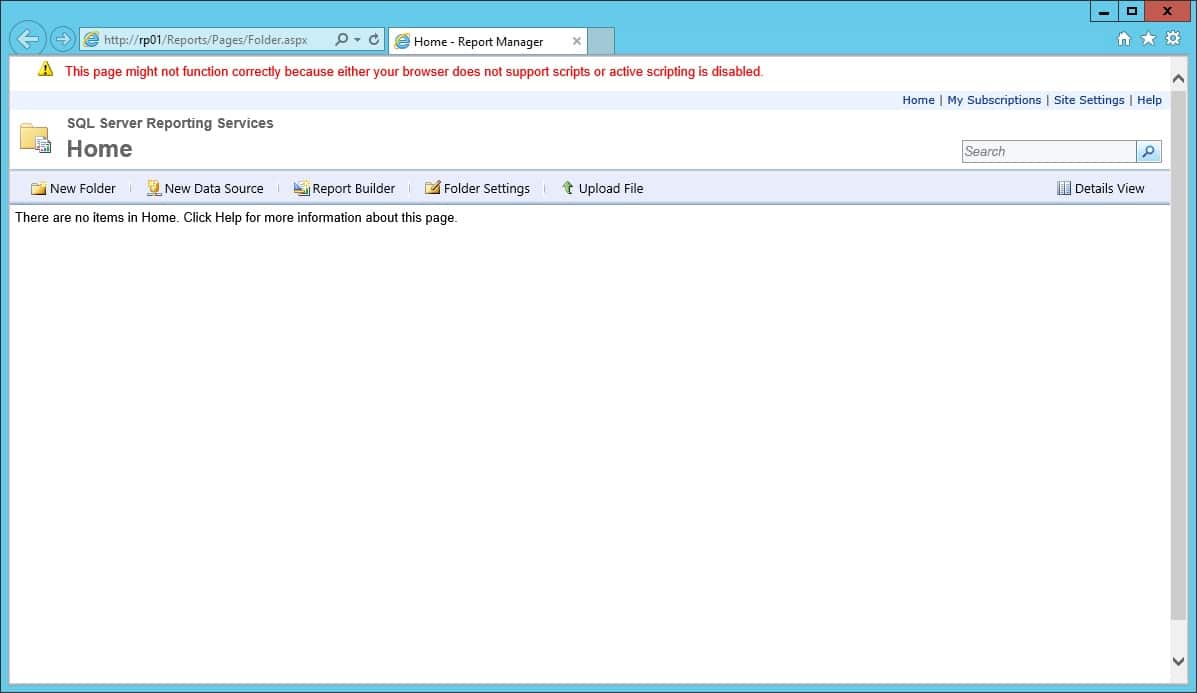
Now that the SQL Server with Reporting Services is installed, it’s a good idea to verify that the Report server is working as expected. Open up Internet Explorer and go to:
https:///Reports
For this tutorial that would be:
https://RP01/Reports
If everything has been installed and configured correctly, you should see a page similar to the following:
Add a Site System server with Reporting Services point role
With the SQL Server and Reporting Services in place, we can continue to add the Reporting Services point from the ConfigMgr console. Before that can be done, it’s necessary to add the Site server computer account in the local Administrators group on the Site System server. I’m not gonna go through the steps required to complete that task, but here you can see that I’ve added my CAS server to the local Administrators group on RP01.contoso.com:

As for any other Site System role in ConfigMgr, the installation is initiated from the Site server in which site it will be associated with. In this case, since we’ll be adding the remote Reporting Services point to the CAS, we need to add the computer account of that server to the local Administrators group. Now that we’ve done that, we can continue with adding the Site System role.
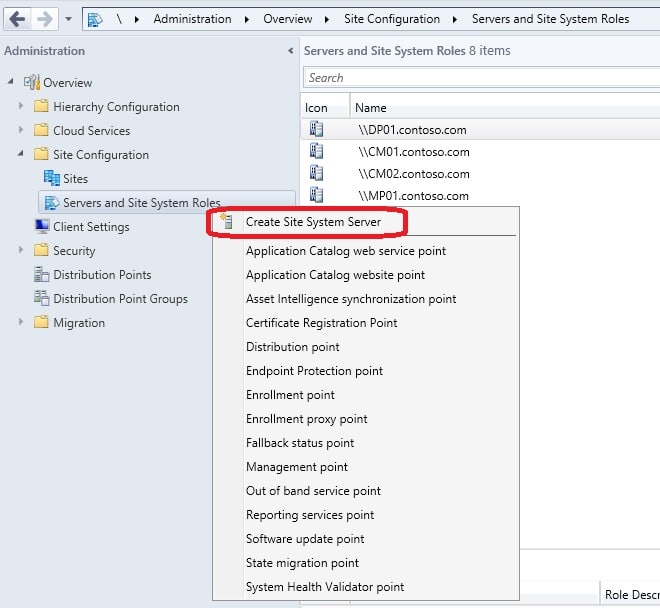
1. Open the ConfigMgr console and go to Administration – Site Configuration – Servers and Site System Roles.
2. Since we’re adding a new remote server, right click on Servers and Site System Roles in the console and select Create Site System Server.
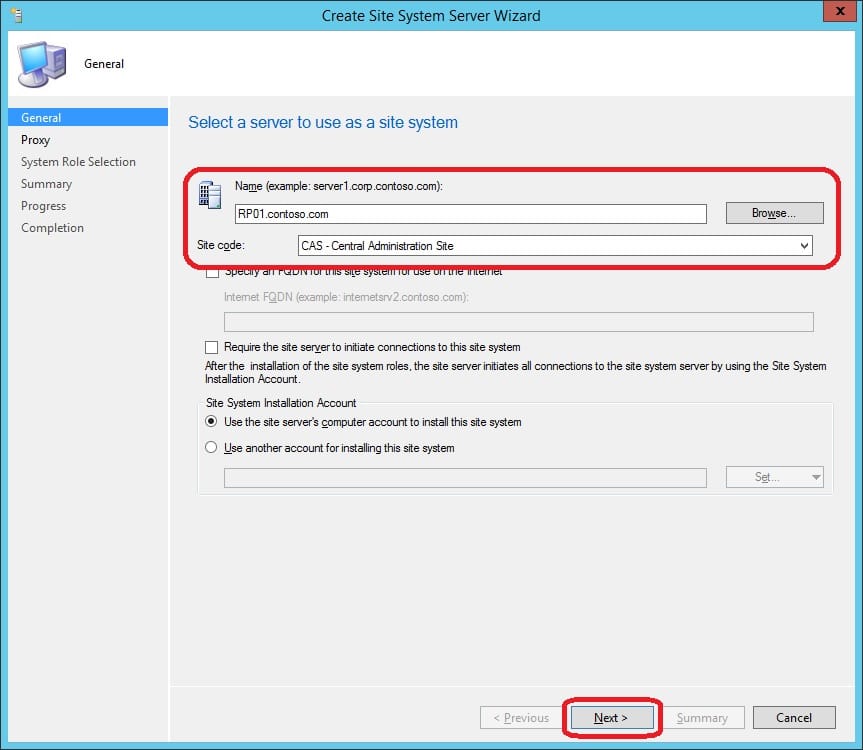
3. On the General page, enter the server name in Name text field (RP01.contoso.com) and select what Site code to associate it with. Click Next.
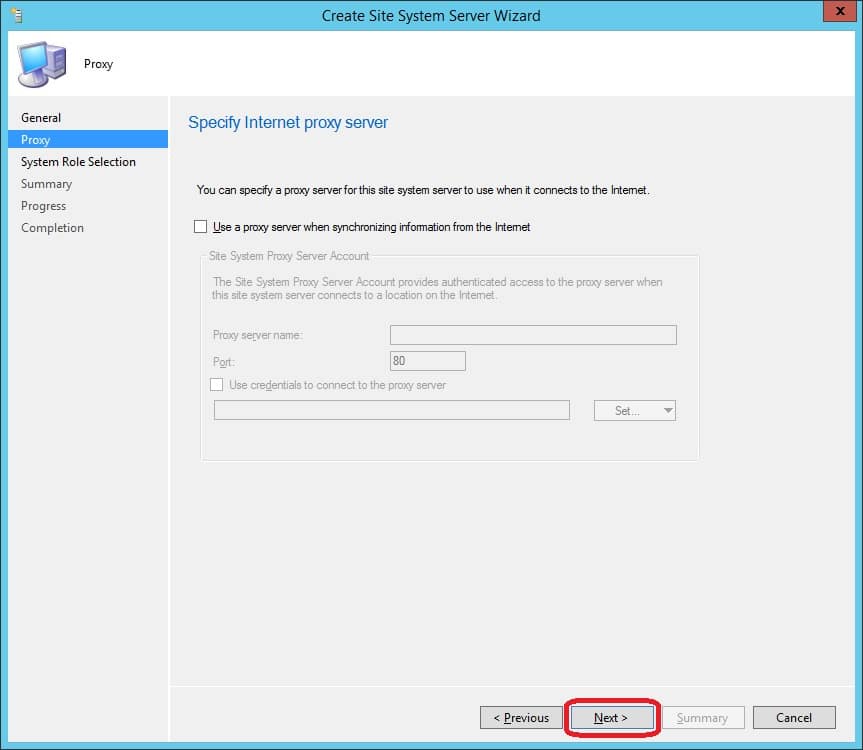
4. On the Proxy page, click Next.
5. Select Reporting services point and click Next.

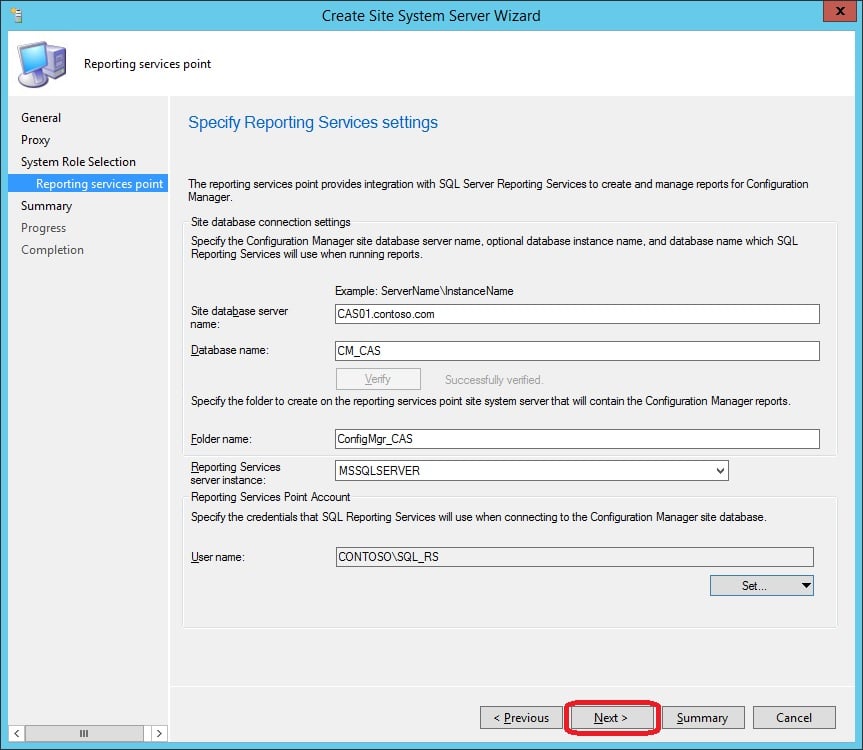
6. On the Reporting services point page, click the Verify button. If successful, the exclamation mark should disappear. Click on Set right under the User name text field and select either Existing Account or New Account. Because we’re in the process of adding a secondary remote Reporting Services point, it’d be expected that there’s already an existing account available that we could use. If that’s not the case, simply just add a new account. For this purpose I’m using the SQL_RS account (see the requirements section of this post), although I would consider it best practice to use a different account, like CM_RS for instance.
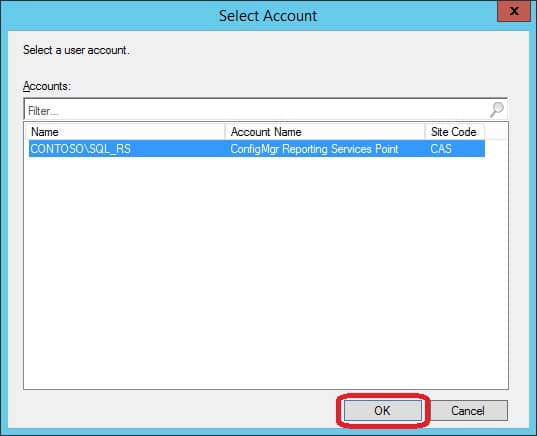
Click OK and then click Next.
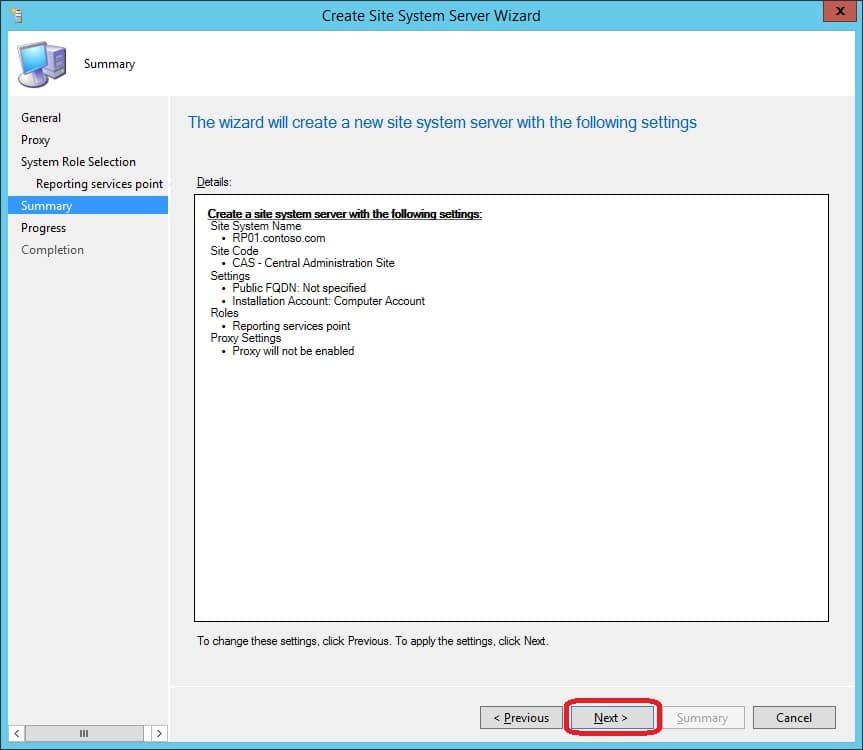
7. On the Summary page, click Next.
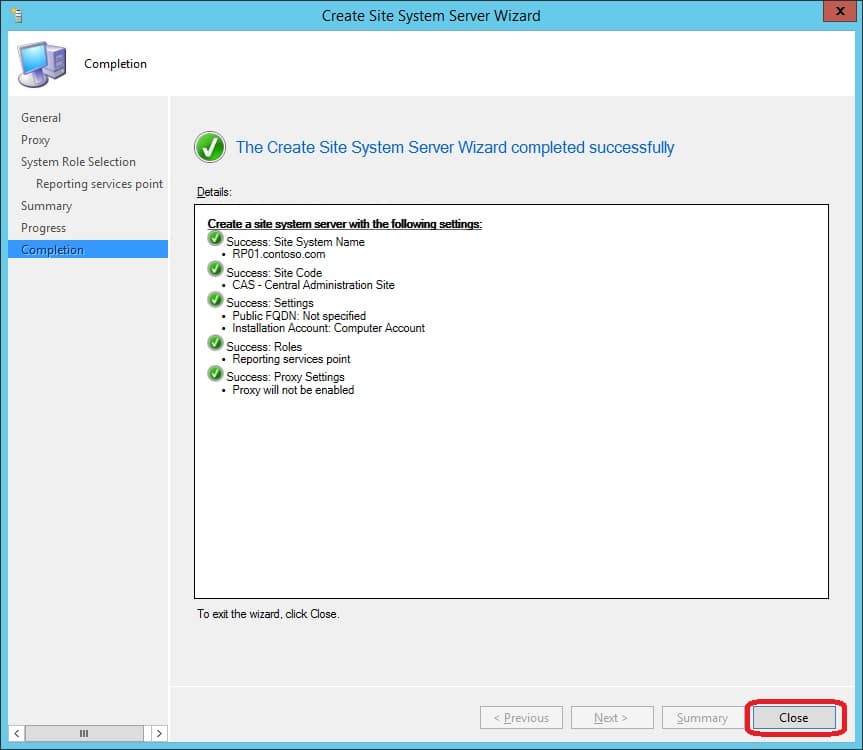
8. On the Completion page, click Close.
That’s it, we’ve now successfully added the Reporting Services point Site System role to RP01.contoso.com.
Verify the Reporting Services point works
Once you’ve completed the wizard above and waited a few minutes for the Reporting Services point to be installed, you can verify that it was installed successfully by examining the following log:
C:\SMS\Logs\srsrpsetup.log
In the end of this log file, you should see atleast one line saying that the Installation was successful:
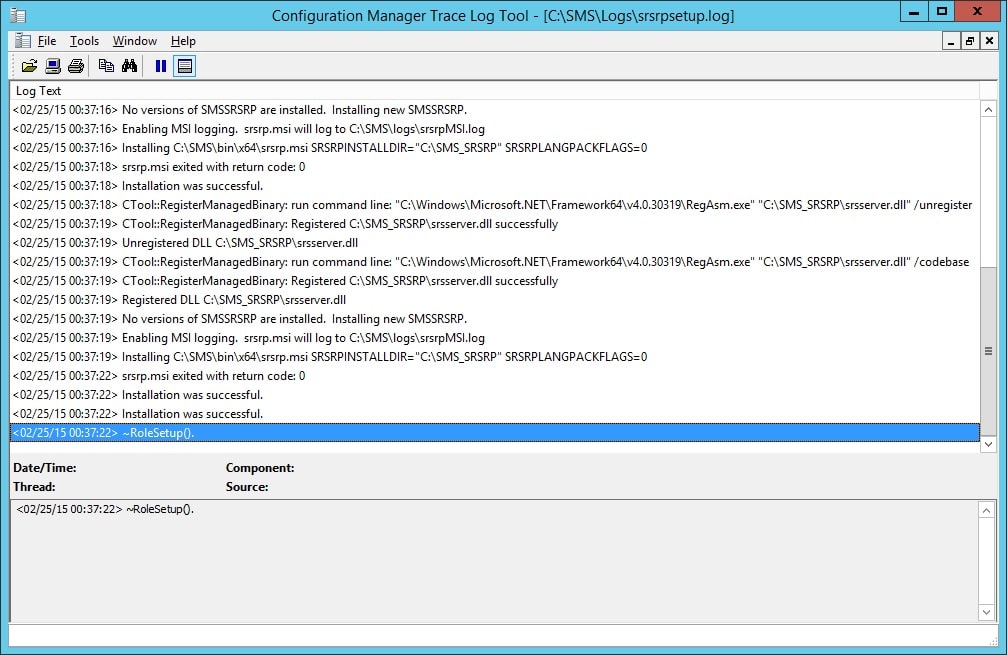
The above log shows that the installation was successful, to see if the Reporting Services point is healthy, open the following log:
C:\SMS\Logs\srsrp.log
and check for:
Successfully checked that the SRS web service is healthy on server RP01.contoso.com

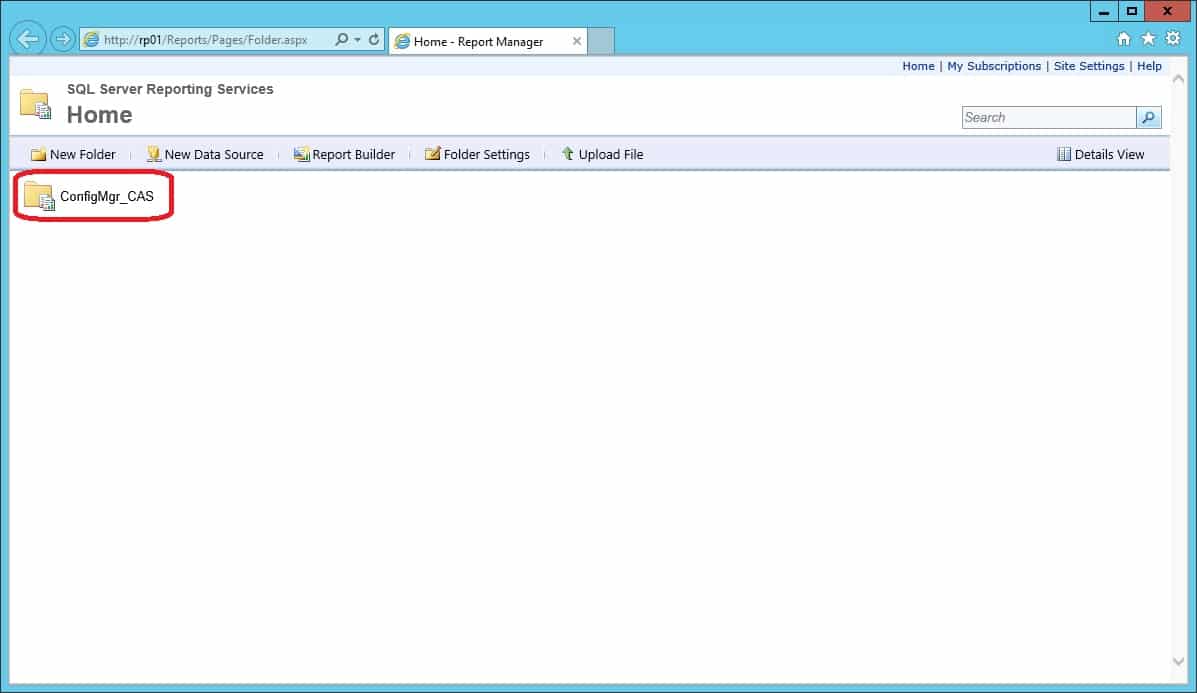
Last but not least, to verify everything is working as expected, open up Internet Explorer and go to:
https://RP01/Reports
This time we should now see that there’s a root folder called ConfigMgr_<sitecode>, as shown in the picture below:
Just to demonstrate that it actually works, I’ve included a picture where I ran one of the reports:
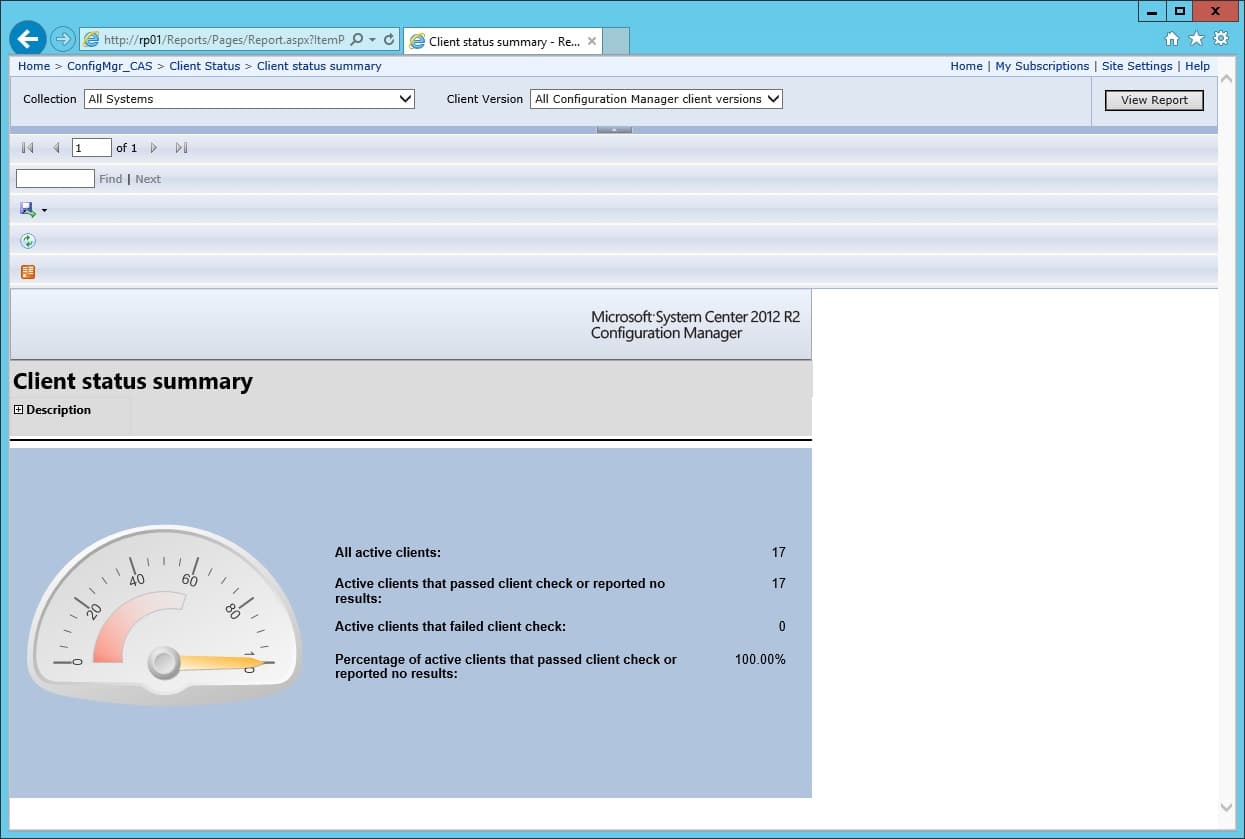
That’s it, your secondary Reporting Services point is now fully operational and ready to serve some reports to needy managers!


Hi, Thanks for the excellent guide. Is it best to install the reporting services role on the SQL Server or on your primary server if you are a 0-2000 endpoint organization and have a remote SQL box?
Hi Andrew,
It’d have to be installed where you have SQL Server Reporting Services. That being on the SQL Server.
Regards,
Nickolaj
I have a similar setup. Everything checks out right up to step 8 for the installing of the Reporting Services Point, all green checks. My problem is that the Role does not seem to be installing. I don’t even have any of the log files created to check. Any ideas as to why the role is not installing despite the wizard giving the green light?
What method are you using to get data to the second reporting instance? SQL Replication? Does this method allow RBAC permissions to work on reports on the secondary instance? How do you handle the certificate error? CM creates a cert SQL uses to communicate – I have found a secondary reporting instance generates a cert not trusted error. We get around by creating a custom data source and doing a scripted find and replace to change the data source on all canned reports . But then RBAC doesn’t work.